
Overview
Captive Portal is a flexible feature, only available on large commercial firewall, this feature helps redirect the user’s browser to a predetermined website, thereby enabling us to manage users (or prohibit others from using your network). This feature is more advanced than the login types such as WPA, WPA2 in that the user will directly manipulate 1 web page (http, https) rather than a dry login table such as authentication WPA, WPA2
The following article will show you how to configure user authentication through the Captive Portal on Sophos XG Firewall device
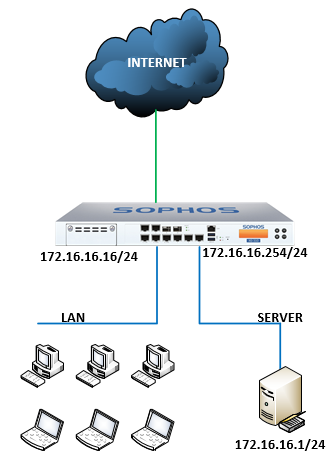
The artical will be configured according to the following model:
How to configure
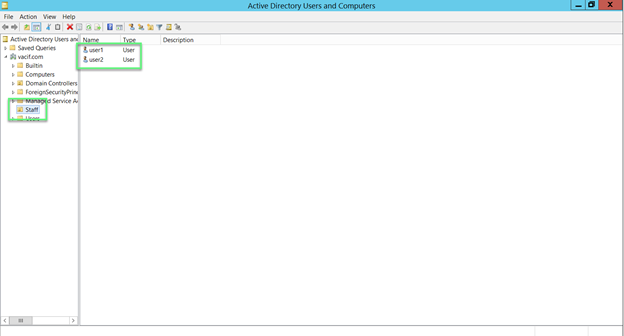
Step 1: Build domain and create users for domain in 1 OU
- In OU Staff, I create two users with the name: User1, User2
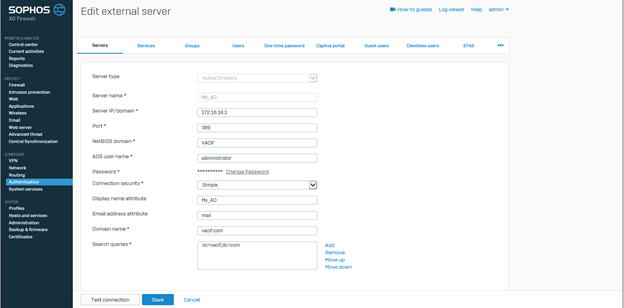
Step 2: Add AD server to the firewall to be able to authentication the domain use
Configuration on Firewall XG
Authentication -> Servers -> Click Add
- In the Server type section: Select Active Directory
- Server name: Name the server you want to manage
- Server IP/domain: Enter the IP of AD
- Port: 389
- NetBIOS domain: Enter the NetBIOS name of AD
- ADS user name: Enter the administrator
- Password: Enter the password of the administrator account
- Connection security: Select Simple
- Display name attribute: Enter the name for the server you want to manage
- Email address attribute: Enter the email you want (can be left blank)
- Domain name: Enter you domain name
- Search queries: Enter domain name in queries (Ex: dc=vacif,dc=com)
-> Click Test connection -> Click Save
Step 3: Add group OU contains the user you want to authenticate into the firewall
Click the Import icon

Click Start
- In the Base DN section: Enter the domain nam with the form dc=vacif,dc=com
- Select the OU you want to select
- Custom policy for group policy according to needs
-> Click Next to finish
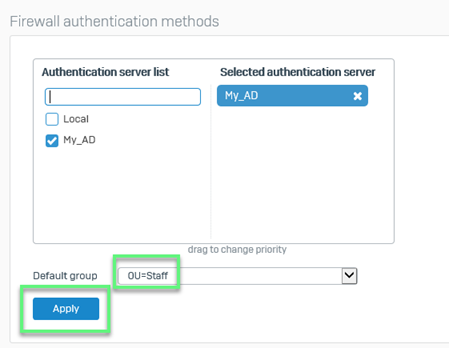
Step 4: Adjust Service configuration to firewall authentication with AD server
Authentication -> Services
In the Firewall authentication methods section
- Click on your AD and uncheck Local
- In the Default group section: Select the OU you have added
-> Click Apply
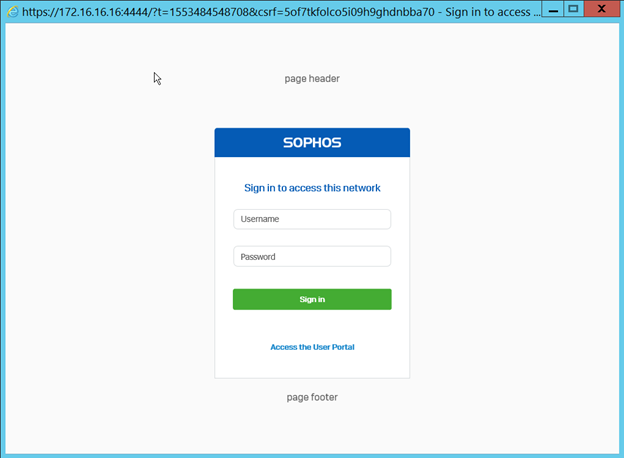
Step 5: Configuring to create Captive Portal
Authentication -> Captive portal
Custom interface for Captive portal at will -> Click Preview to preview the interface
-> Click Apply to save the Captive portal interface
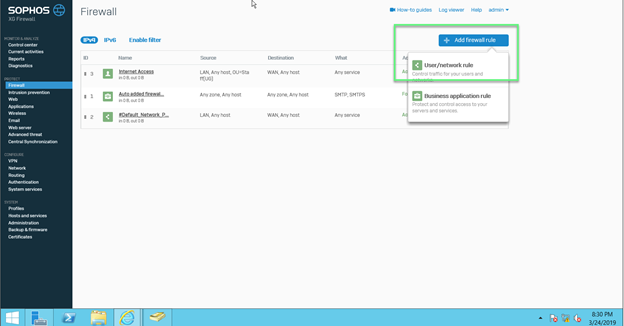
Step 6: Create firewall rule so that users who want to access the Web must authentication through the Captive portal
Firewall -> Add firewall rule -> User/network rule
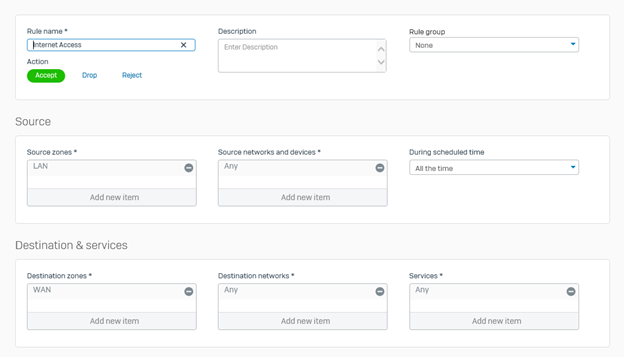
In the Source section and Destination & services
- Name the rule
- In Source zones: Select LAN
- On Source networks and devices: Select Any
- At Destination: Choose WAN
- Destination networks: Select Any
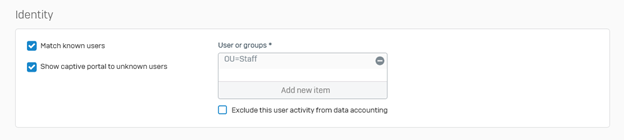
On the Identity section
- Choose Match known users and Show captive portal ton unknown users
- In the Users and groups section: Choose the OU you created
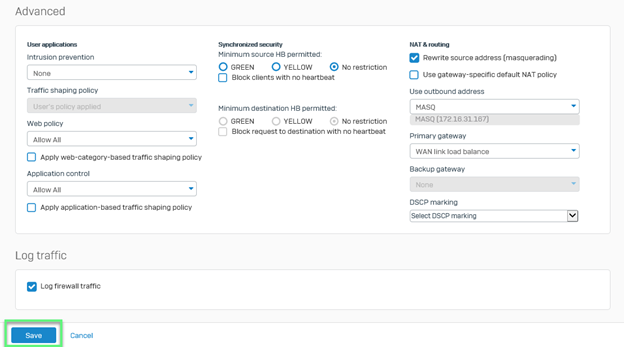
In the Advanced section
- Custom Web policy and Application policy at will
- If you want to get log, select Log firewall traffic
-> Click Save
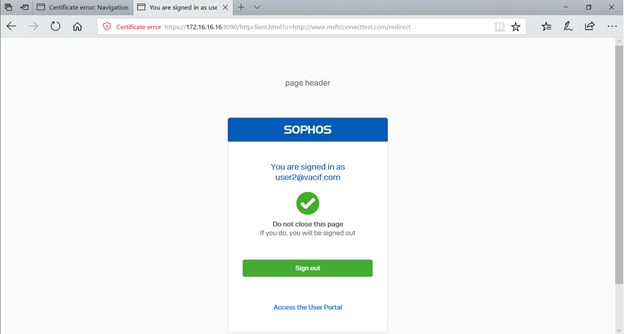
Step 7: On the workstation, when the user wants to access the Internet, he/she must authentication the user account
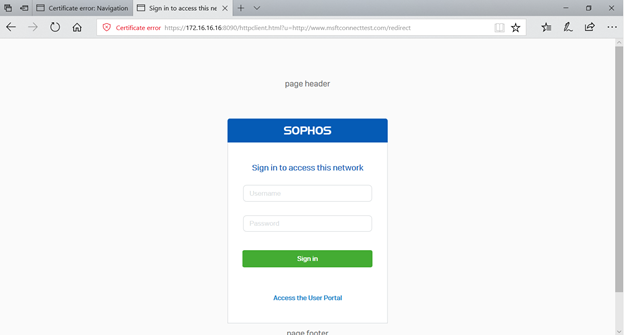
After authentication by user account -> Users can access the Internet as usual
** If you have difficulty configuring Sophos products in VietNam, please contact us:
EMAIL: info@thegioifirewall.com
HOTLINE: 02862711677
Leave a Reply