
Overview
The article guides to configure the Hotspot gateway feature on Sophos XGS firewall device for Wireless network using any access point
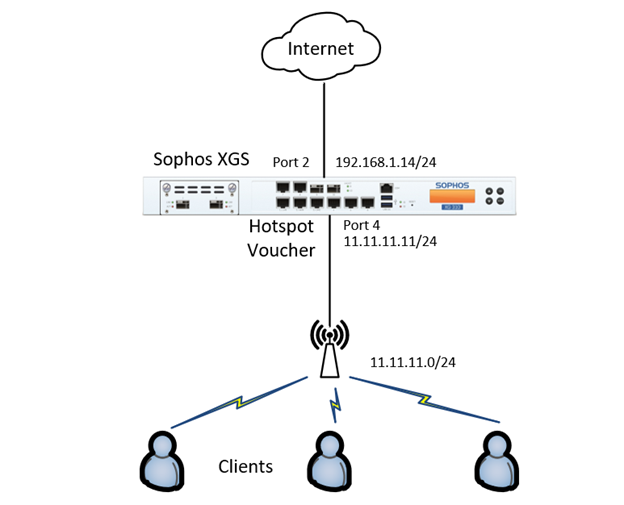
Diagram
Configuration steps
- Create a Voucher with a policy that regulates users’s internet access via Wireless
- Create Wireless network on Sophos XGS
- Create DHCP server to grant dynamic IP when connecting Wireless
- Create Hotspot with Voucher created on Sophos XGS
- Create firewall rule for Wireless network to allow access on demand
How to configure
Create a Voucher with a policy that regulates user’s internet access via Wireless
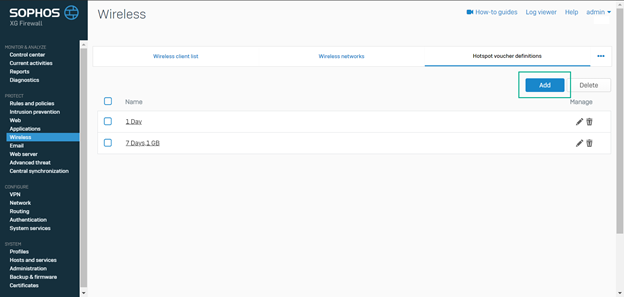
- Go to PROTECT -> Choose Wireless -> Choose Hotspot voucher definitions -> Click Add
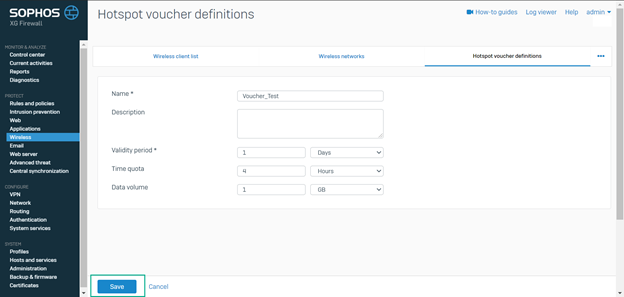
- Enter name
- In Validity period: Select the time the voucher is valid. Time starts from first login
- In Time quota: Select the maximum connection time of the voucher. Quota starts at login and stops at logout. The countdown stops after 5 minutes of inactivity
- In Data volume: Select the maximum amount of data to be transmitted of the voucher
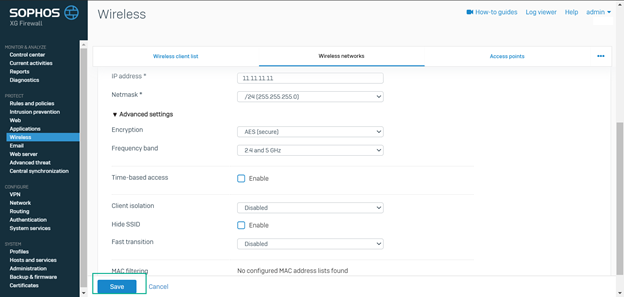
Create Wireless network on Sophos XGS
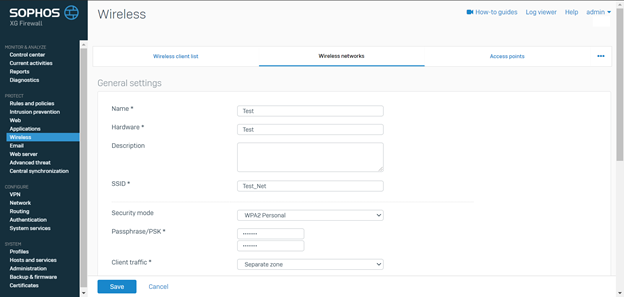
- Go to PROTECT -> Choose Wireless -> Choose Wireless networks -> Click Add

- Enter name for Wireless Network
- In SSID: Enter Wifi name you want
- In Security mode: Select the type of security you want for the wifi network
- In Passphare/PSK: Enter the password for your SSID
- In Client traffic: Choose Separate zone
- In Zone: Choose Wifi
- In IP address: Enter the gateway IP of your wifi network
- In Netmask: Select the subnet mask you want
- In Encryption: Choose AES (secure)
- In Frequency band: Select the band you want to use for wifi
- Click Save -> Click Configure DHCP server
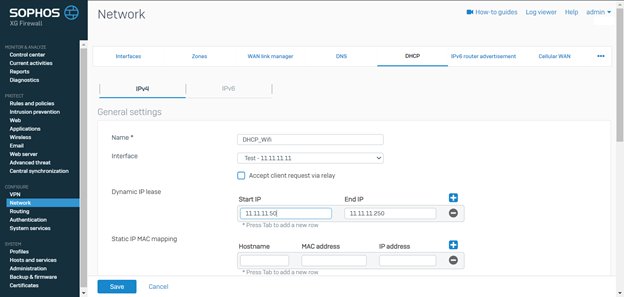
Create DHCP server to grant dynamic IP when connecting Wireless
- Enter name for DHCP pool
- In Interface: Select Wireless network that was create before
- In Dynamic IP lease: Enter IP range you want
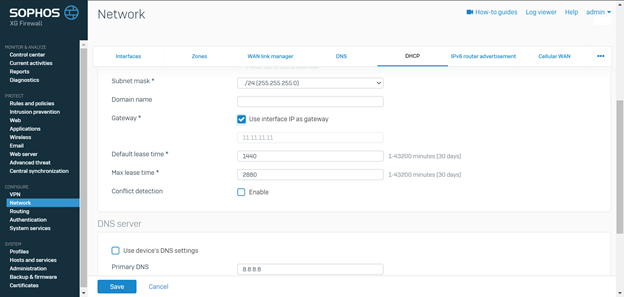
- In Subnet mask: Select the subnet mask you want
- In Gateway: Tick in Use interface IP as gateway
- In DNS: Enter DNS server you want
- Click Save
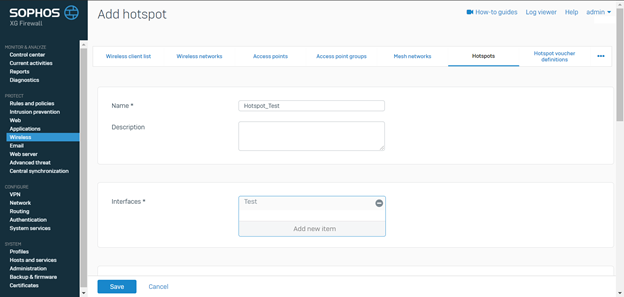
Create Hotspot with Voucher created on Sophos XGS
- Go to PROTECT -> Choose Wireless -> Choose Hotspots -> Click Add
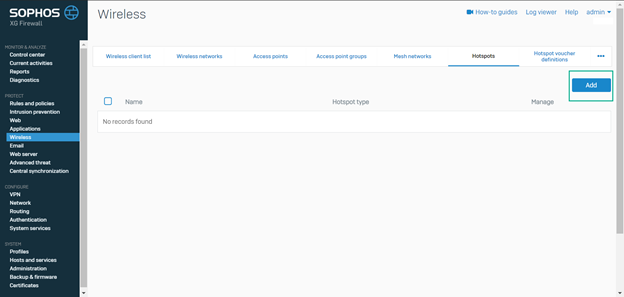
- Enter name for hotspot
- In Interfaces: Select interface Test created before
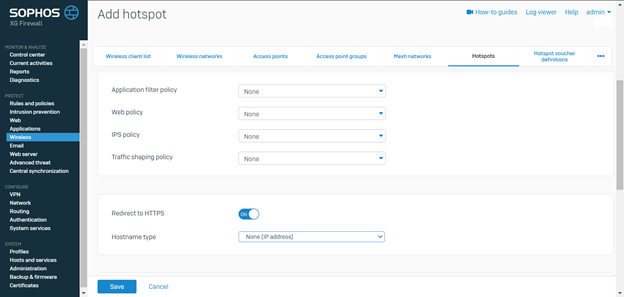
- In Application Filter Policy: Select app policy to restrict the use of prohibited apps
- In Web Policy: Select web policy to restrict access to prohibited websites
- In IPS Policy: Select Intrusion Prevention policy to protect user’s network
- In Traffic Shapping Policy: Choose policy to enable QoS for hotspot
- Enable Redirect to HTTPS to redirect users to HTTPS instead of HTTP for enhanced security
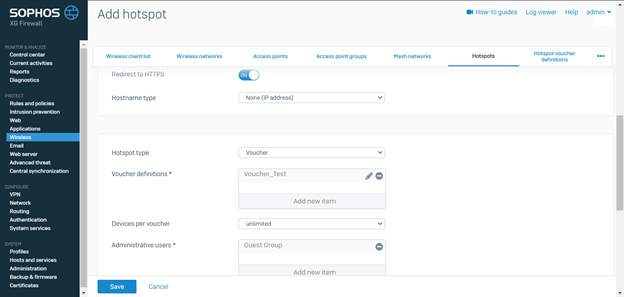
- In Hotspot Type: Select previously created hotspot voucher
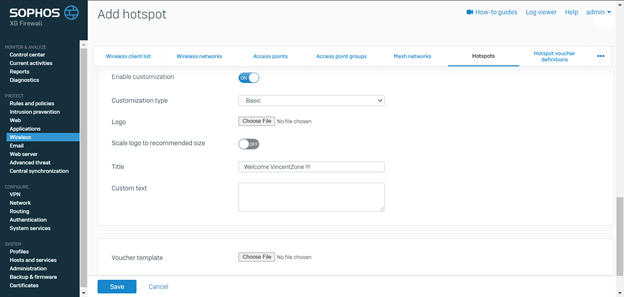
- To customize Hotspot voucher (default voucher uses Soophos template): Tick Enable customization
- In Customization type: Choose Basic if you want simple custom hotspot and choose Full if you want to customize the entire hotspot
- In Logo: Upload logo
- In Title: Enter title
- In Custom text: Enter message you want to show
- If there is a voucher template available, you can upload in Voucher template
- Click Save
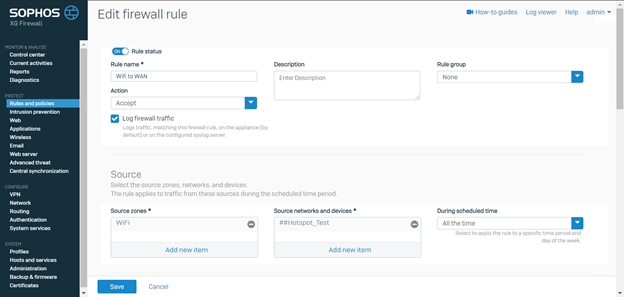
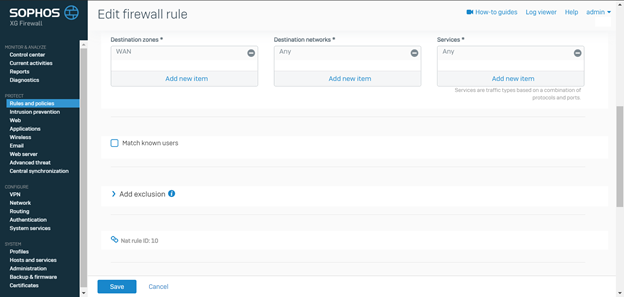
- After saving, Sophos will automatically create firewall rule for Wireless to Internet
- Go in and adjust the configuration you want
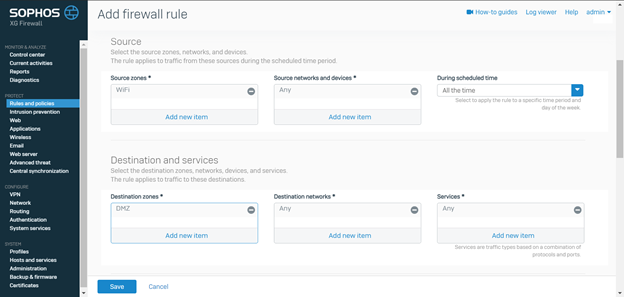
Create firewall rule for Wireless network to allow access on demand
- You can create firewall rule so that the Wireless network layer can access it on demand
Leave a Reply