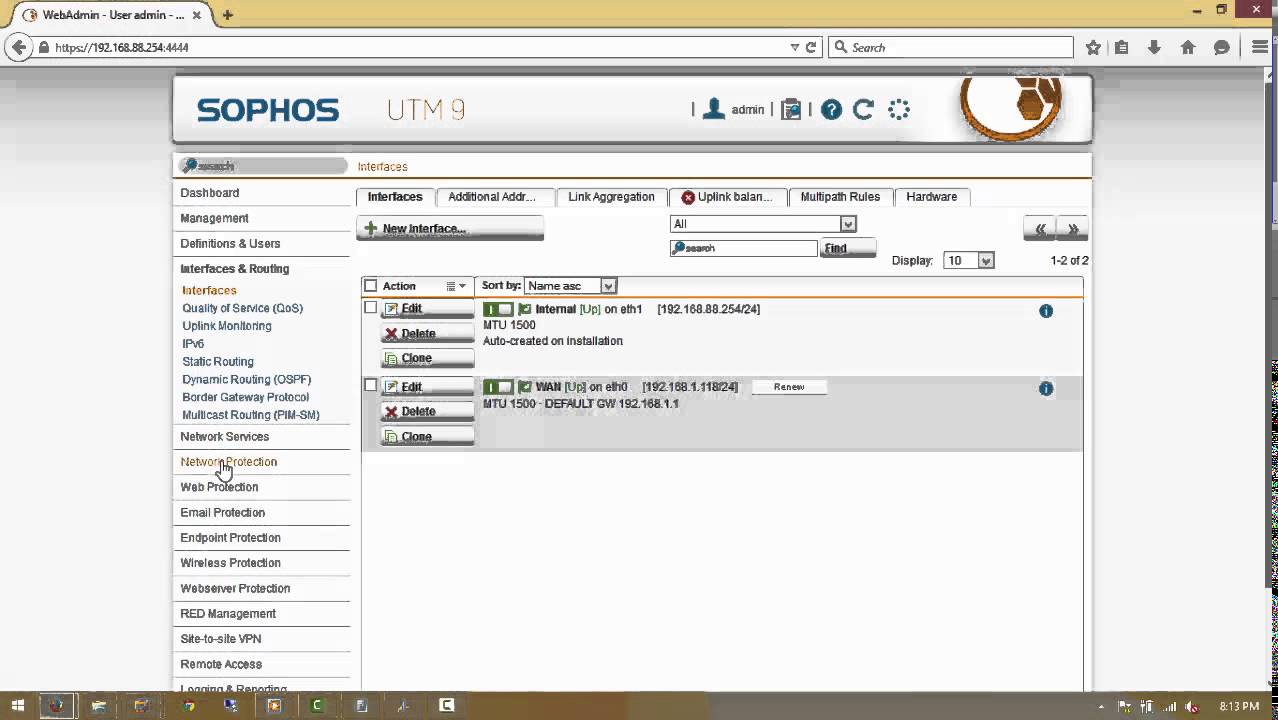
Configuration the Sophos UTM is easy in 12 steps. This perform basic setup for a computer in LAN go out internet through UTM.
Important Step noted:
- Setup WAN interface and Default Gateway (step 6)
- Setup DNS forwarder (step 7)
- Setup Firewall Rule (step 8)
- Setup NAT Masquerading (step 9)
- Option for setup DHCP server
STEP 1: Go to Webadmin by default IP address:
Sophos UTM hardware default IP: https://192.168.0.1:4444
Sophos UTM Software default IP: https://192.168.2.100:4444
In this example: https://192.168.88.254:4444
See more in Sophos UTM Software/hardware Appliance Quick Start Guide
http://www.sophos.com/en-us/medialibrary/PDFs/documentation/sophosutmsoftwarewebadminqsgen.pdf?la=en
STEP 2: Enter Administrator Contact and Password
Click APPLY and waiting for some second

STEP 3: Go to again Webadmin with new certificate
You will be noticed the Certificate error, and Add Exception for this.
STEP 4: Login to Webadmin with new password
STEP 5: Cancel the Wizard
Click “Cancel” button in bottom of Wizard
You will see the dashboard of Sophos UTM
STEP 6: Add WAN Interface
Go to “Interfaces & Routing” -> “Interfaces” -> click “New Interface”
· Name: WAN
· Type: Ethernet
· Hardware: choose the hardware interface connect to Router/Modem of ISP
· IPv4 Default Gateway: Checked
Click “SAVE” and you will see the new interface which is disabled
Click enable button to enable the WAN Interface
STEP 7: Setup DNS
Add Google or Public DNS to DNS forwarders
STEP 8: Setup Firewall Rule
Go to Network Protection -> Firewall
Default No rule and all traffic is blocked.
Click New Rule Button
· Sources: Internal Network
· Services: ANY (or Some Services)
· Destinations: ANY
· Action: Allow
· Advanced: Log Traffic checked
Enable the new firewall Rule
STEP 9: NAT
Go to Network Protection -> NAT -> Masquerading
· Network: Internal (Network)
· Interface: WAN
· Use address: Primary address
Enable the new Masquerading Rule
STEP 10: Enable Advanced Threat Protection
Go to Network Protection -> Advanced Threat Protection -> Click Enable button (Grey to Green)
STEP 11: Enable Intrusion Prevention System
Go to Network Protection -> Intrusion Prevention -> Click Enable button (Grey button in the right).
Add the Internal (Network) to Local Network box -> Click Apply.
Enable Anti-Portscan
STEP 12: Check the Firewall Live Log
Go to Network Protection -> Firewall
Click “Open Live Log” button
· Green line: traffic allow through firewall
· Red line: traffic deny through firewall
Option STEP: DHCP Server (if needed)
Go to Network Services -> DHCP -> Click “New DHCP Server” button.
· Interface: Internal
Done!


Thanks for this and the other UTM videos & docs, very useful!
thanks again for this awesome tutorial
I would like to know if there is any videos talking about advanced configuration in Sophos UTM 9
let me know please
kassambara73@gmail.com
Dude, You really rock thanks so much. I was thinking it was going to be harder to set up than PFSense, But Sophos UTM is easy to set up compared to PFSense. Keep up the good work.
I have a UTM9 we are changing our ISP.
Do I need to provide a Router before the UTM9 from the ISP Connection?
thanks
Thanks to you I did configure my UTM.
Appreciate your hard work and sharing.
Hello,
Thanks to you I did configure my UTM.
Appreciate your hard work and sharing.