
Overview
Synchronized User ID will share user account information logged in with Heartbeat firewall. The firewall will check the user account based on the AD server configured and active the user. The synced user ID will only work with the Active Directory configured to be configured as an authentication server in XG Firewall and currently supports Windows 7 and Windows 10 machines
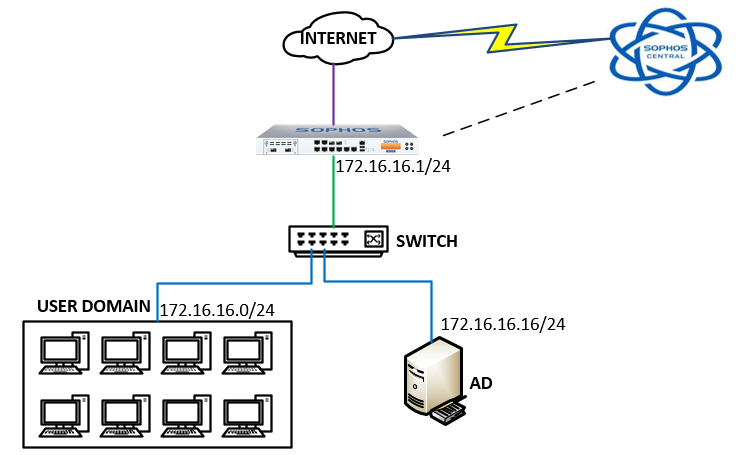
The article explains how to configure Synchronized User ID according to the following diagram:
How to configure
Step 1: Install Sophos Endpoint Protection software for user domain machines
You can refer to configuring Endpoint settings for workstation here
Step 2: Add Sophos Central account to XG Firewall device
- Login to Sophos XG by Admin account
- Central Synchronization -> Register
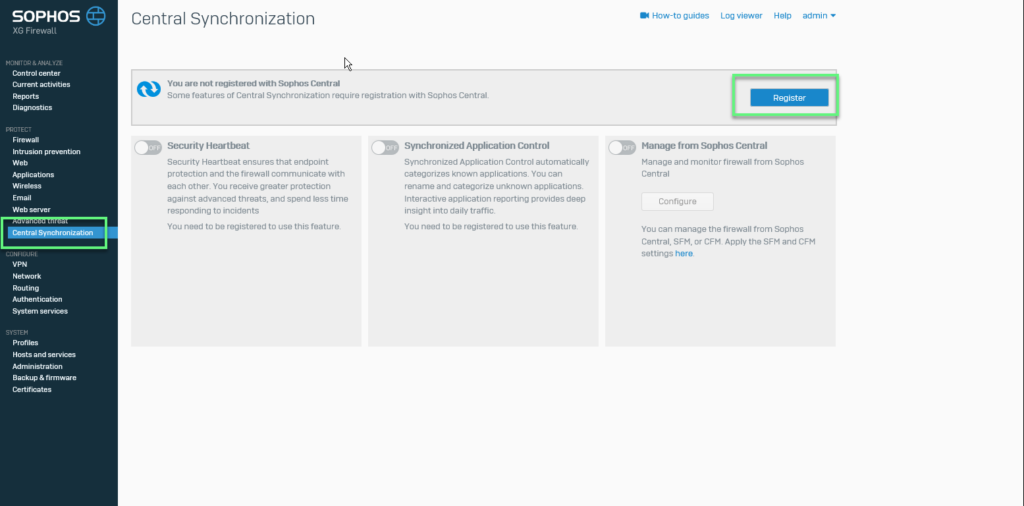
- Enter your Username and Passwork account of Sophos Central -> Click Register

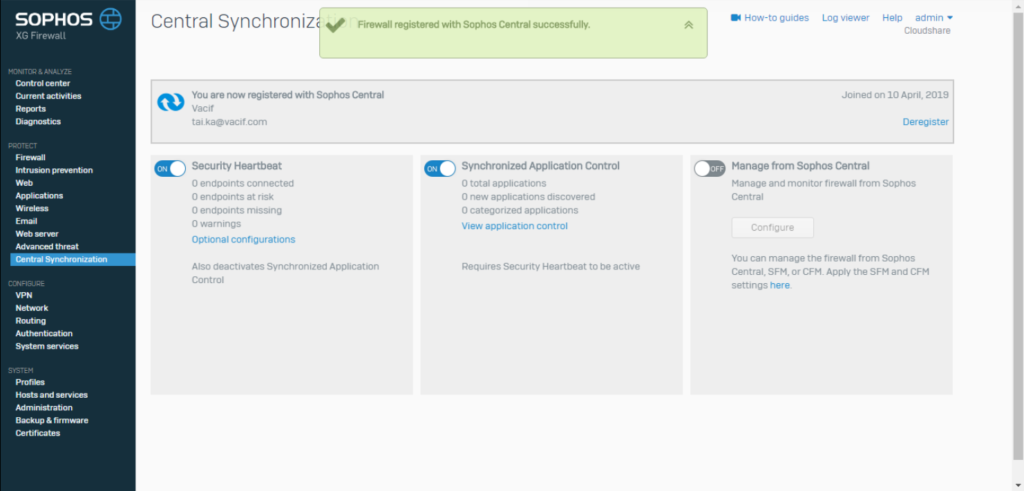
- After you have register your Sophos Central account -> The Security Heartbeat feature has been activated
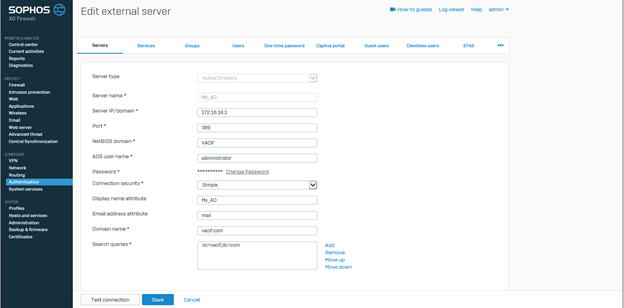
Step 3: Add AD Server to Firewall to be enable to authenticate users
- Authenticate -> Servers -> Click Add
- In the Server type: Select Active Directory
- Server name: Name the server you want to manage
- Server IP/domain: Enter the IP of AD
- Port: 389
- NetBIOS domain: Enter the NetBIOS name of AD
- ADS user name: Enter the administrator
- Password: Enter the password of the administrator account
- Connection security: Select Simple
- Display name attribute: Enter the name for the server you want to manage
- Email address attribute: Enter the email you want (can be left blank)
- Domain name: Enter your domain name
- Search queries: Enter domain name in queries (Ex: dc=vacif,dc=com)
-> Click Test connection -> Click Next
Step 4: Add group contains the users you want to authenticate into the firewall
Click Import icon

Click Start
In the Base DN section: Enter the domain name with the form dc=vacif,dc=com
- Select the group you want to select
- Custom policy for group policy according to needs
-> Click Next to continue
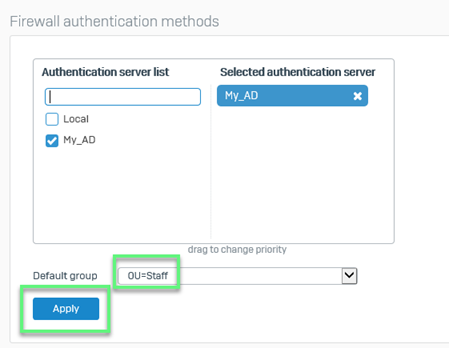
Step 5: Adjust the Service configuration so that the firewall authenticates the AD Server user
Authencation -> Services
In the Firewall authentication methods
- Click your AD and uncheck Local (or you can choose AD and upload it on Local, do not deselect Local)
- In the Default group section: Select the OU or group you have added
-> Click Apply
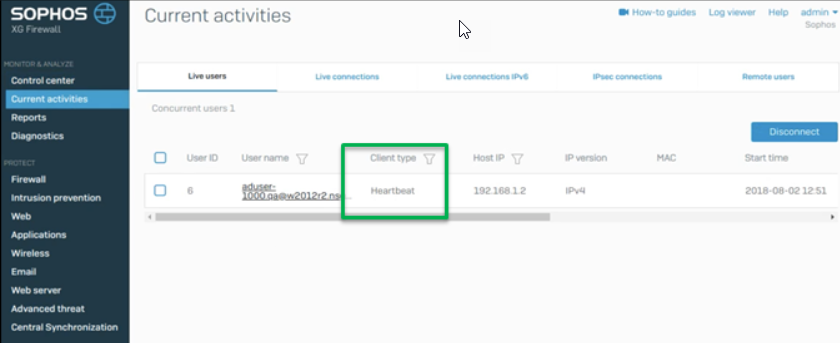
Step 6: Check that the user is accessing the system
- We will see the user of the domain is displayed with heartbeat when logging in to the account and participating in network access
** If you have difficulty to configure Sophos products in VietNam, please contact us:
Hotline: 02862711677
Email: info@thegioifirewall.com
I was suggested this blog by my cousin. I am not sure whether this post is written by him as no one else know such detailed about my trouble. You’re amazing! Thanks!