
Overview
SMTP Route and Scan policies appear only when MTA (Mail Tranfer Agent) mode is enabled. SMTP route and scan policy allows you to protect emails from spam and malware, to SPX-encrypt emails and to provide data and file protection
How to configure
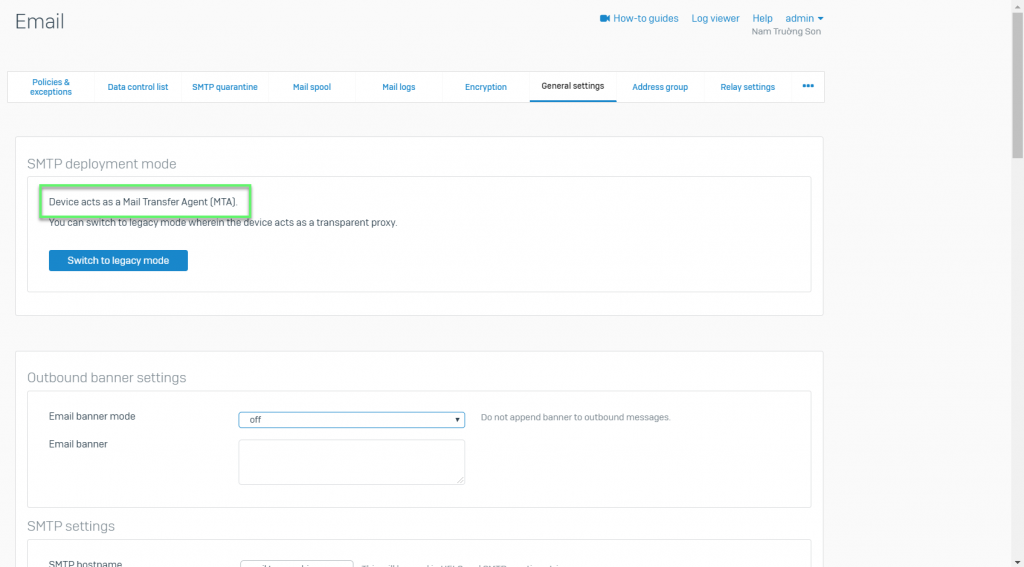
- Email -> General setting -> Check and switch to MTA mode
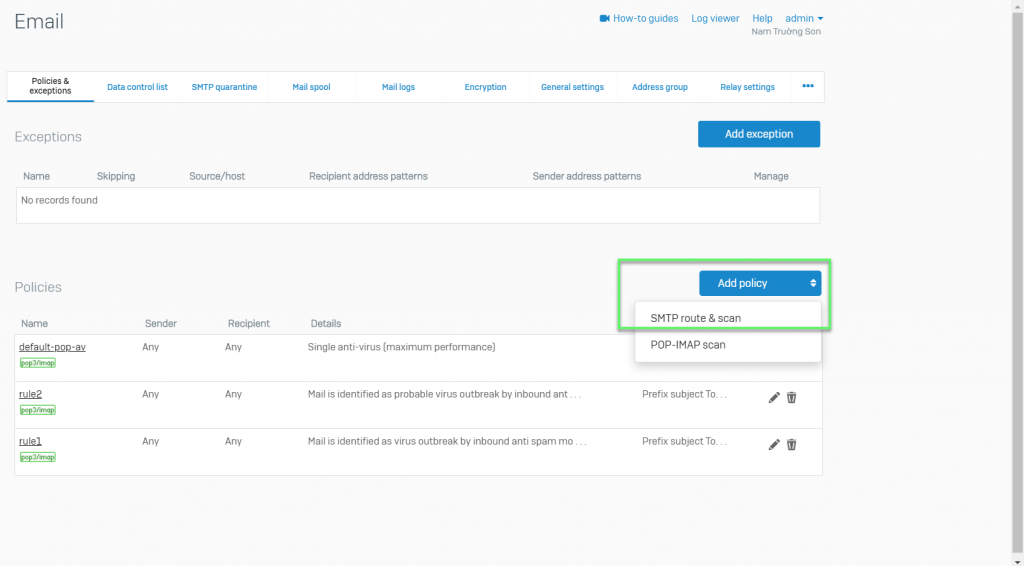
- Email -> Policies -> Click Add Policy -> Choose SMTP route & scan
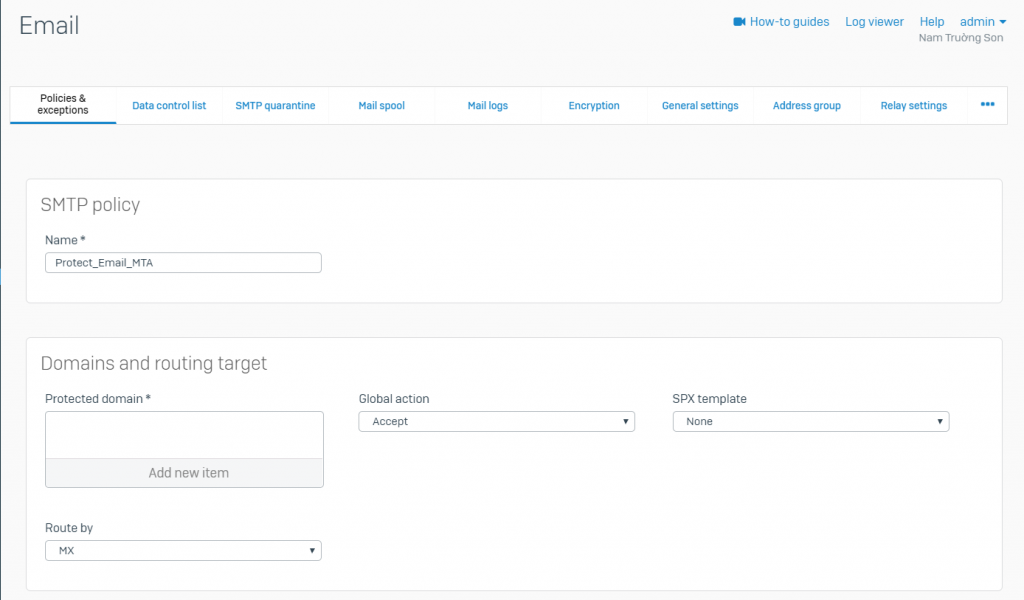
- Enter Name
- Enter the Domains and Routing Target details
- Protected Domain: Select the domains. The policy applies to emails to and from the selected domains
- Emails received by users of the protected domains are Inbound Emails
- Emails sent out by users of the protected domains are Outbound Emails
- Emails sent among users of protected domains are Internal Emails
- Route By: Select the email server to forward the emails to. Select from the following server types:
- Static Host: From the Host List, select the static IP addresses of the internal email servers. If the first host in the selected list is not reachable, the device forwards emails to the next host until it reaches the end of the list
- MX: Select to route emails based on MX
- Global Action:
- Accept: Accepts all emails to the specified domains. You can apply SPX encryption on outbound emails by selecting the SPX Template from the drop-down list
- Reject: Rejects all emails to the specified domains. Sender is notified
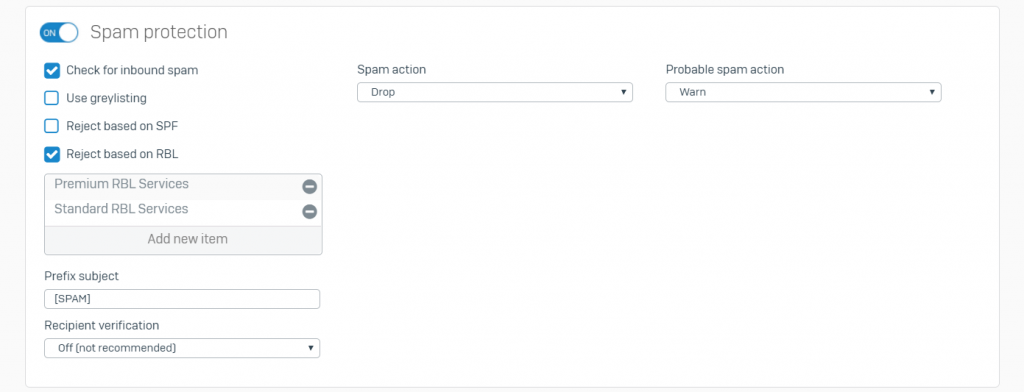
- Turn on Spam Protection: You can enable protection for inbound and outbound spam, virus outbreak and blacklisted sender IP addresses through RBLs
- Warn: Delivers the email to the recipient after adding a prefix to the subject. Specify the prefix in Prefix Subject
- Quarantine
- Drop: Drops the email without sending a notification to the sender
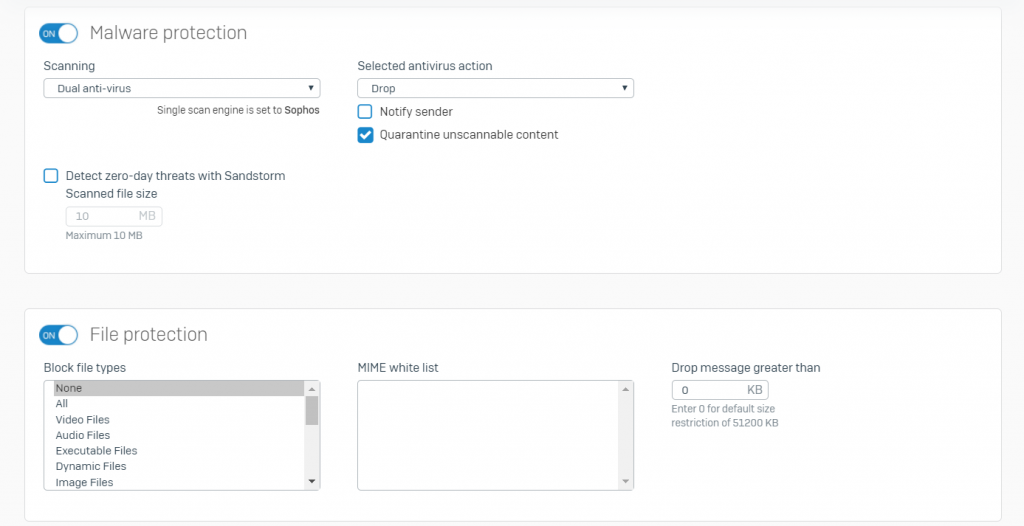
- Turn on Malware Protection
- Disable: Emails are not scanned
- Enable: Emails are scanned by the device’s anti-virus engine
- Single Anti Virus: The primary anti-virus engine scans the emails
- Dual Anti-Virus: The primary and secondary engines scan emails sequentially
- Notify Sender: Select to notify the sender about the infected email
- Quarantine unscannable content: Select to quarantine emails that could not be scanned. These include corrupt, encrypted, compressed files, oversized emails, and emails not scanned due to an internal error
- Turn on File Protection
- Block File Types: Select the type of attachments you want to block
- MIME White List: Select the MIME headers to be allowed during the malware scan. Unselected headers are blocked
- Drop Message Greater Than: Enter the maximum file size (in KB) to be scanned by the device. Larger emails are dropped
- Turn on Data Protection
- Data Control List: Select the list to be applied to scan emails for sensitive information
- Data Control List Action: Select the action to be taken against emails containing sensitive information
- Available Actions:
- Accept: Accepts the email and delivers it to the recipient
- Accept with SPX: Accepts and SPX-encrypts the email before delivering it to the recipient
- Drop: Drops the email without sending a notification to the sender
- Notify Sender: Select to notify the sender that the email contains sensitive information

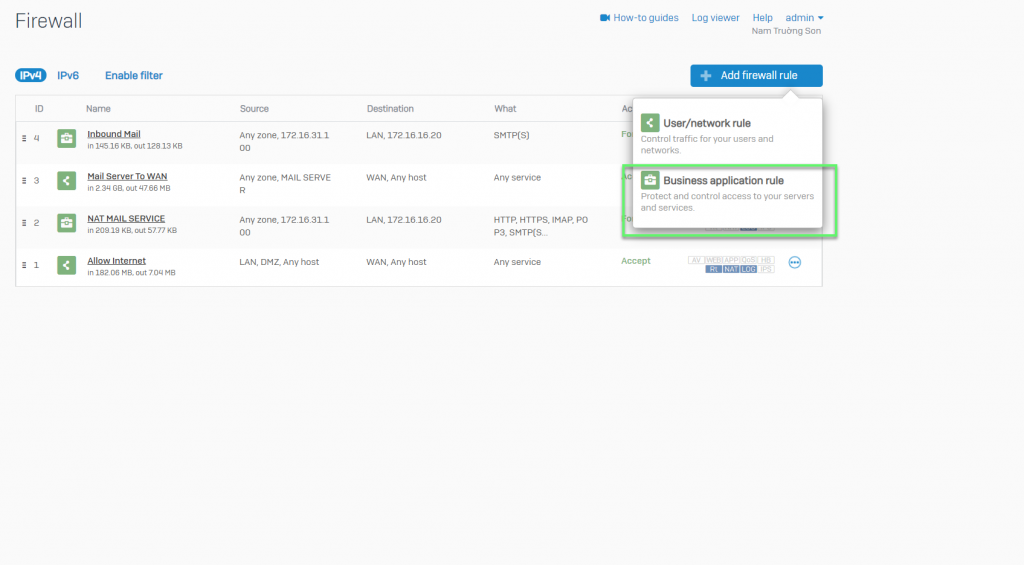
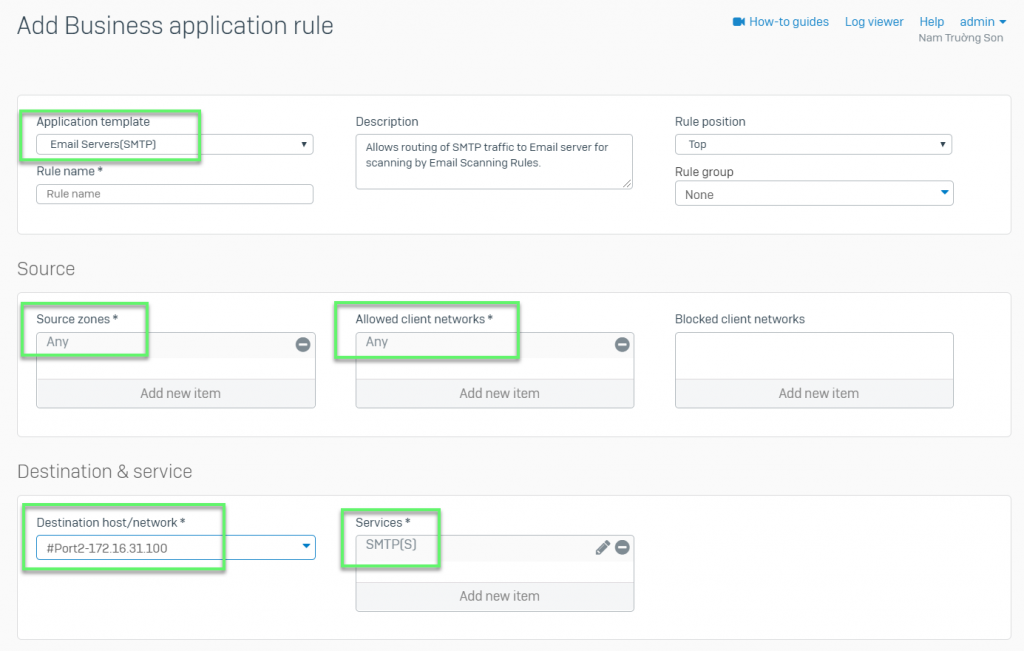
- Firewall -> Add firewall rule -> Choose Business application rule
- In Application template: Choose Email Server (SMTP)
- In Source zone: Choose Any
- In Allowed client networks: Choose Any
- In Destination host/network: Choose Port WAN
- In Services: Choose SMTP(s)
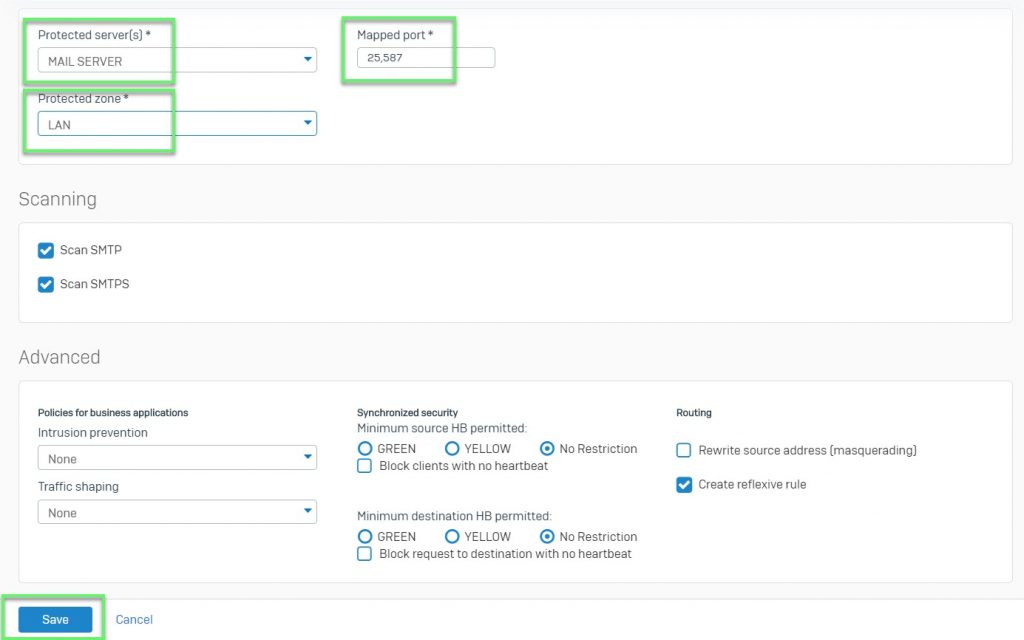
- In Protected server(s): Choose Mail server
- In Mapped port: 25,587
- In Protected zone: Choose LAN
-> Click Save
Leave a Reply