
1.The purpose of the article
This article will show you how to configure Load Balancing using the SD-WAN feature for systems with multiple internet connections so that when one of the lines fails, the connection will not be interrupted.
2.Diagram
Details:
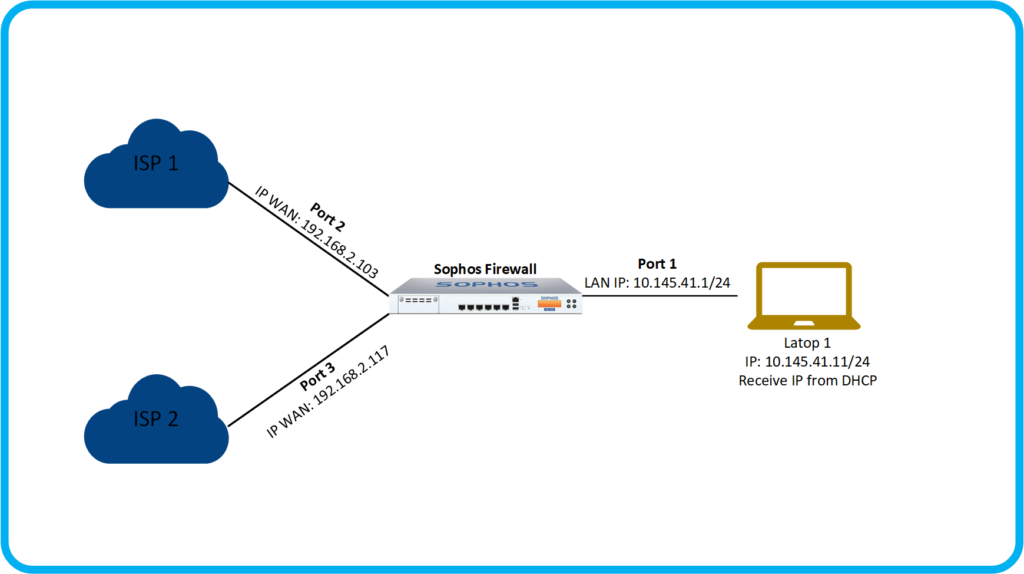
- There are 2 are connecting to Sophos firewall and running Load Balcing, ISP 1 internet connection connects to Port 2 of Sophos Firewall with IP 192.168.2.103 and Default gateway has IP 192.168.2.1.
- ISP line 2 is connecting to Sophos firewall at Port 3 with IP 192.168.2.117 and Default gateway has IP 192.168.2.1.
- Port 1 will be in the LAN zone of the Sophos firewall with IP 10.145.41.1/24 and has DHCP configured to allocate IP.
- Finally, Laptop 1 has IP 10,145.41.11/24.
3.Scenario
We will configure Load balancing for two internet lines, ISP 1 and ISP 2, with ISP 1 as the Active line and ISP 2 as the Backup line.
Then the traffic going to the internet will follow ISP 1 to access the internet.
Then we will turn off the ISP 1 connection to check if the device fails to failover the internet connection to the ISP 2 backup line like the load balancing configuration that we have configured.
4.Step to take
- Check internet ports.
- Configure ISP 1 connection as Active line.
- Configure ISP 2 connection as Backup line.
- Result.
5.Configuration
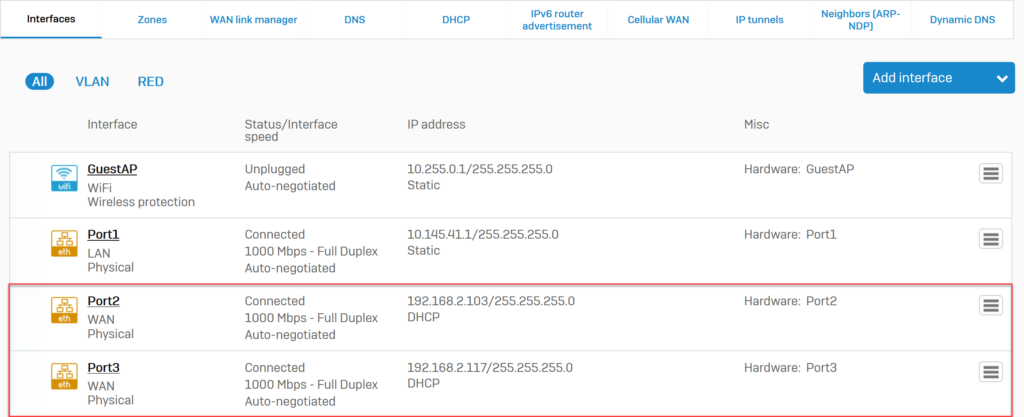
5.1.Check internet ports
We will go to Network > Interface and see that we currently have 2 internet connections at Port 2 and Port 3.
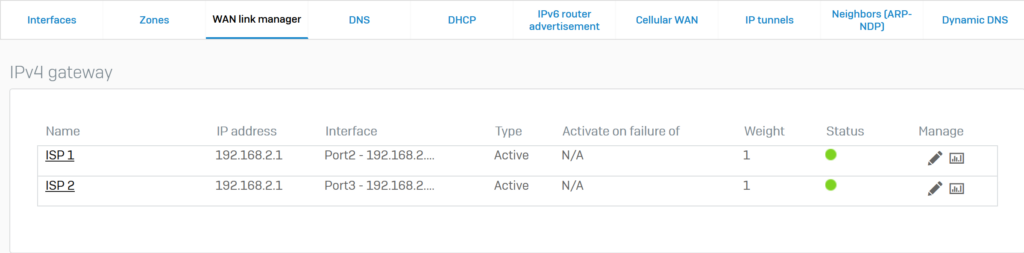
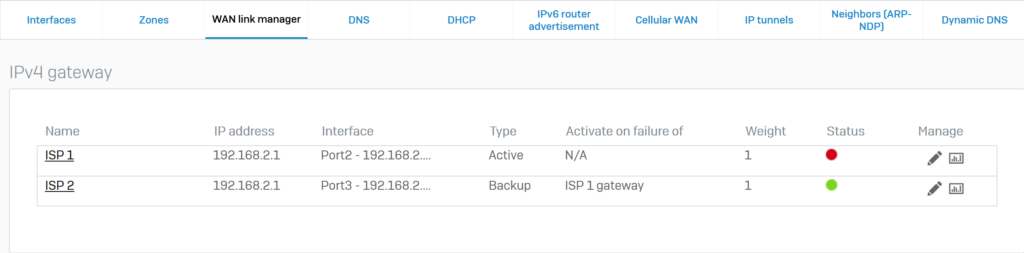
Next we go to Network > WAN link manager and see that these two lines are running in active mode and their weight is 1, which means each line is under 50% load.
5.2. Configure ISP 1 connection as Active line
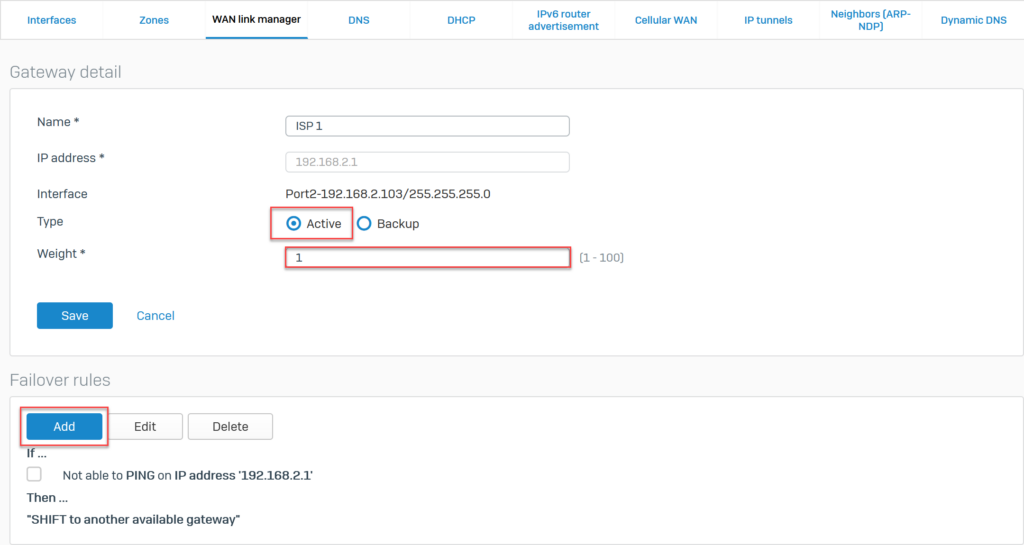
Click on the pencil icon at ISP line 1 to configure.
Configure with the following parameters:
- Type: Active.
- Weight: 1.
- Click Add at Failover rules to configure failover conditions.
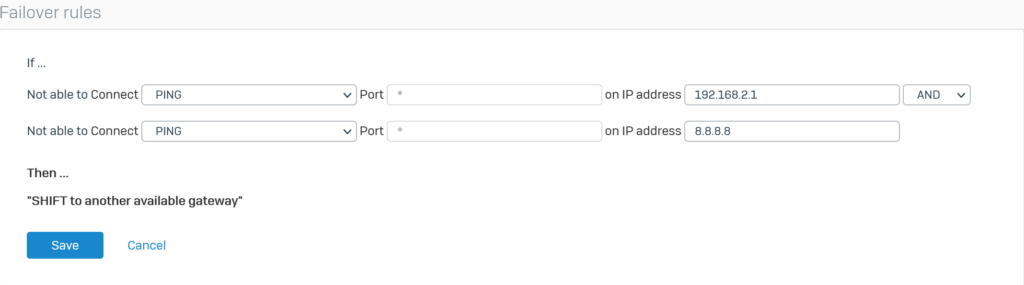
We configure the Failover rule as follows:
- At Not able to Connect on the first line select PING – 192.168.2.1 – AND.
- At Not able to Connect 2nd line select PING – 8.8.8.8.
- Click Save.
These parameters have the effect that the device will ping to 2 IP 192.168.2.1 which is the default gateway of ISP lines 1 and 8.8.8.8 of google…
If the device pings successfully, the internet traffic will go through ISP line 1.
If the device fails to ping this 2 traffic, it will failover the traffic over ISP 2.
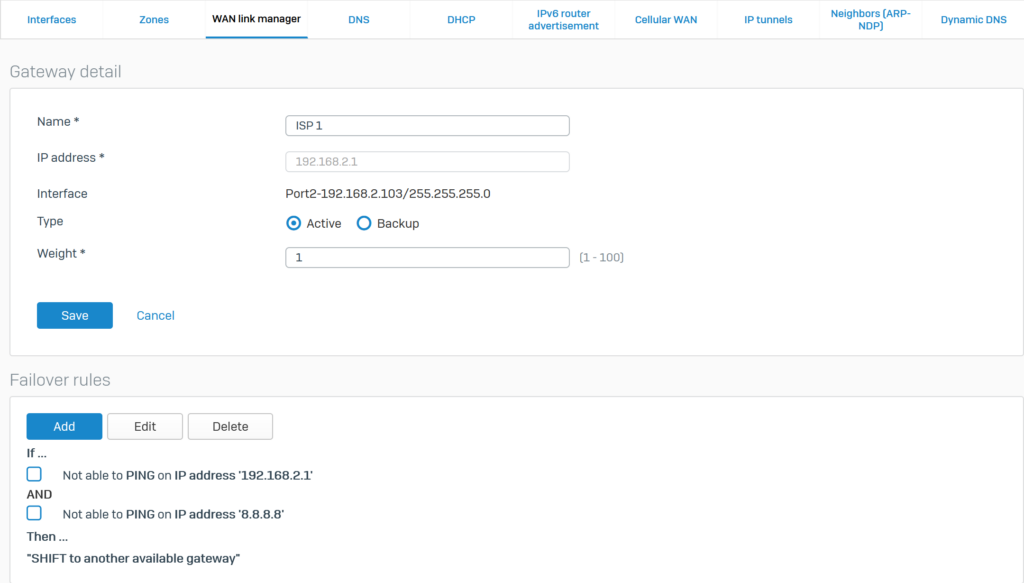
After configuration, the parameters of ISP 1 will display as follows.
Click Save.
5.3. Configure ISP 2 connection as Backup line.
Similar to ISP 1 line, we also click on the pencil icon of ISP 2 to configure.
Configure with the following parameters:
- Type: select Backup.
- Activate this gateway*: select ISP 1
- Action on activation: select Inherit weight of the failed active gateway.
- Serve new connections throught restored gateway.
- Click Save.
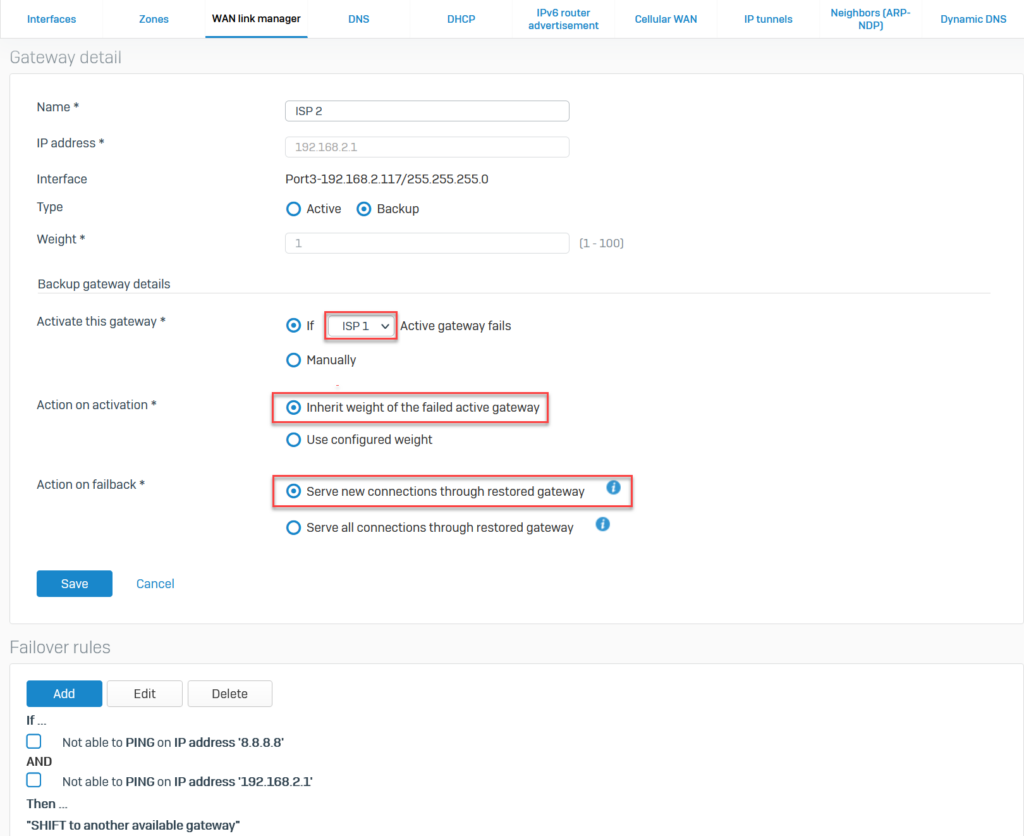
The parameters that we configure for ISP 2 mean that if ISP line 1 is dropped, ISP 2 will inherit the weight parameter from ISP 1 and new traffic going to the internet will be redirected to ISP 2.
5.4.Result.
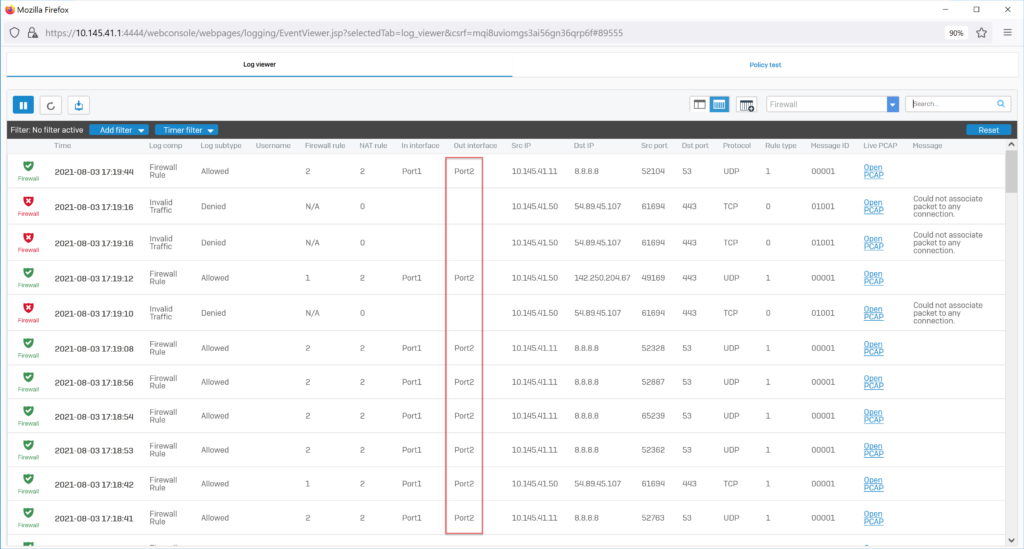
We will use laptop 1 to access the internet.
Then in the log viewer, we will see that the current outgoing internet traffic is going using Port 2 (ISP 1).
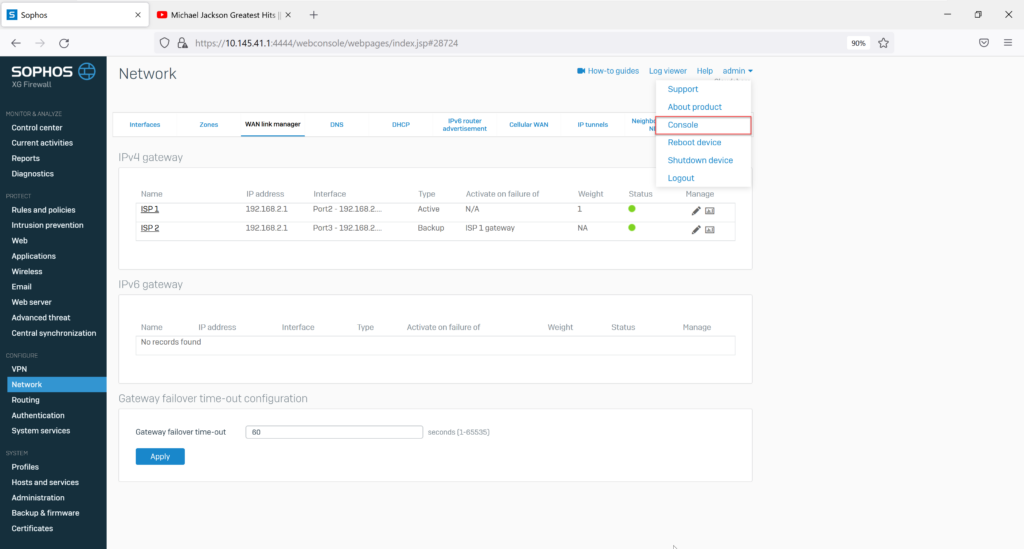
Then we will perform ISP 1 disconnection to test failover.
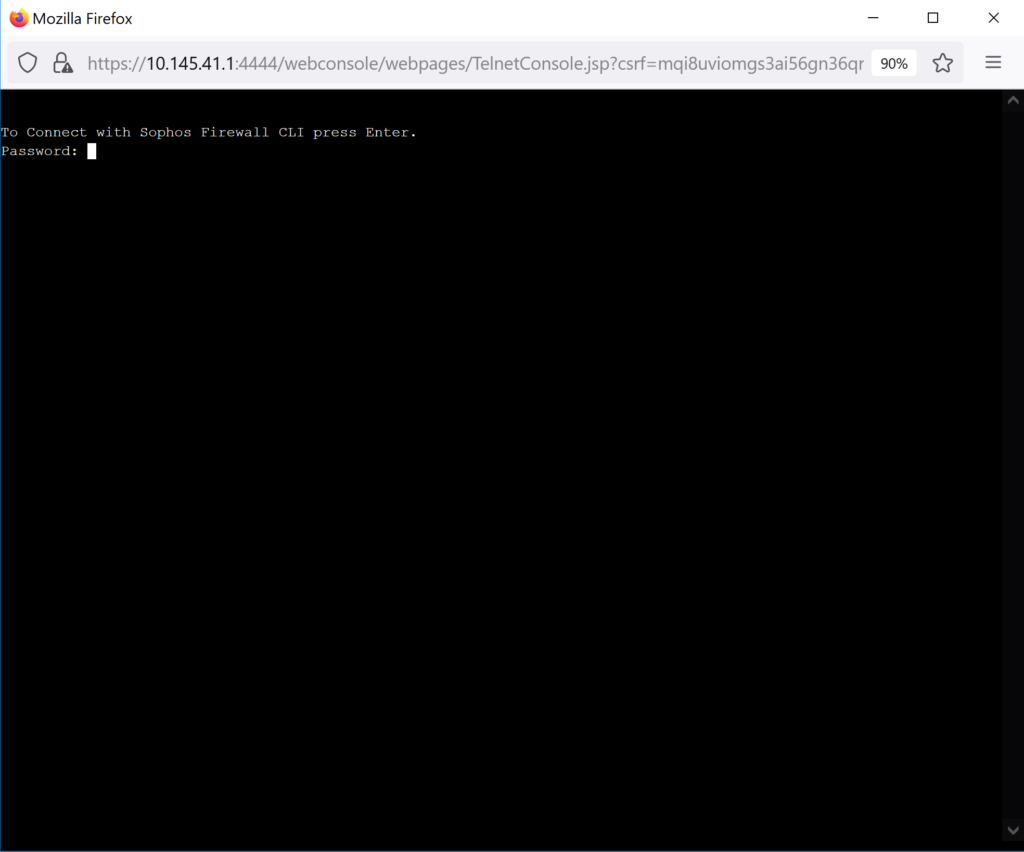
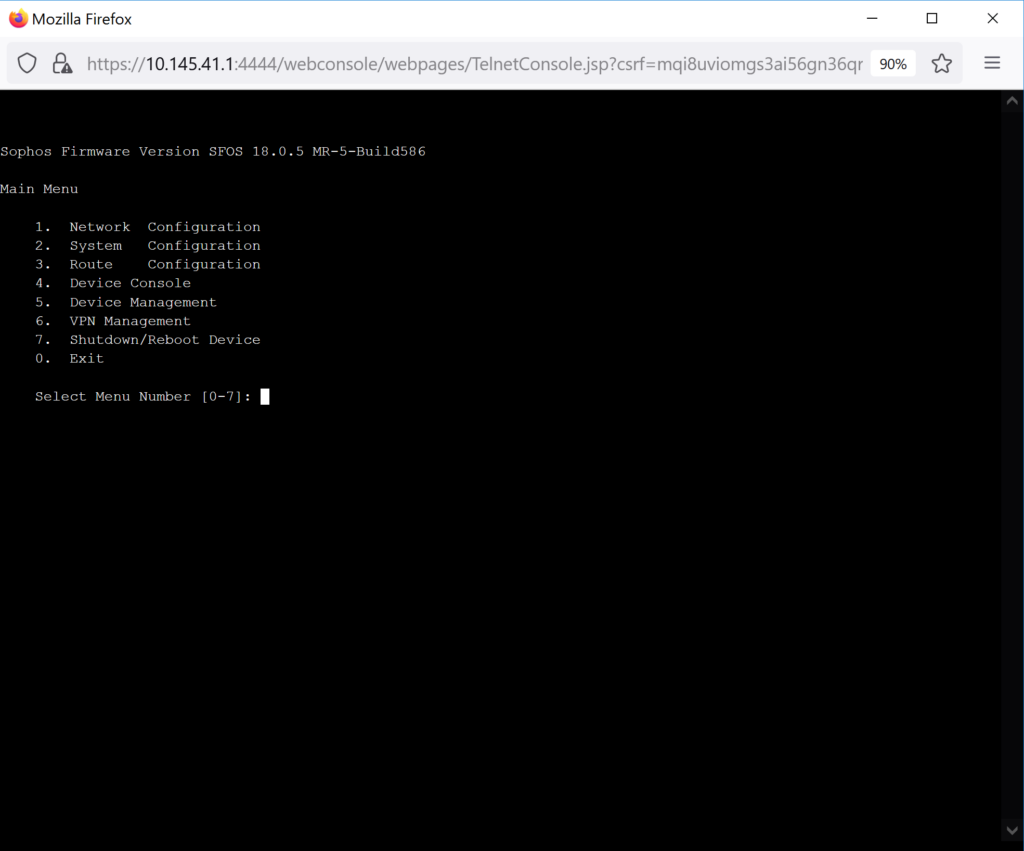
To turn off we click on admin in the upper right corner of the screen select Console or you can access the console with Putty.
After pressing Console a new window appears press Enter then enter the password and press Enter again to login to the console of the device.
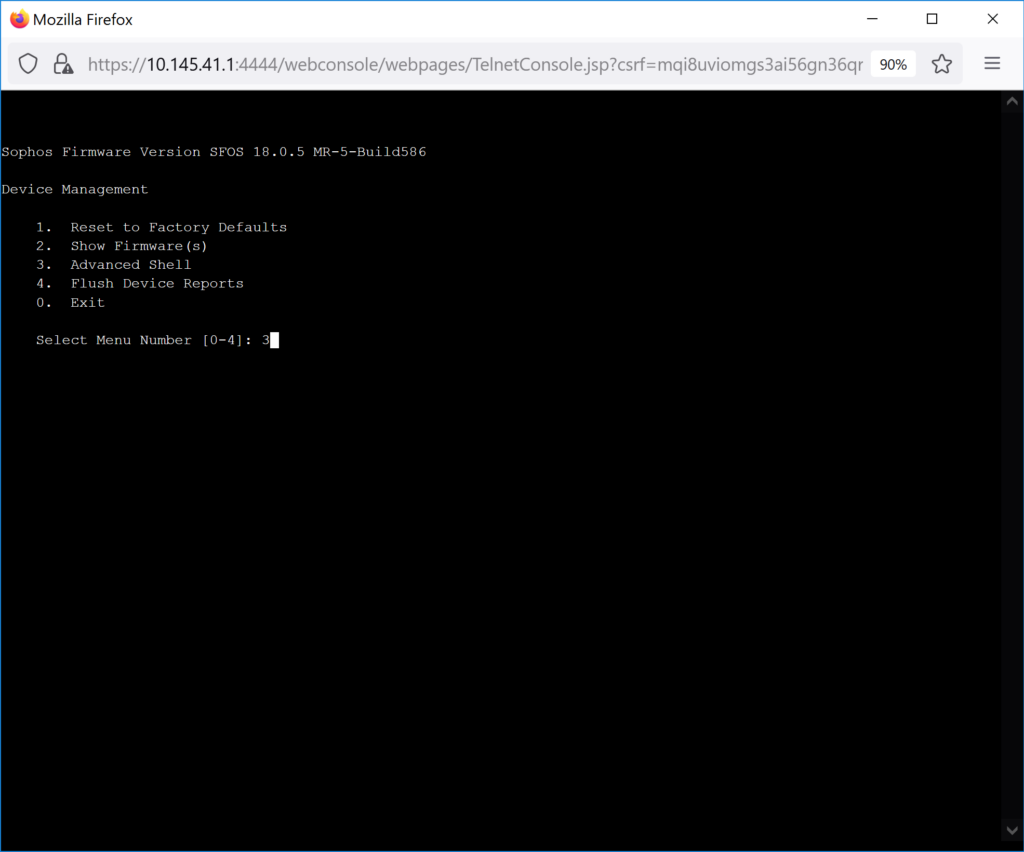
Type 5 and press enter to enter Device Management.
Type 3 and press enter to enter Advanced Shell.
Enter the command “ifconfig Port2 down” to disable this port.
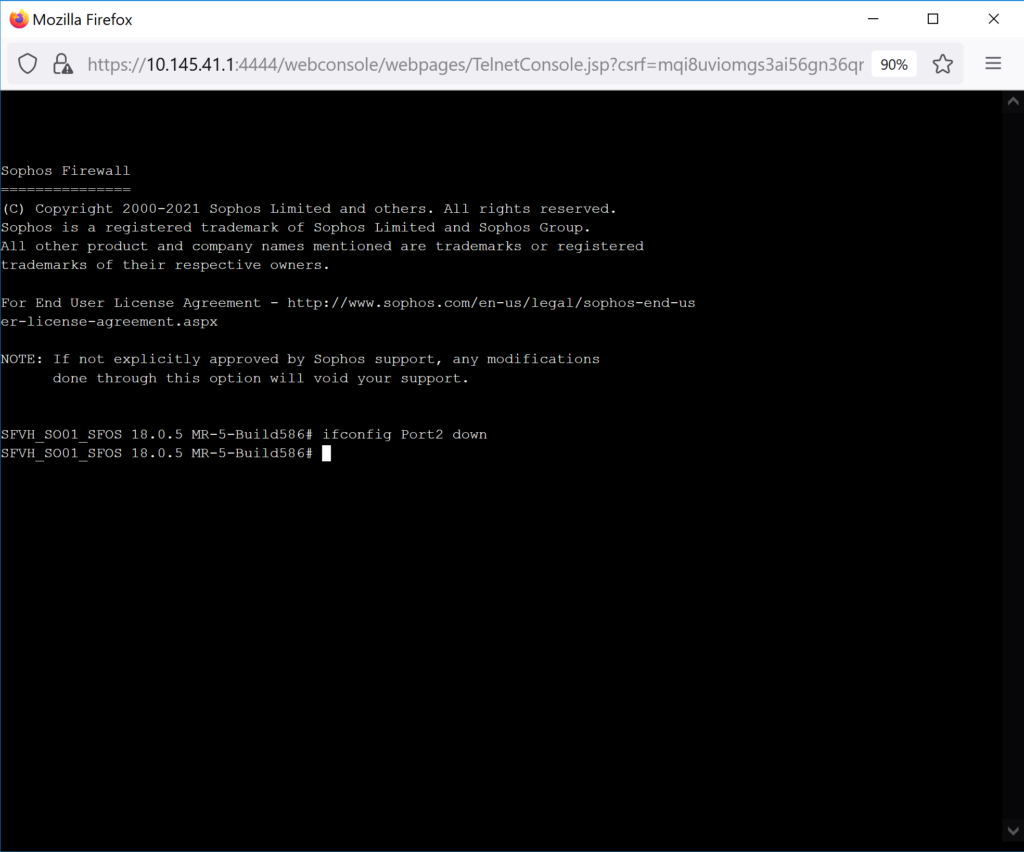
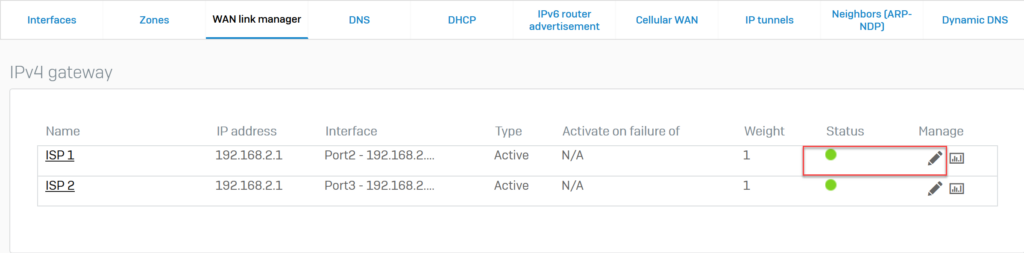
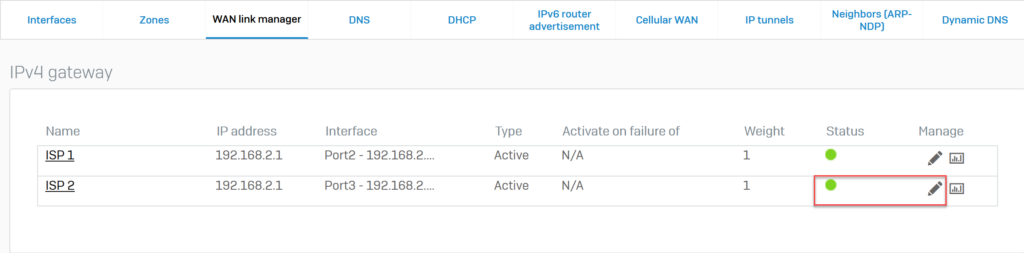
Then go back to the configuration page of the Sophos Firewall device, go to Network > WAN link manager we see the status of ISP 1 to turn red, which means it’s turned off.
Then we will access the internet using the browser and the result is still normal internet access.
This proves that failover happened when ISP line 1 was down.
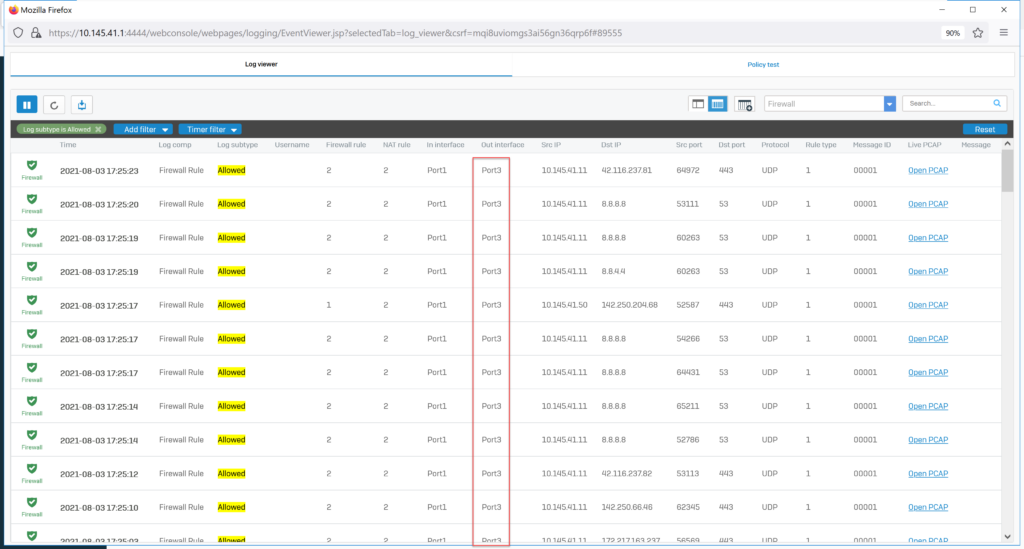
To check we go back to the Log Viewer and see that the current internet traffic goes to Port3 ie ISP 2.
Leave a Reply