
1 Overview
This article will guide you to add an Admin account on your Central. Requires an email account that is not located on another Central.
2 Steps to take
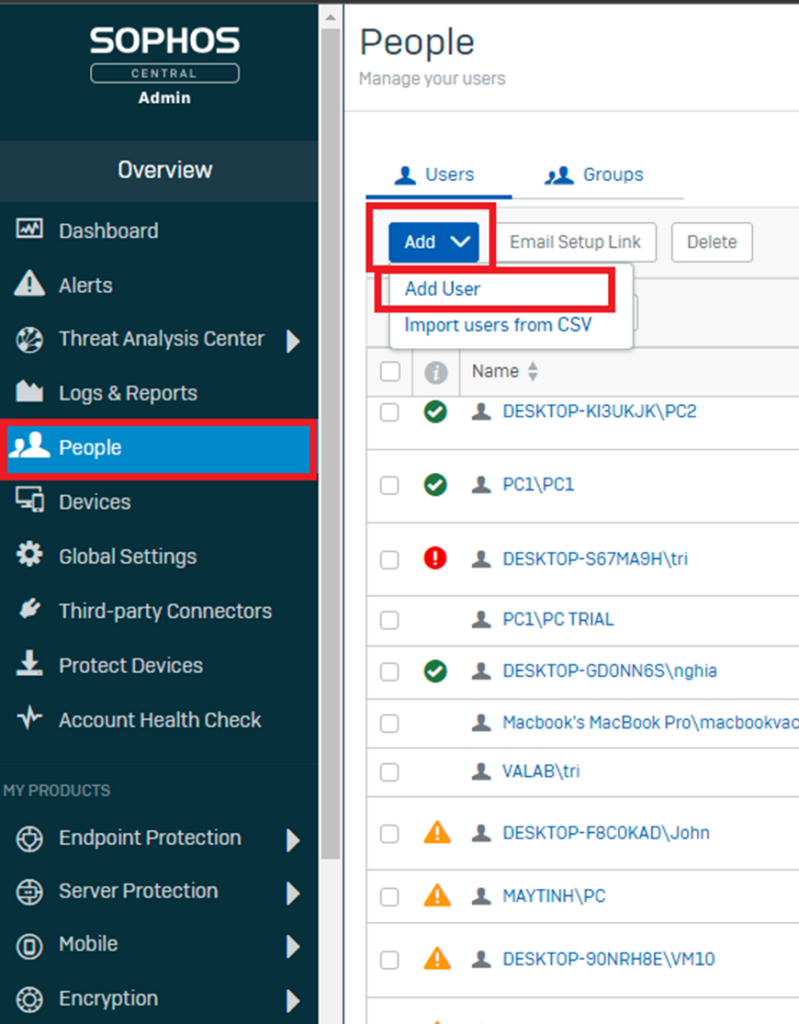
Access Sophos central with an account with Super Admin rights. In the People section, we choose Add User

Fill in user information such as Name, Email. Select Role here is Admin. Then click Save.
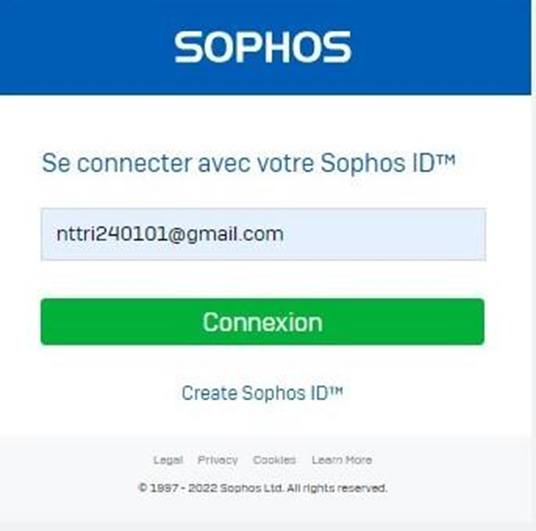
Then log in to Sophos Central with the newly created Email account.
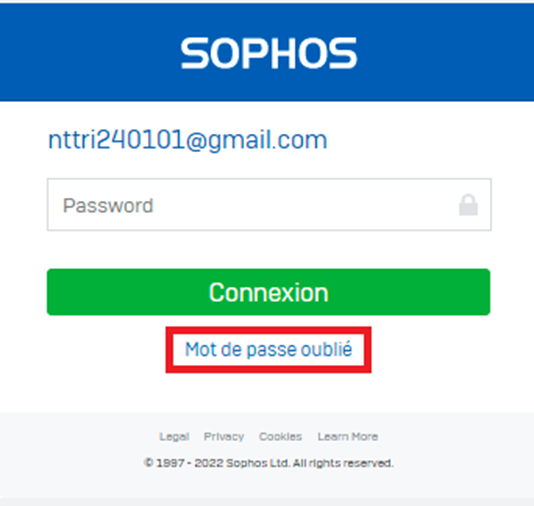
Click the item below to create a Password.

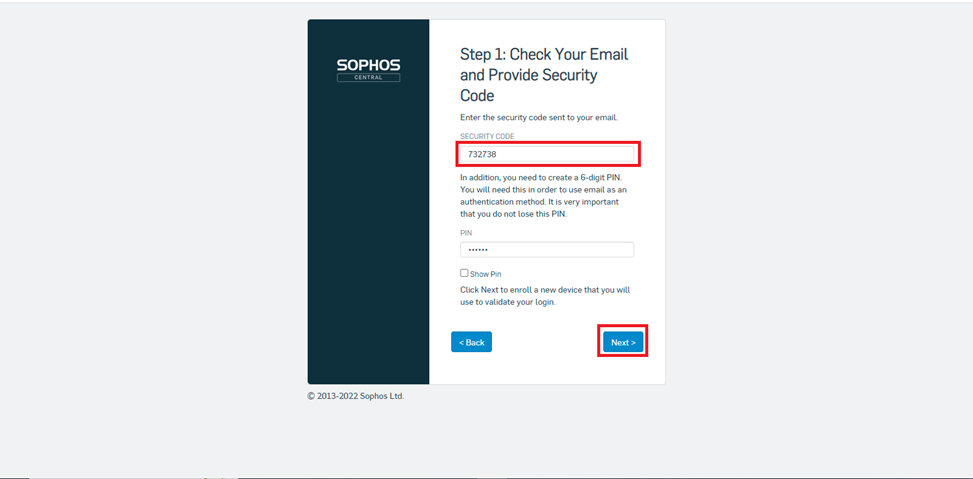
We click on the item as shown so that Sophos will send the verification code to the registered email.
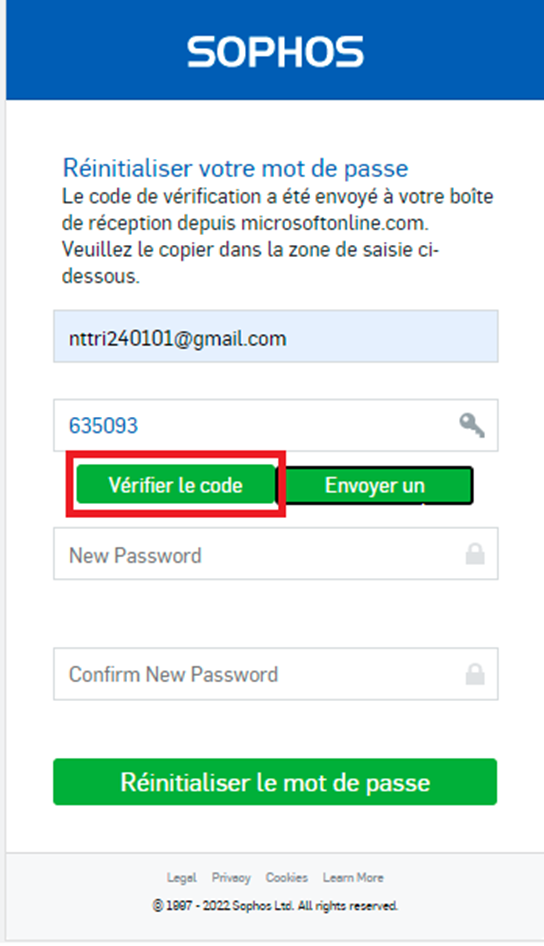
Enter the code received from the email. We click on the item above to verify.
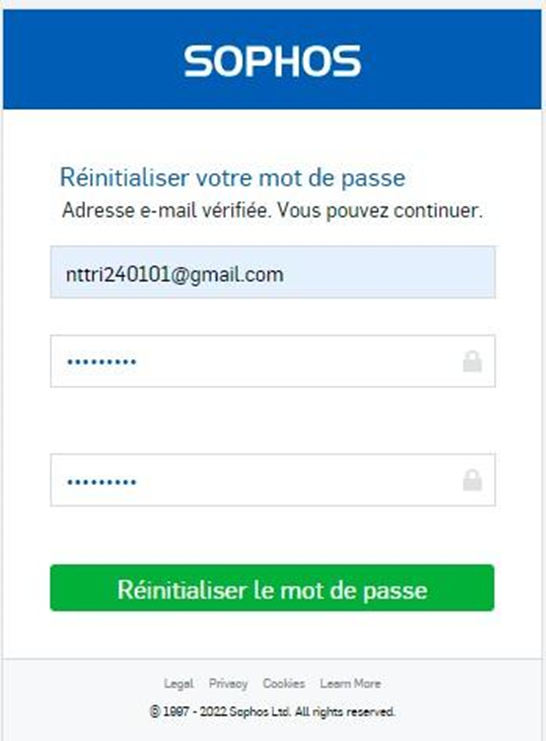
After successful authentication. We create a password for the account. Confirm the password again. Then click the green button to confirm.

Password generated successfully. The browser will navigate to the next item. Click next.
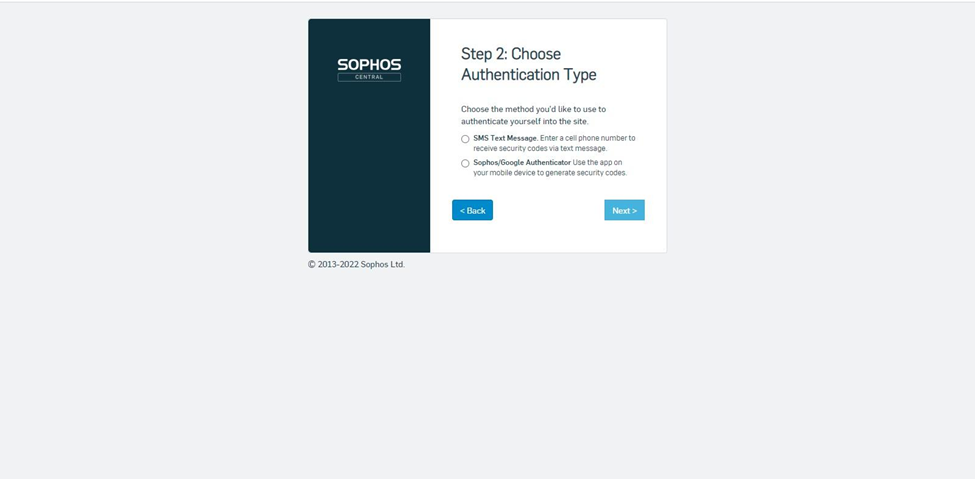
Choose a 2-layer security method to enhance account security. Here I choose Sophos Google Authentication. Then click Next. The QR code appears. We enter the QR code into the Google Authentication App on the phone.
Enter the Security code you just created from Google Authentication on your phone. Create a Pin to log in, this Pin is tied to your account. Click Next.
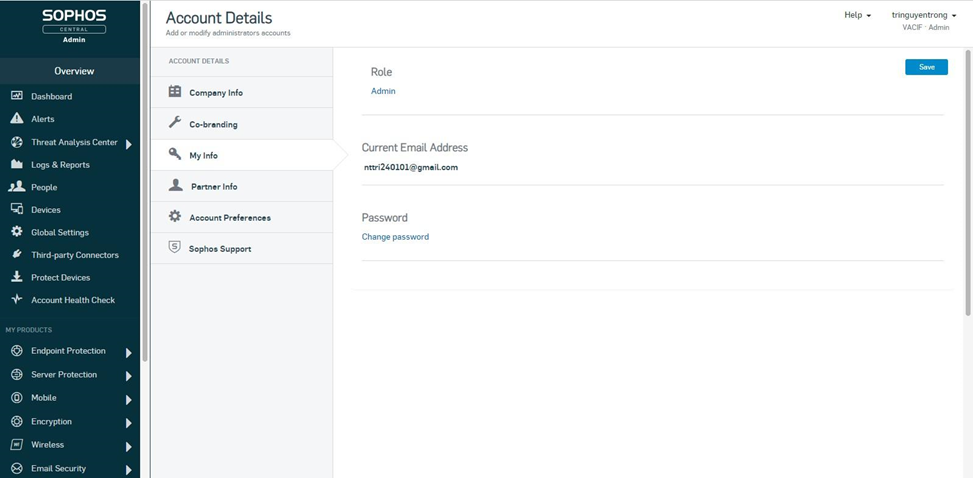
Finish the steps. The account has been successfully created with Admin rights.
Leave a Reply