
Overview
- This article describes how to configure and establish an IPsec VPN Connection between Sophos Firewall (SF) and Ciscoä VPN Client for Windows. The VPN connection enables all data to be transferred in an encrypted form, ensuring complete security.
Scenario
- Configure SF and Cisco VPN Client to enable an IPsec VPN connection between them. This article consists of 2 sections:
- Sophos Firewall Configuration
- Client Configuration in Windows
Sophos Firewall Configuration
- You must be logged in to the Admin Console as an administrator with Read-Write permissions for the relevant feature(s).
- Configure SF to connect with Windows via IPsec VPN by following the instructions below.
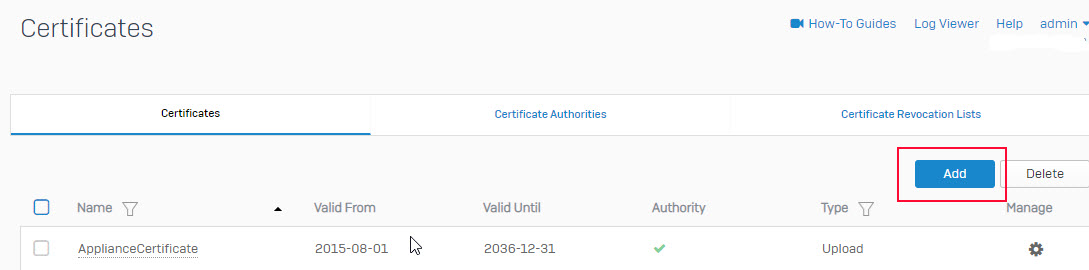
Step 1: Create Self-signed Certificates for Sophos Firewall and Client
- Go to SYSTEM -> Certificate and click Add to add new certificate.
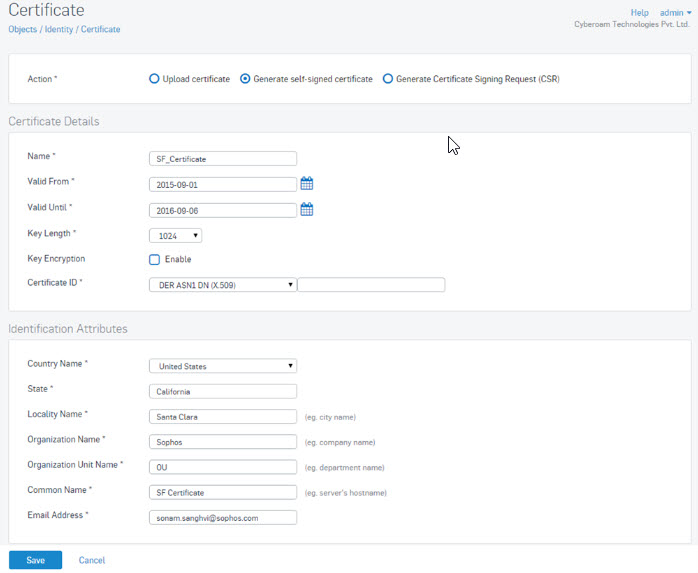
- Enter the following parameters as image (Please enter your parameters owned, this is example).
- Click Save to create the certificate.
- Create a similar certificate called Client_Certificate which would be used by the Cisco VPN Client.
Note:
- Make sure that you configure the Certificate ID of these certificates as DER ASN1 DN (X.509) to make them compatible with the Cisco VPN Client. This is because when the Cisco VPN Client receives a connection request, it responds with a default ID of X.509.
- If you want the Key to be encrypted, check the Enable box next to Key Encryption and enter the Passphrase that will be used for authentication.
- The Common Name used in the Certificate should NOT be the same as that used in CA.
Step 2: Configure VPN Connection
- Go to Configure -> VPN -> Cisco VPN Client.
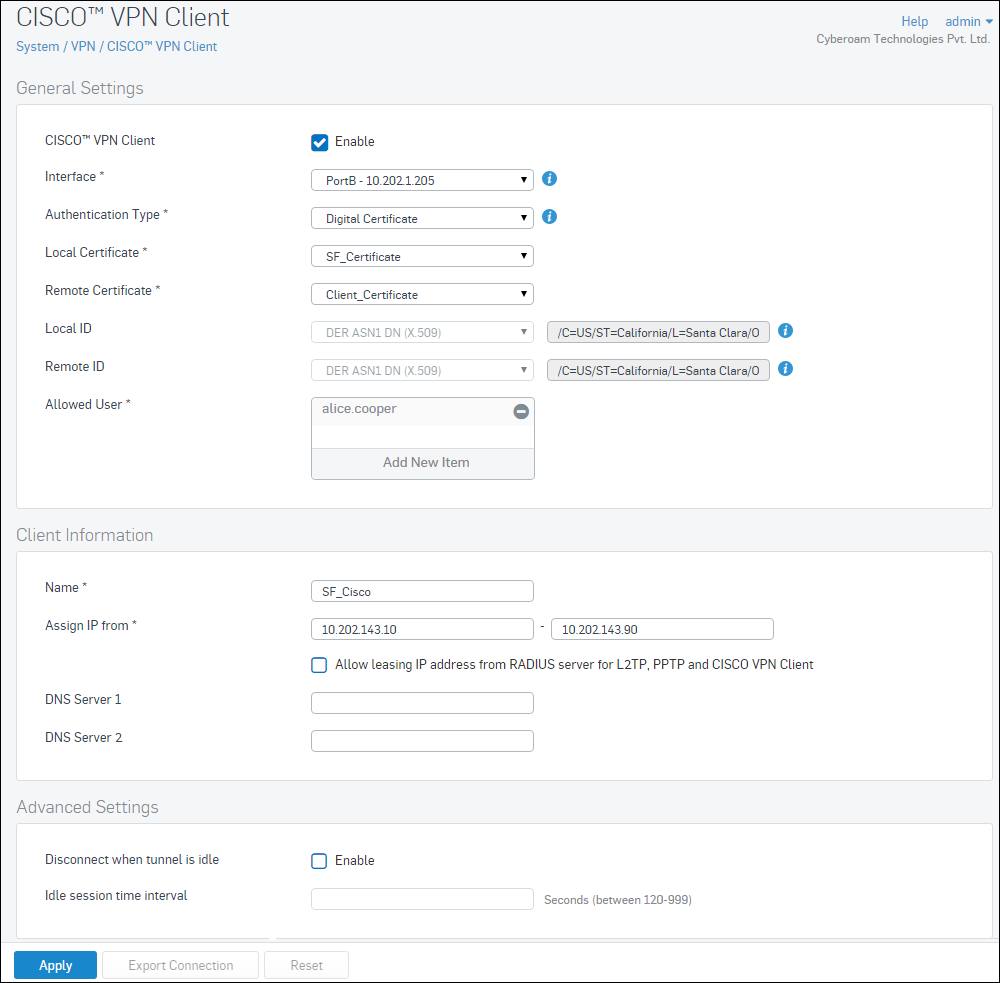
- Click Apply to save the configuration.
Client Configuration in Windows
You can configure Cisco VPN Client in your Windows machine by following the steps below.
Step 1: Download Ciscoä VPN Client
- Download and install Ciscoä VPN Client onto your Windows machine.
Step 2: Download Client Certificate from Sophos Firewall
- Download the Client Certificate (created in Step 1 of SF Configuration) onto your Windows machine. To download the certificate, log on to SF and go to SYSTEM > Certificate. Click on the download icon to download the certificate.
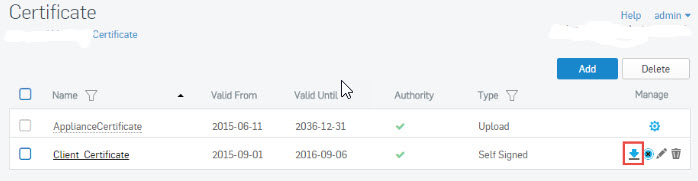
- A .tar.gz file is downloaded. Save and unzip it.
Step 3: Import Client Certificate into Cisco VPN Client
- In the VPN Client, go to Certificates > Import. In the Import Certificate screen, Select the Import Path of the Certificate (by browsing to it) and enter the Import Password.
- You can find the Import Password in the Client_Certificate zip file.
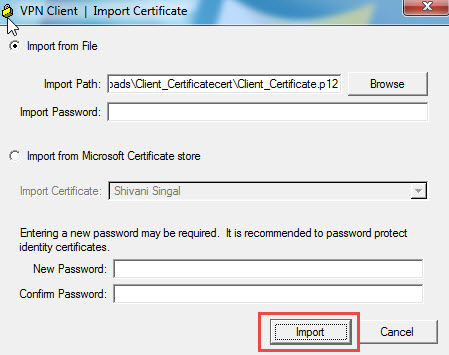
- Click Import to import the certificate.
Note:
- Make sure to import the certificate with .p12 extension. The Client Certificate package contains certificates with both .p12 and .pem extensions.
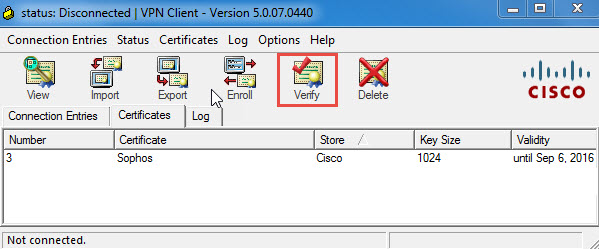
Step 4: Verify Imported Certificate
- Switch to the Certificates tab, select the certificate and click Verify to verify the certificate.
Step 5: Create Connection with Sophos Firewall
- Go to Connection Entries > New to create a new connection entry in client. In the Create New VPN Connection Entry window, configure the connection entry according to the parameters below.

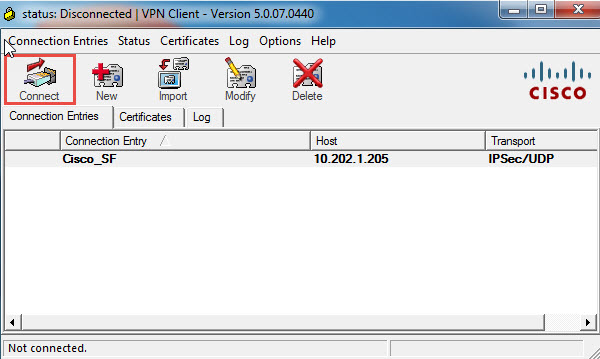
Step 6: Connect to Sophos Firewall
- Switch to Connection Entries tab, select Cisco_SF connection and click Connect to connect to SF.
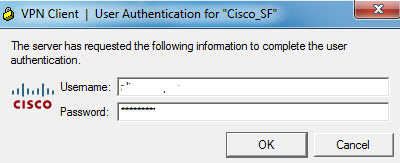
- Authentication details of the allowed user will be required to establish the connection. Upon submitting the details, the connection will be established and the user can access network resources through the VPN tunnel.
- The connection can be disconnected by clicking Disconnect.
Leave a Reply