
Overview
This article explains how to integrate STAS in an environment with a single Active Directory Server.
Note: Please be aware that once STAS is activated for testing or implementation, the firewall drops un-authenticated traffic until the probing responds or times out.
Sophos Clientless SSO Authentication
Sophos Clientless SSO is in the form of Sophos Transparent Authentication Suite (STAS). The STA Suite consists of:
- The STA Agent: monitors user authentication requests and sends information to the STA Collector for authentication.
- The STA Collector: collects the user authentication requests from the STA agent, processes the request, and then sends them to the XG Firewall for authentication.
Configuration
-
ADS Configuration:
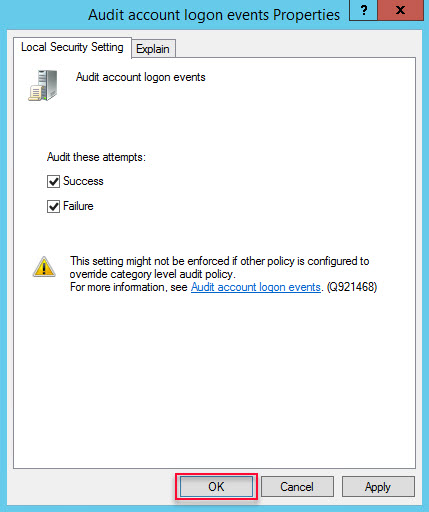
- Go to Start > Administrative Tools > Local Security Policy to view Security Settings. Browse to Security Settings > Local Policies > Audit Policy and double click on Audit account logon events to view the Audit account logon events Properties window.
- Select both the Success and Failure options and click OK to close the window.
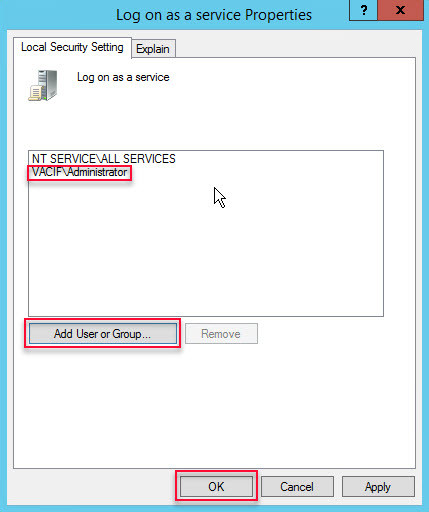
- While still in the Local Security Policy, browse to Security Settings > Local Policies > User Rights Assignment and double click on Log on as a service to view the Log on as a service Properties.
- If the Administrative user being used to install and run STAS is not listed here, select Add User or Group and add the user. Select OK to close the window.
- Configure the Windows Firewall and/or 3rd party firewall software to allow communication over the following ports:
- AD Server: Inbound UDP 6677, Outbound UDP 6060, Outbound TCP 135 & 445 (if using Workstation Polling Method WMI or Registry Read Access), Outbound ICMP (if using Logoff Detection Ping), Inbound/Outbound UDP 50001 (collector test), Inbound/Outbound TCP 27015 (config sync).
-
STAS Configuration
- Log in to your AD Server using an Administrator account and follow the steps below to install and configure STAS
- Download STAS from the graphical user interface (GUI) of the XG Firewall, go to Authentication > … (click on the … symbol at the far right of the authentication menu) > Client Downloads and install it on the AD Server.
- You can also download STAS from the Download Clients page in the User Portal while logged in as an Administrator.

-
Install STAS:
- Proceed to install the recently downloaded STAS file. Click Next four time and click Install.
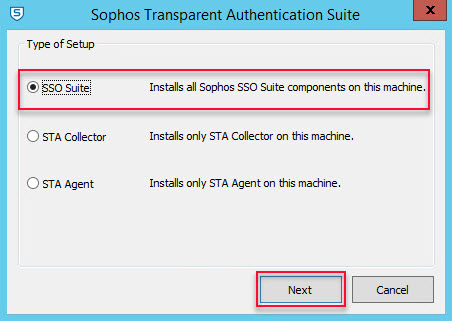
- Select SSO Suite and click Next.
- Enter the administrator user name and password(s), select Next.
- Press Finish to complete the installation.
- Once STAS in installed, launch it from Start > All Programs > STAS > Sophos Transparent Authentication Suite or from the Desktop shortcut.
-
Configure STAS:
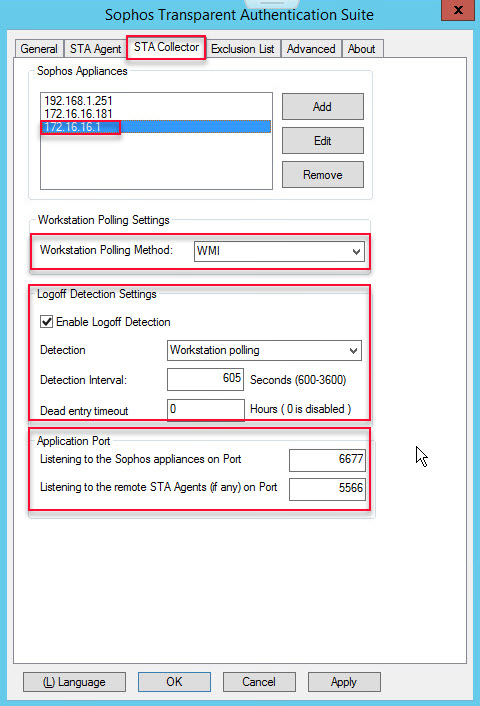
- Switch to the STA Collector tab.
- Under Sophos Appliances, add the XG Firewall’s IP address (Please enter your IP address XG Firewall).
- Set Workstation Polling Settings as WMI.
- Keep Logoff Detection Settings in its default configuration.
- Setting the Dead Entry Timeout will log the user off from the XG Firewall after the allotted time, even if the Logoff Detection for the users is disabled.
- Leave the default ports at 6677 and 5566.
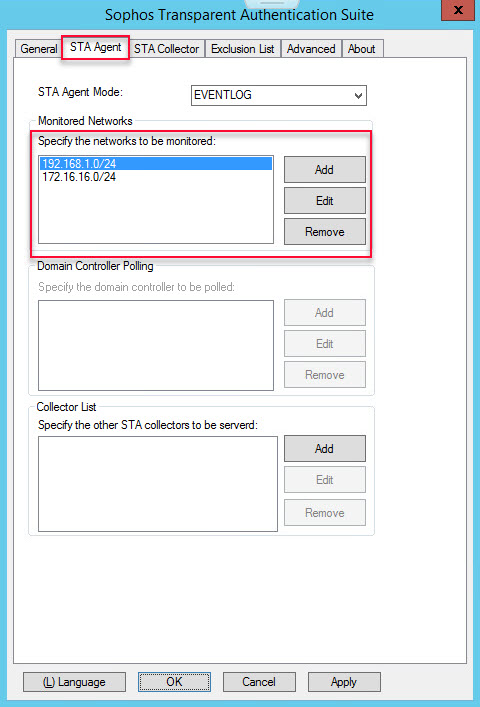
- Switch to the STA Agent tab.
- Enter the network(s) to be monitored by STAS.
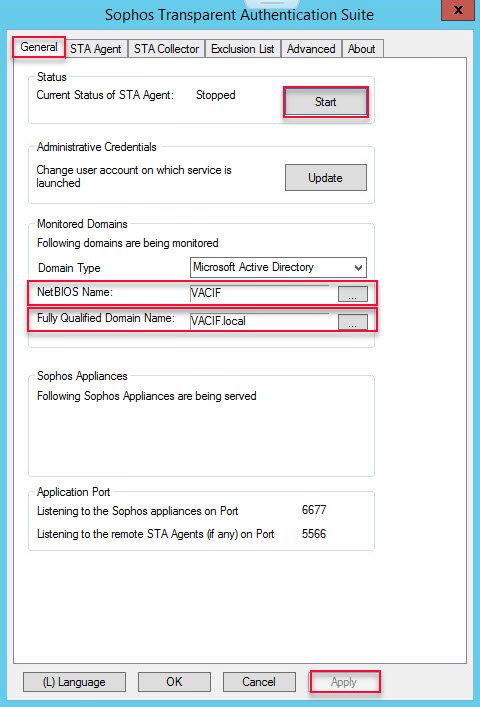
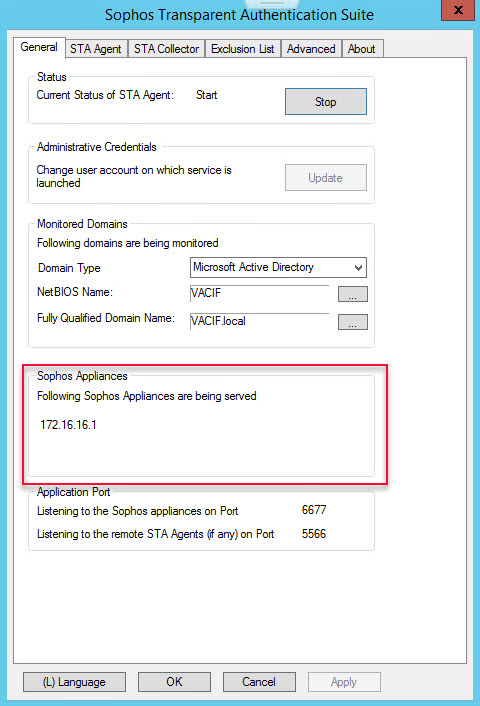
- Switch to the General tab.
- Enter in the NetBIOS Name for the domain.
- Enter the FQDN for the domain.
- Select Apply.
- Select Start to start the STAS Service.
Integrate Sophos XG Firewall with Active Directory
- Please refer to https://techbast.com/2018/11/sophos-firewall-how-to-integrate-sophos-firewall-with-active-directory.html for detailed instructions.
- Note: You must add the AD Server as a Firewall Authentication Method under the Services tab.
XG Firewall Configuration
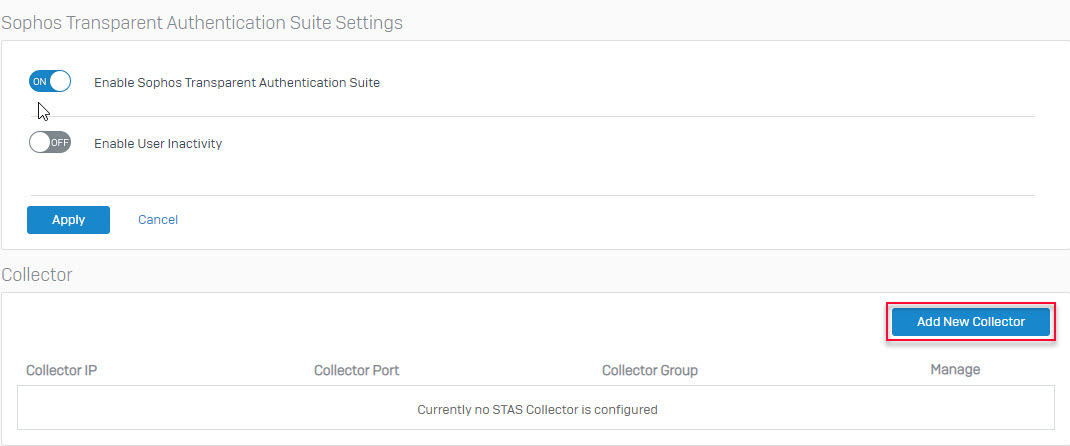
- Go to Authentication > STAS to enable STAS by selecting the ON button and click on Activate STAS.

- Once activated, select Add New Collector.
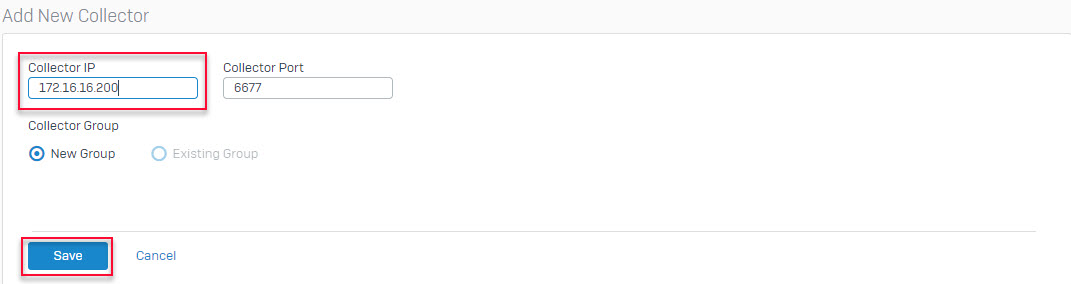
- Enter the IP address of the AD server (Please enter Your IP) into the Collector IP box and Save.
- At this point, the XG Firewall attempts to contact STAS on the AD server over UDP 6060. On the AD Server, open STAS and go to the General tab to see the XG Firewall’s IP address under Sophos Appliances. This is an indication that STAS is connected to the XG Firewall correctly.
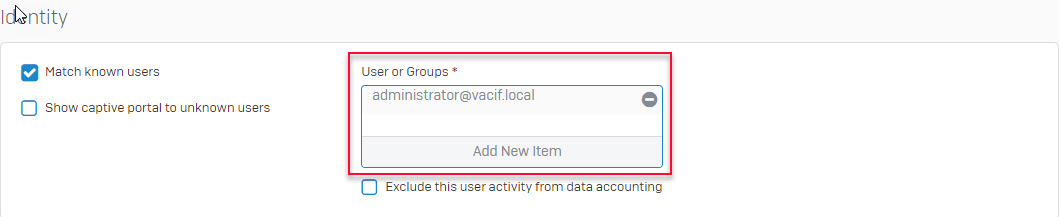
- Go to Firewall > + Add Firewall Rule to create an identity based firewall rule to control the traffic in a user based fashion.
Results
-
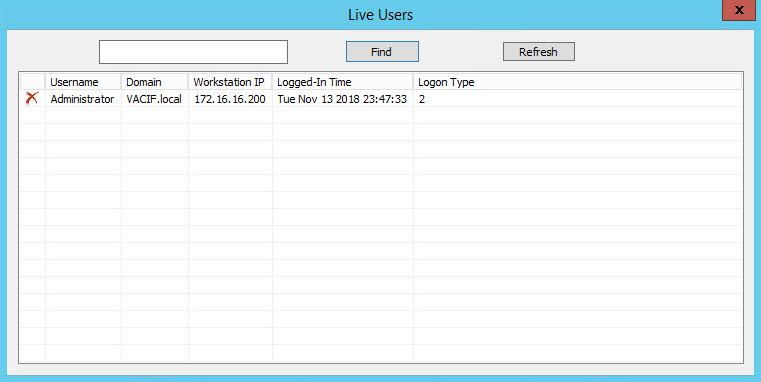
Verify live users
- Once users has successfully authenticated to the domain, they can be viewed as a live users on either STAS or in Sophos XG Firewall.
- On STAS, go to the Advanced tab and select Show Live Users.
- On the XG Firewall, go to Monitor & Analyze > Current Activities > Live Users.

Leave a Reply