Overview
- This articles describes how to configure RIP in the Sophos XG Firewall.
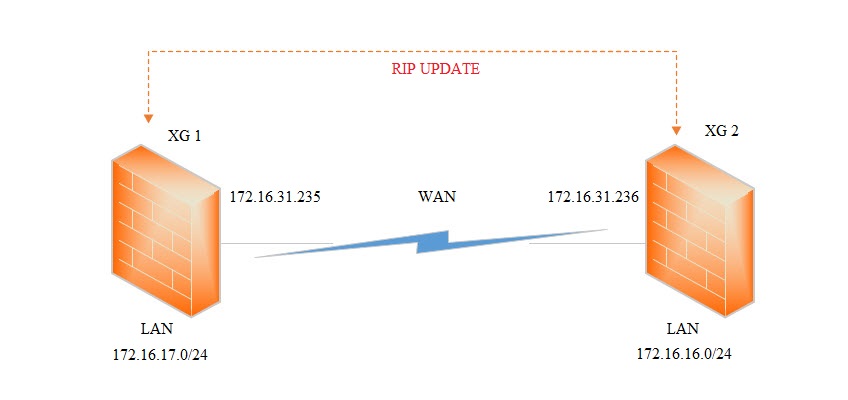
Scenario and Diagram:
- Configure RIP routing between two Sophos XG Firewalls. The configuration steps will be similar for both XG Firewalls.
Configuring On XG 1 and XG 2
- You must be logged on to the Web Admin Console as an administrator with Read-Write permission for the relevant feature(s).
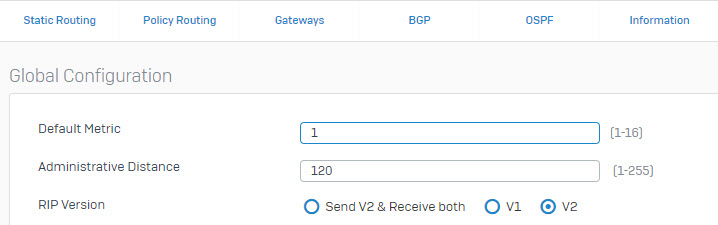
- Select RIP Version.
- Go to Routing -> RIP. Under Global Configuration, select V2 for the RIP Version and click Apply.
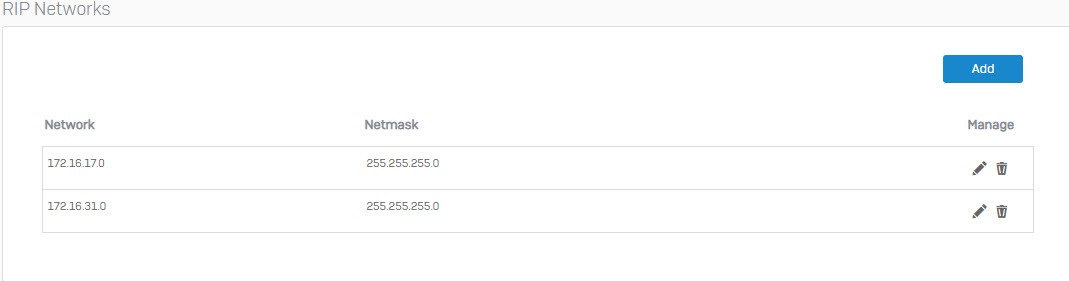
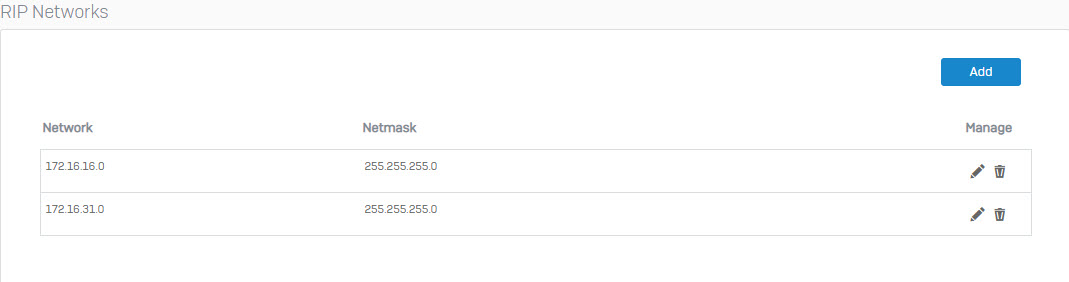
- Add networks to be advertised
- Under RIP Networks section, click Add. This is where the networks that will participate in RIP routing will be added.
- Enter XG 1’s and XG2’s IP Network (LAN &WAN) as shown below.
XG 1
XG 2
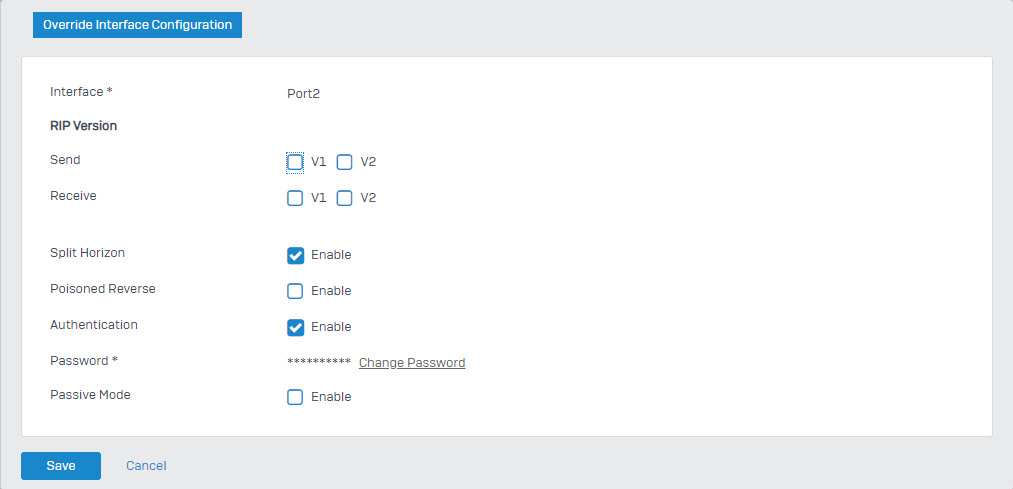
- Enable authentication (Optional) on XG 1 and XG 2
- To enable authentication for RIP updates:
- Under Override Interface Configuration section, click Select Interface.
- Specify the interface through which the RIP updates are to be exchanged.
- Click Enable for Authentication and specify the Password.
- Click Save.
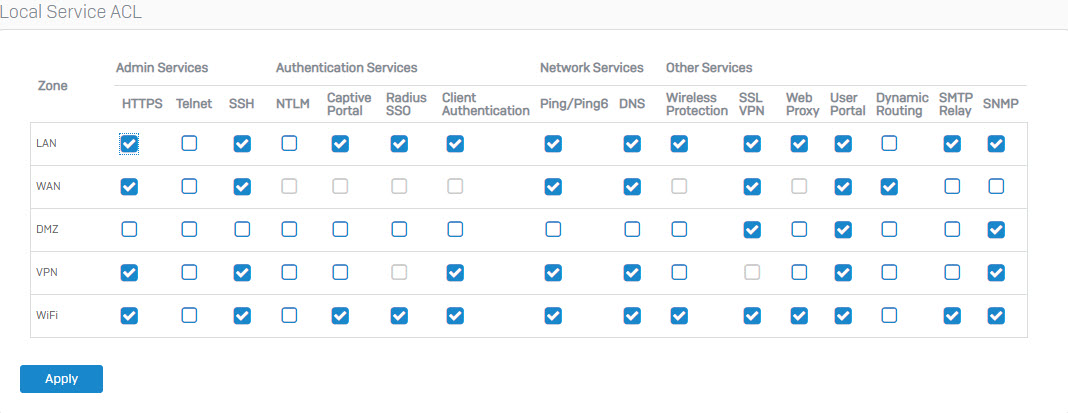
- Allow Dynamic Routing on XG 1 and XG 2
- Go to Administration > Device Access. Under Local Service ACL section, enable Dynamic Routing for the required zones for your network. For this example, it is enabled for WAN. Click Apply.
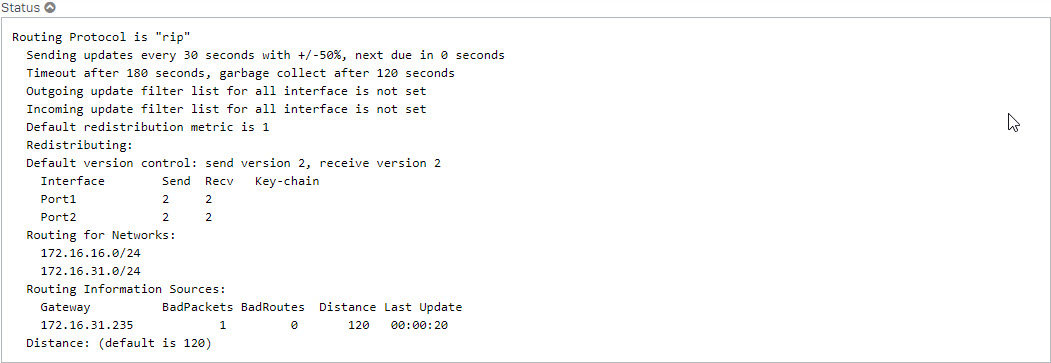
Verify RIP configuration
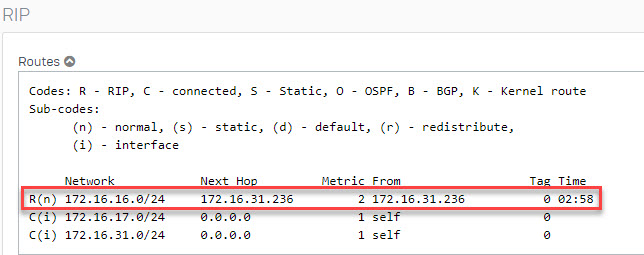
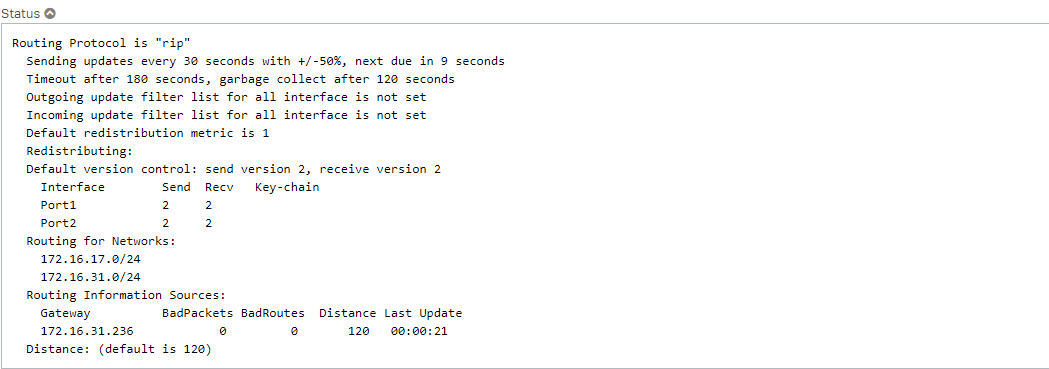
- To verify the RIP configuration, go to Routing > Information. Under RIP section, click on Routes or Status.
- The images below shows the routes and status for XG1. The networks of XG2 appears in the routing table of XG1.
- The images below shows the routes and status for XG2. The networks of XG1 appears in the routing table of XG2.

Leave a Reply