
Overview
This article introduces redundant power equipment for Sophos firewall devices (XG/SG External Redundant Power Supply)
Supported devices for firewall device models below:
- Sophos SG 210 rev.3
- Sophos SG 230 rev.3
- Sophos SG 310 rev.2
- Sophos SG 330 rev.2
- Sophos SG 430 rev.2
- Sophos SG 450 rev.2
- Sophos XG 210 rev.3
- Sophos XG 230 rev.2
- Sophos XG 310 rev.2
- Sophos XG 330 rev.2
- Sophos XG 430 rev.2
- Sophos XG 450 rev.2
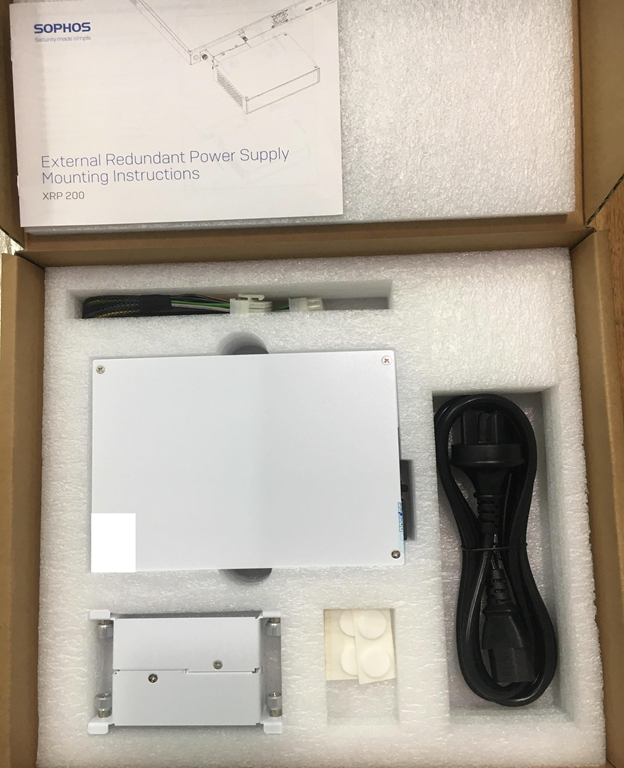
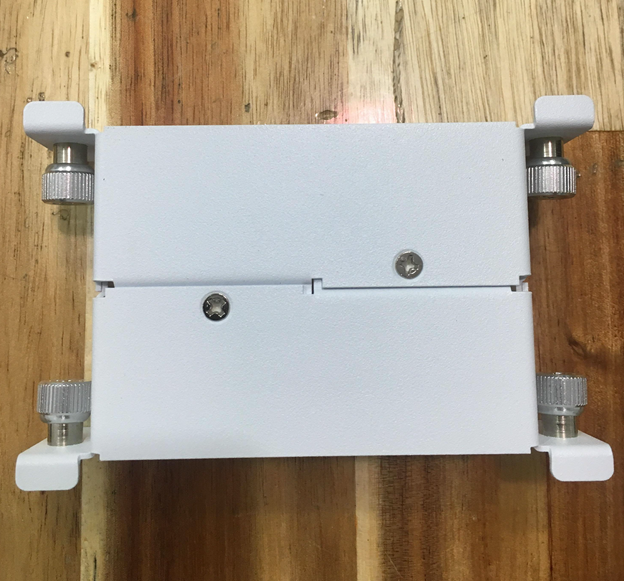
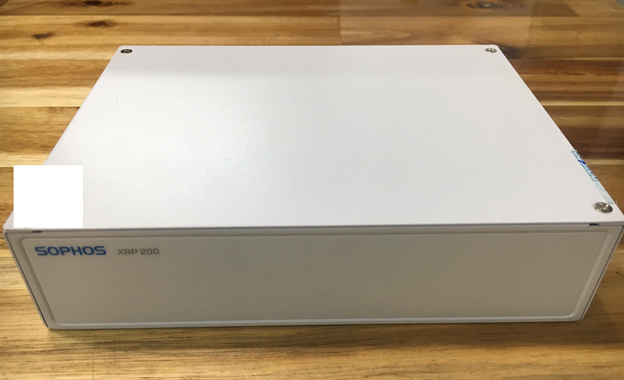
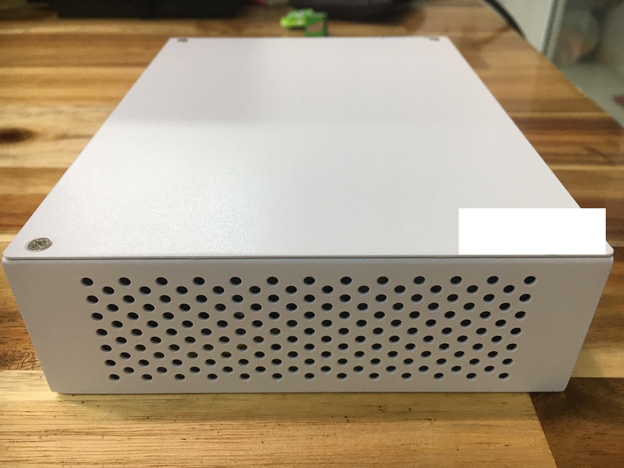
Actual image of the device
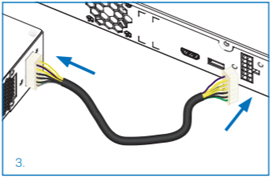
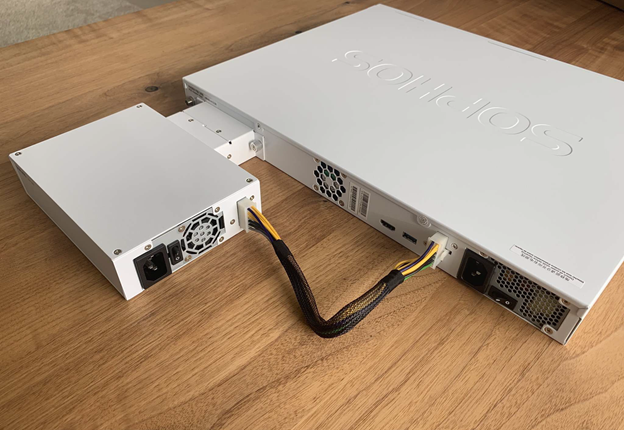
-> The supplied box included the power cord, Redundant Power device, rack and cable that connects the Redundant Power to the the firewall device
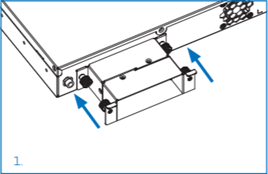
-> Rack between Redundant Power device and Firewall device with four screws
-> The front of the device has the manufacturer’s name and the product name XRP 200, the device is compact and white electrostatic
-> The side of the device is the power, the toggle switch, the heat for the device and 1 port connect to the Firewall device
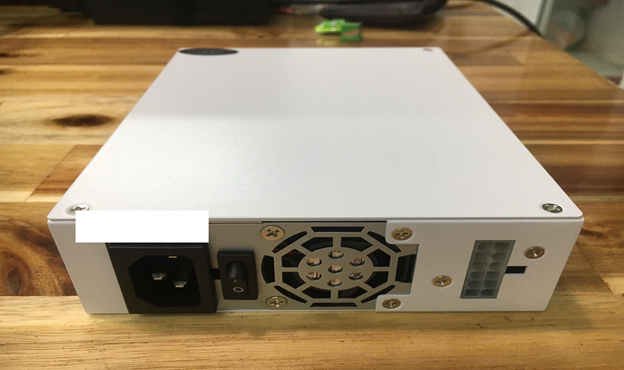
-> The other side of the device is the ventilation hole to reduce the heat load. The device is not fanless so it will not cause noise during operation
Instructions for attaching redundant power to the firewall device
Step 1: Attach the bracket to the mounting holes on the back of the firewall device and tighten the screw
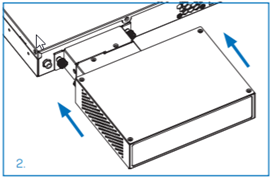
Step 2: Attach the external redundant power supply unit to the bracket and tighten the screws
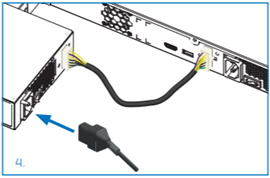
Step 3: Connect the cable between the External Redundant Power and the redundant power plug on the firewall device
Step 4: Plug the power into the Redundant Power and turn on the switch
** If you have difficulty configuring Sophos products in VietNam, please contact us:
EMAIL: info@thegioifirewall.com
HOTLINE: 02862711677
Leave a Reply