Overview
Microsoft Windows Server Update Services (WSUS) is an effective solution for businesses in system update issues. WSUS offers a solution to this problem, WSUS server will download updates to provide back to the workstations. You will no longer have to worry about bandwidth
How to configure
Step 1: Install WSUS
- Log in to Windows Server by Admin account
- Server Manager -> Add roles and features -> Windows Server Update Services
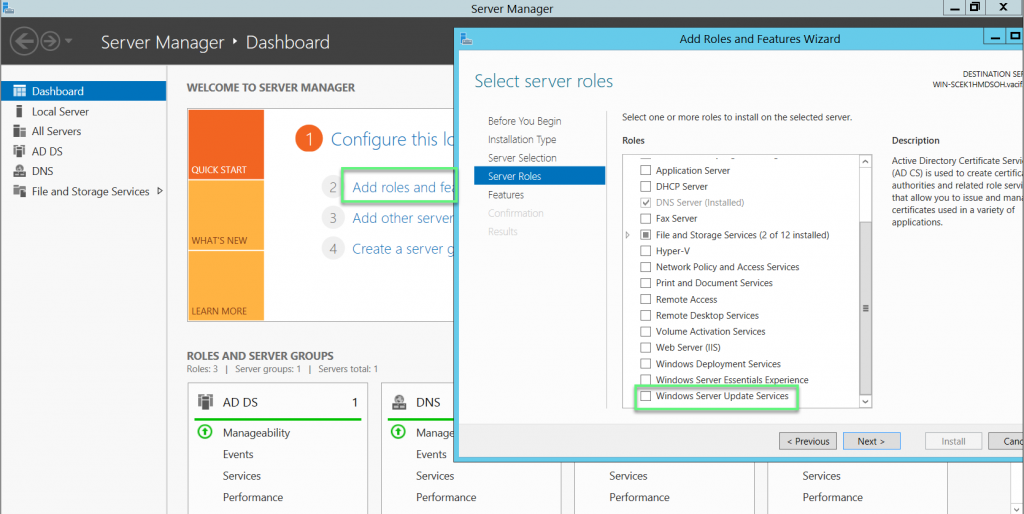
- Click Add Features -> Click Next

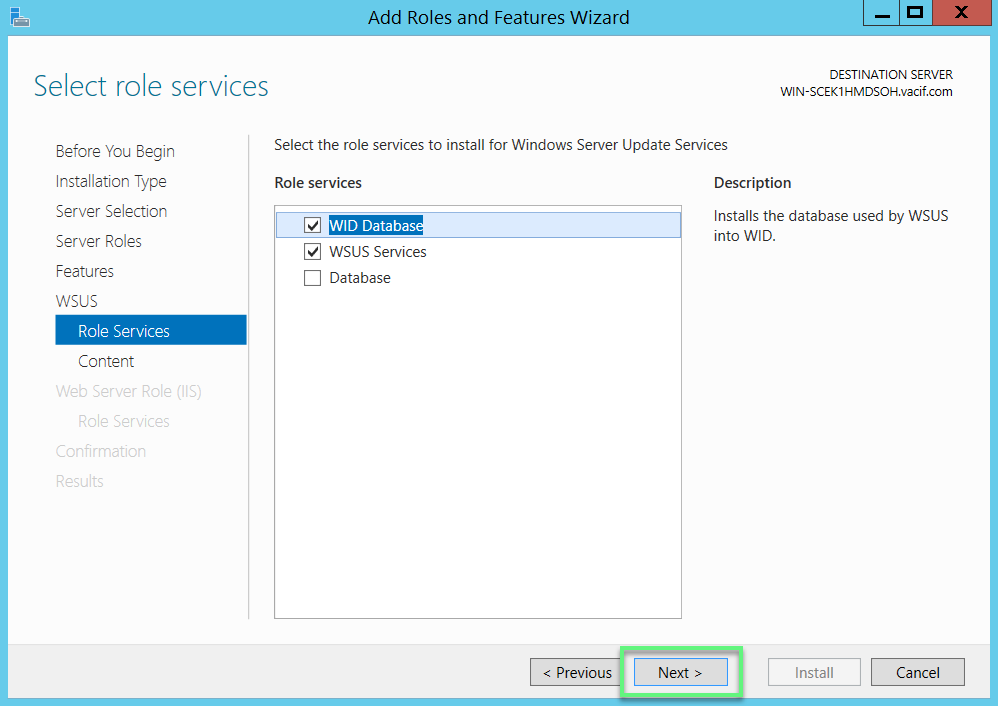
- Click Next to continue
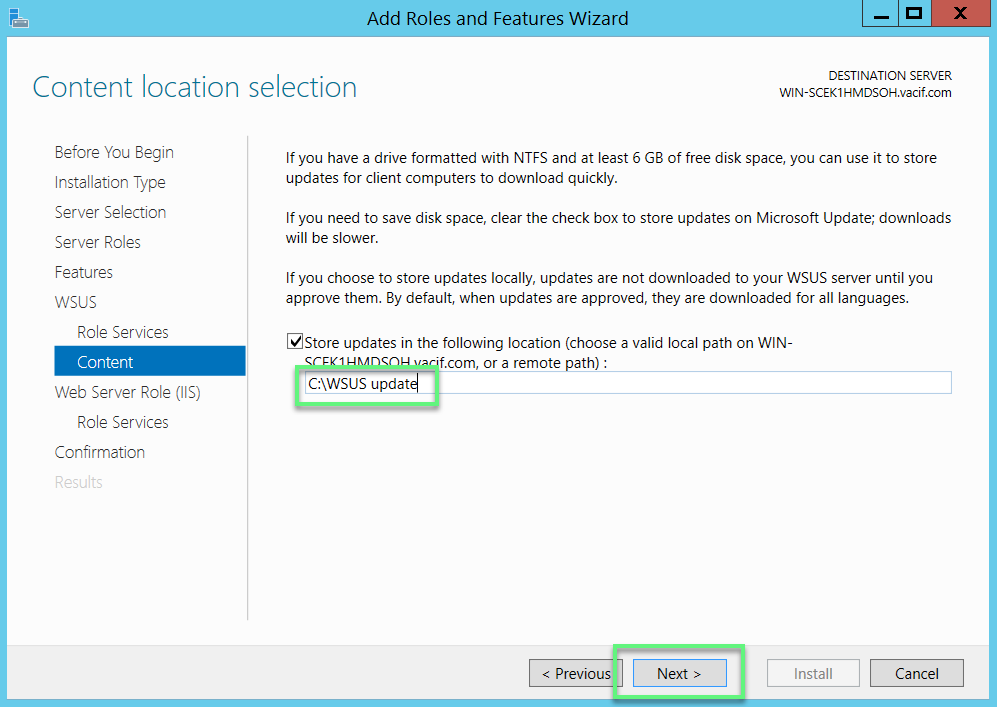
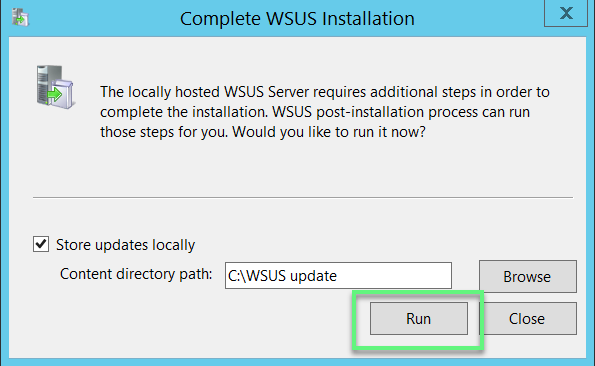
- Enter the path where WSUS updates are stored
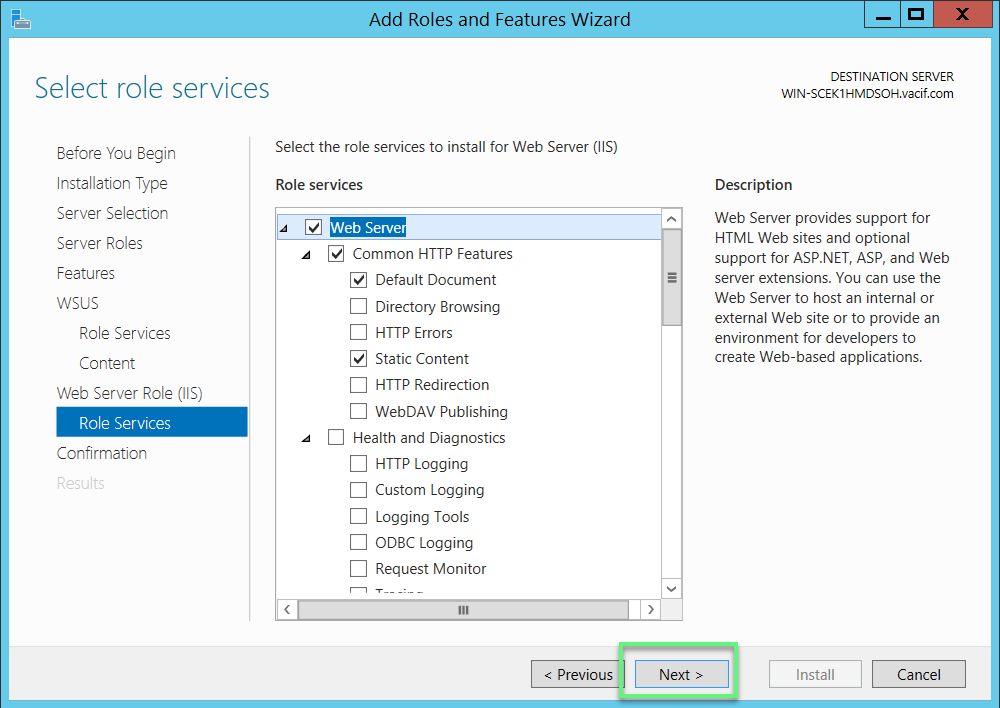
- In Role Services, choose Next to continue
- Confirm the installation and select Install to start the installation

Step 2: Configure WSUS
- After successful installation, open WSUS
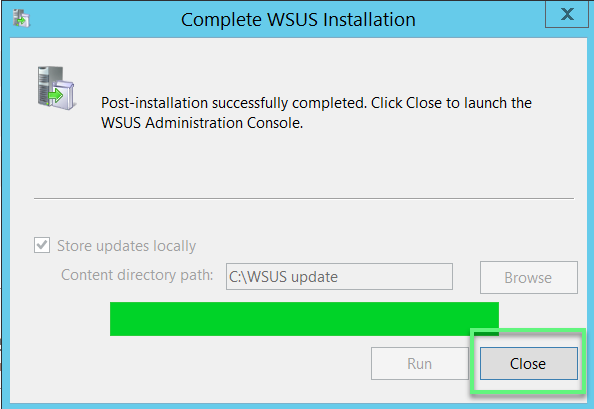
- Choose Run -> Click Close
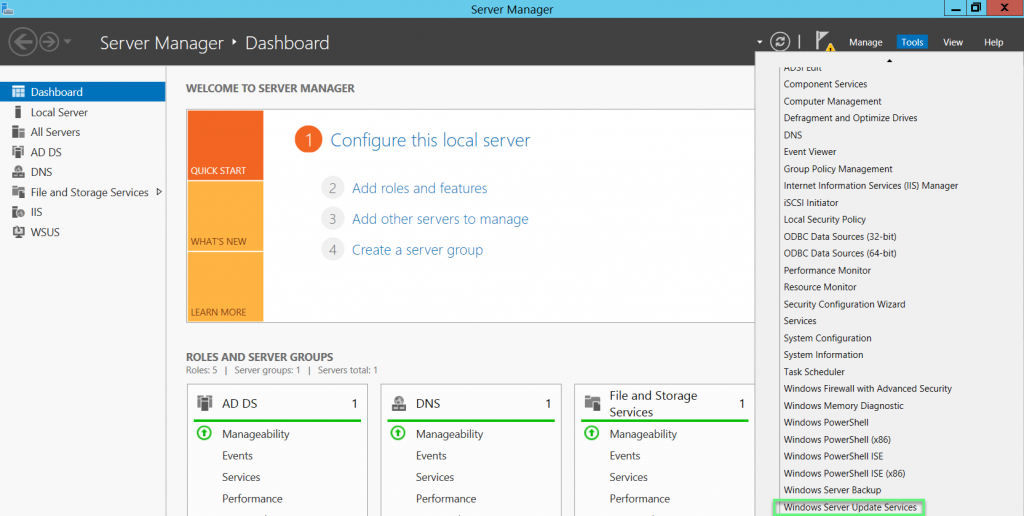
- Tools -> Windows Server Update Services
- Click Next

- Choose Synchronize from Microsoft Update -> Click Next

- In Specify Proxy Server, select if you use Proxy Server, otherwise uncheck and click Next to continue

- Choose Start Connecting

- Select the language for the updates

- Select the content you want to update, here for basic users, choose updates for Office and Windows

- Choose specific classifications for each update content

- Choose the timing of synchronizing, there are 2 ways to synchronize manually and automatically according to the set time

- Click Next and Finish


Step 3: Create policy allow user’s computer to automatically download and install updates
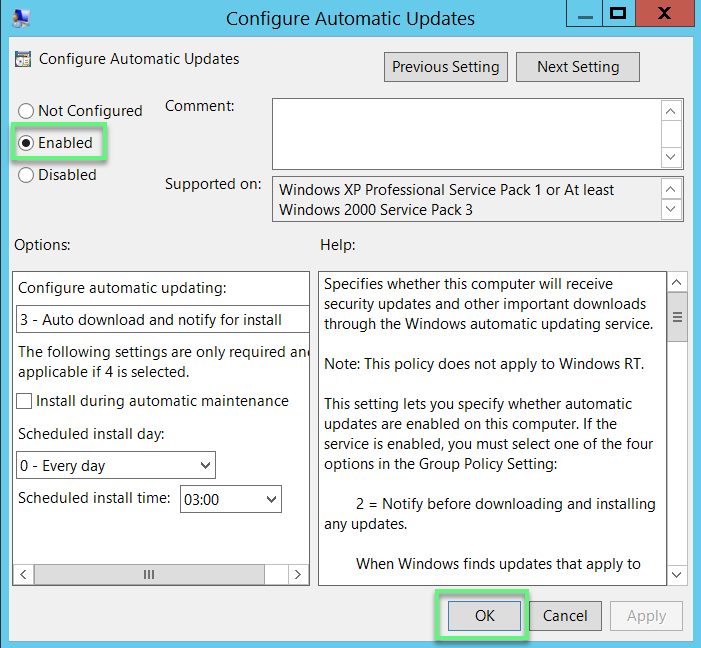
- Group Policy Management -> Create a policy -> Edit this policy -> Computer Configuration -> Policies -> Administrative Templates: Policy Definations (ADMX file retrieved from local machine) -> Windows Components -> Windows Update -> right mouse choose Edit in Configure Automatic Updates
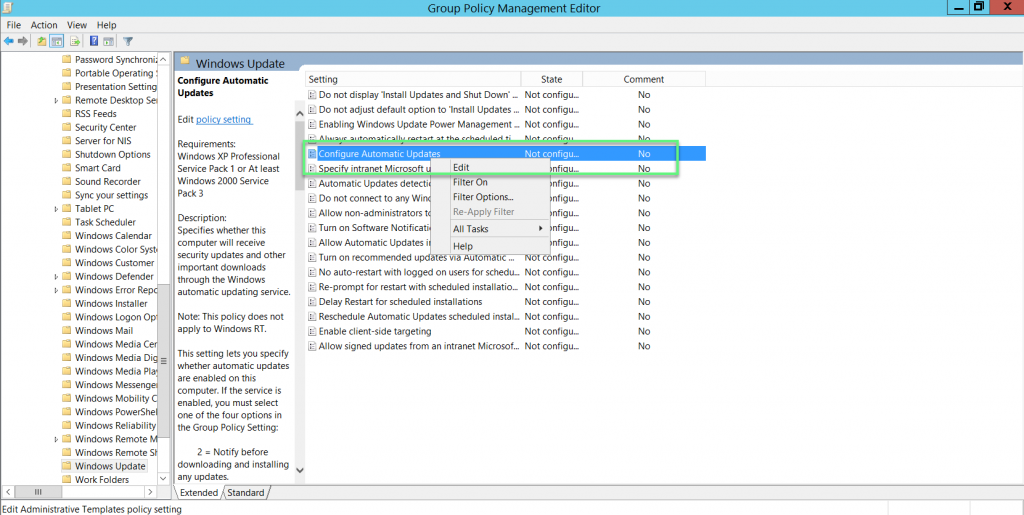
- Choose Enabled -> Click OK
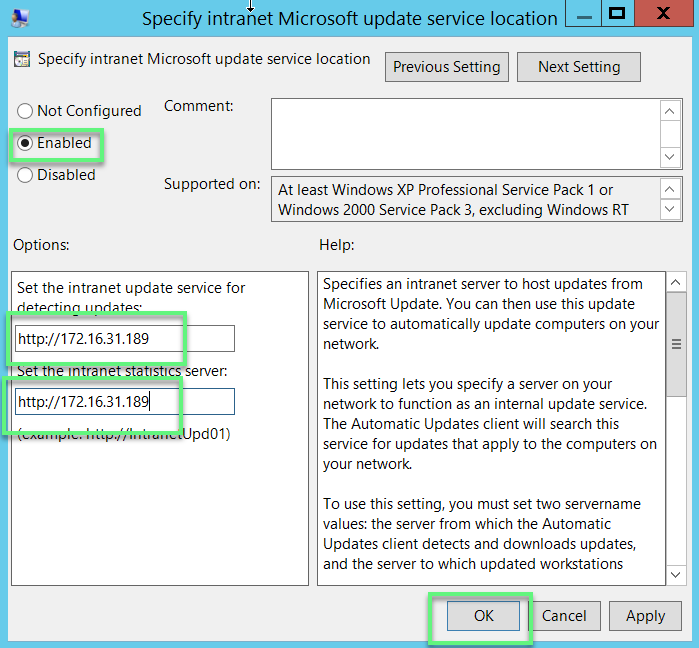
- Right mouse choose Edit in Specify internet Microsoft update service location
- Choose Enabled -> Enter WSUS Server’s IP -> Click OK
- Run -> Enter gpupdate /force to enforce policy immediately

** If you have difficulty in configuring Sophos products in Viet Nam, please contact us:
Hotline: 02862711677
Email: info@thegioifirewall.com
Leave a Reply