
Overview
- If you are working with shared data on the local network, you may find it troublesome to access files because you have to search for them in many shared folders. To simplify this, you can create a Network Drive on Windows. This method can also be called mapping network drives or Map Network Drive, Map of network drives.
- In this article, we will learn how to map the network drive on Windows 10 to the graphical interface and the Command line interface with PowerShell (CMD). Of course you will also know how to delete Network Drive when not in use.
What is Map Network Drive?
- Map Network Drive, also called network drive mapping, is creating a link to a shared folder (drive) in the local network.
- After a shared drive or folder is mapped, you can access those shared resources as if it is on your computer. Netwrok Drive may look like a local drive (eg drive C, D, E, ..) in FIle Explorer.
The function of Map Network Drive?
- Not too complicated, the simplest function of map network drive help you easy access to shared files and folders on the local network.
- A mapped Netwrok Drive will appear in Windows Explorer (FIle Explorer) as local drives in the computer. To access it, just double click to open it as usual.
How to create Network Dirve on Windows 10 graphical interface
- To create a network drive, first open File Explorer (This PC) on your computer. Click on Map network drive at the Computer tab.
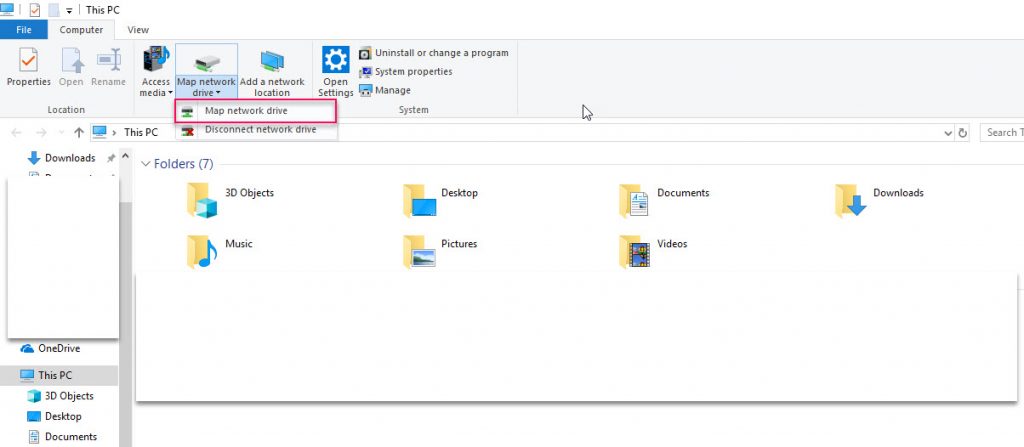
- The Map Network Drive installation window appears. At the Drive section, you select the character name for your network drive similar to the drive letter C, D,, .. on the computer.
- The Folder section selects Browse and waits for a bit to disk space, the shared folder in the local network will appear, you just need to choose which one you want to add shortcut => click Finish to Map.
- Or you can type the path to the shared folder in the LAN in the form of:
\\shared computer name or IP address of share computer\folder name is shared

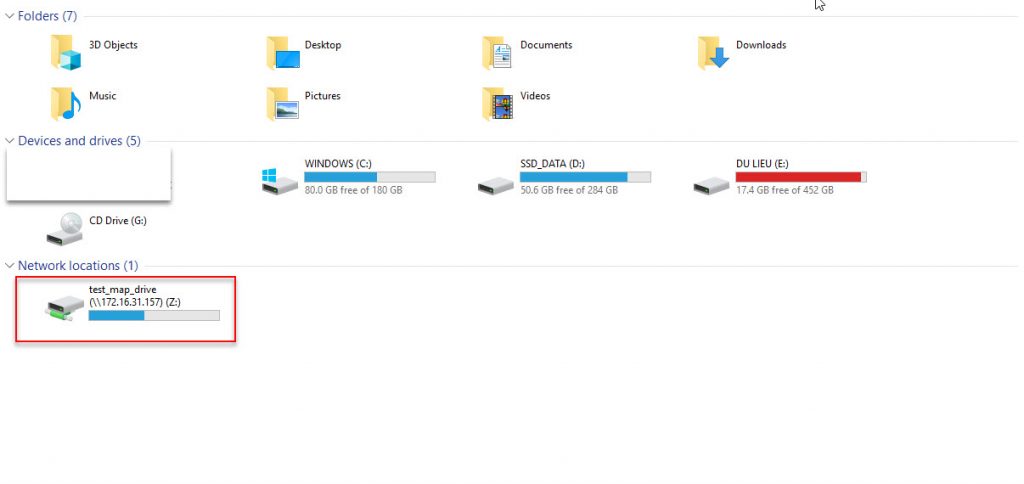
- Ok, now that you return to File Explorer, you will see a new drive appear. This is the network drive after Map succeeds. You can access the shared folder as a local drive on your computer.
Map NetWork Drive uses Windows Command Line
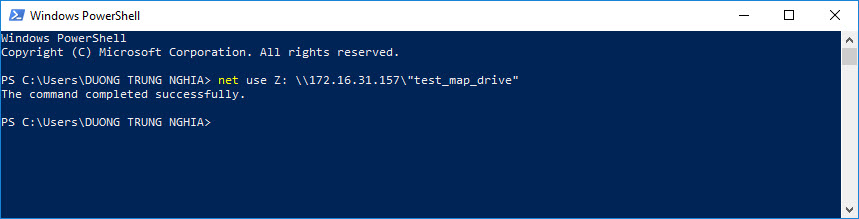
- To map the network drive using the Command line, you can use the “net use” command. This command works on both CMD and PowerShell.
- Open CMD or PowerShell, and use the following structure:
net use Z: \\Server\Folder
This syntax is similar to that in the above graphical interface. Inside:
- Z is the drive letter you want. Don’t forget you can use other characters just if it’s not used yet.
- Server: computer name sharing resources or IP address.
- Folder: folder name, shared drive.
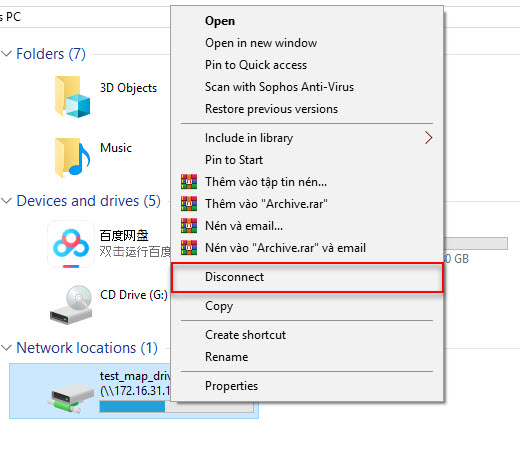
Delete Network Drive
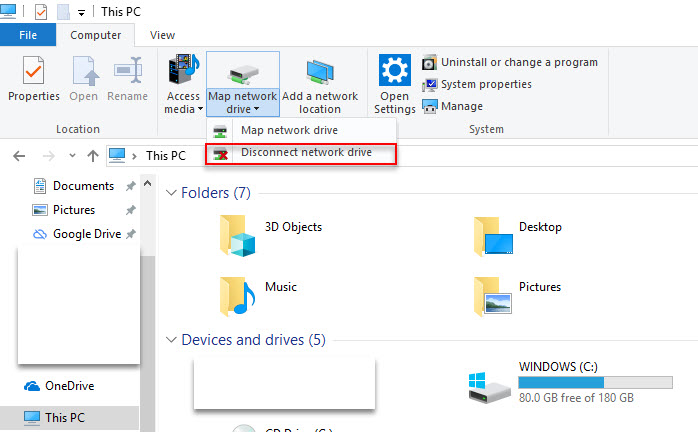
- Removing Network Drive or disconnecting a network drive is relatively simple. You can right-click the drive, the mapped folder and select Disconnect. Or select Map Network Drive and select Disconnect network drive to disconnect.
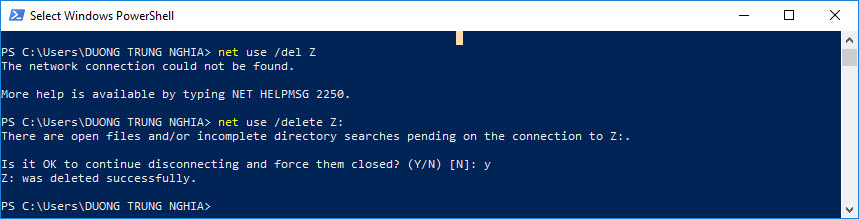
- On the command line interface, to disconnect each drive one by one, you can use the command:
net use Z: \delete
- With Z is the drive letter name you created.
- If the message is displayed, enter “Y” to agree.
- If you want to delete all Map network drives, use:
net use /del *
Leave a Reply