
Overview
- If you want to create a private cloud for sharing and converting large files without restrictions, you can create an FTP Server (File Transfer Protocol Server) on your Windows 10 computer.
1. Install FTP Server on Windows 10
Similar to previous versions, on Windows 10 also integrated the necessary elements to run FTP Server. Follow the steps below to install FTP Server on your Windows 10 computer:
- Open Control Panel and select Program > Program and Features.
- Click the Turn Windows features link on or off.

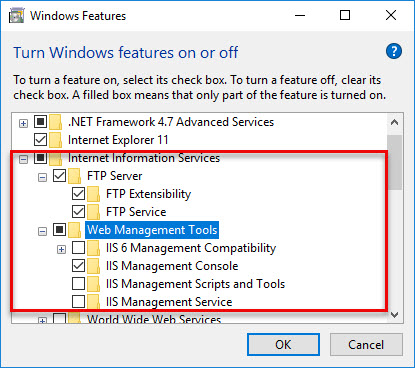
- Expand Internet Information Services and then check the FTP Server option.
- Expand FTP Server and then check the FTP Extensibility.
- Check Web Management Tools with the dafault option.
- Click OK to start install.
- Click Close.
2. Configure FTP site on Windows 10
After you have installed the necessary elements to run the FTP Server on your Windows 10 computer, proceed to create an FTP site:
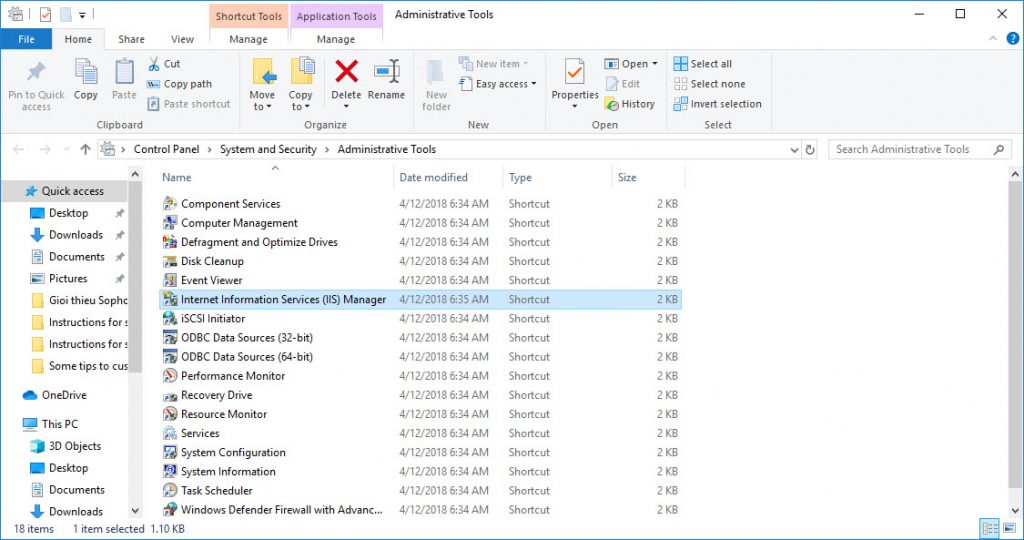
- Open Control Panel > System and Security and open Administrative Tools.
- Double-click on Internet Information Services (IIS) Manager.
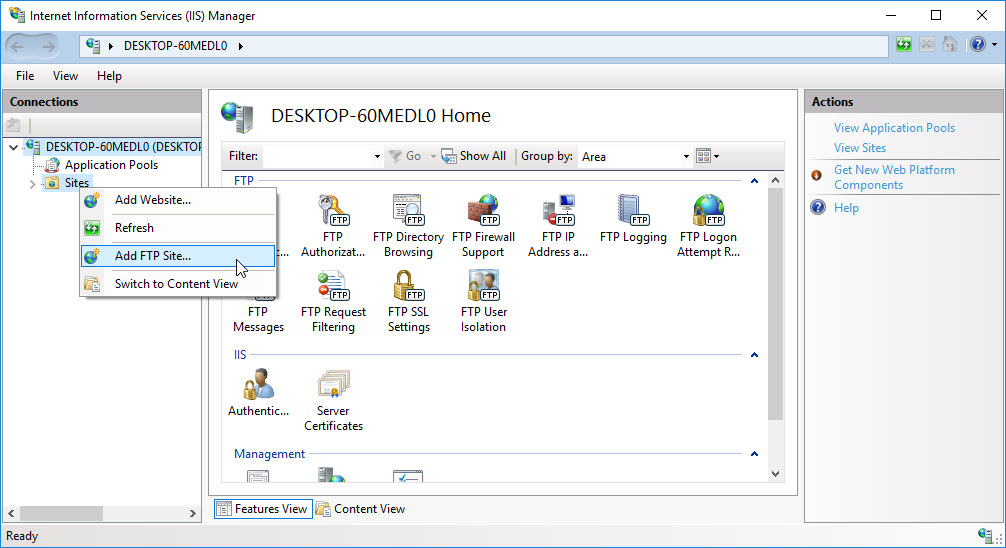
- Expand Connection table and right-click on Site.
- Select Add FTP Site.
- Name your new FTP site and enter the path to the FTP directory you want to use to send and receive files.
- Note: You can use the Make New Folder button to create a specific folder containing the FTP file.
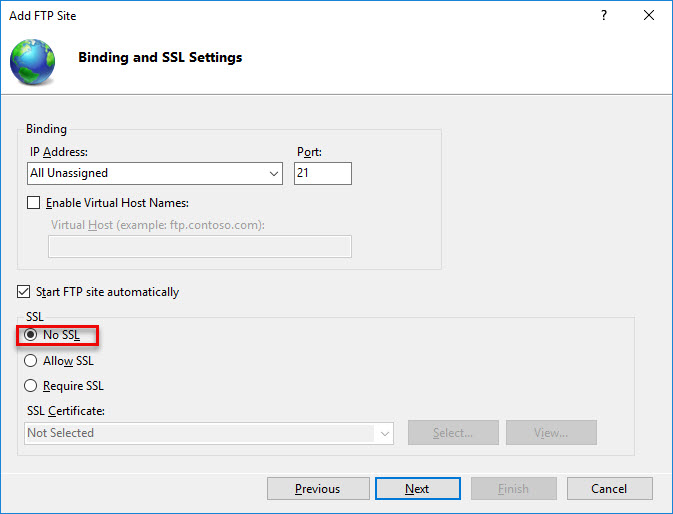
- Click Next.

- On the Binding and SSL Settings interface, remove all default settings, change the SSL option to No SSL.
- Click Next.
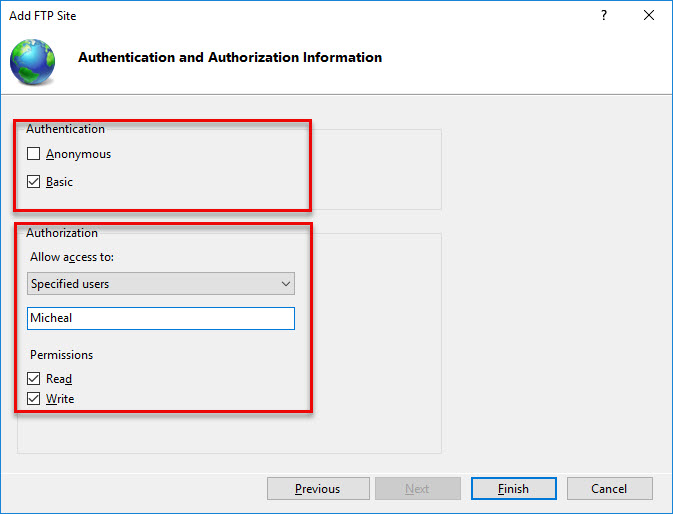
- At the Authentication section, select the Basic option.
- At the Authorization section select Specified users from the drop-down menu.
- Enter your Windows 10 account email address or Local account name to allow you to access the FTP Server.
- Select the Read and Write options.
- Click Finish.
3. How to allow FTP Server through Windows Firewall?
If the Windows Firewall is running on your computer, the Firewall will block any connection trying to access the FTP Server.
Follow the steps below to enable FTP Server through Firewall:
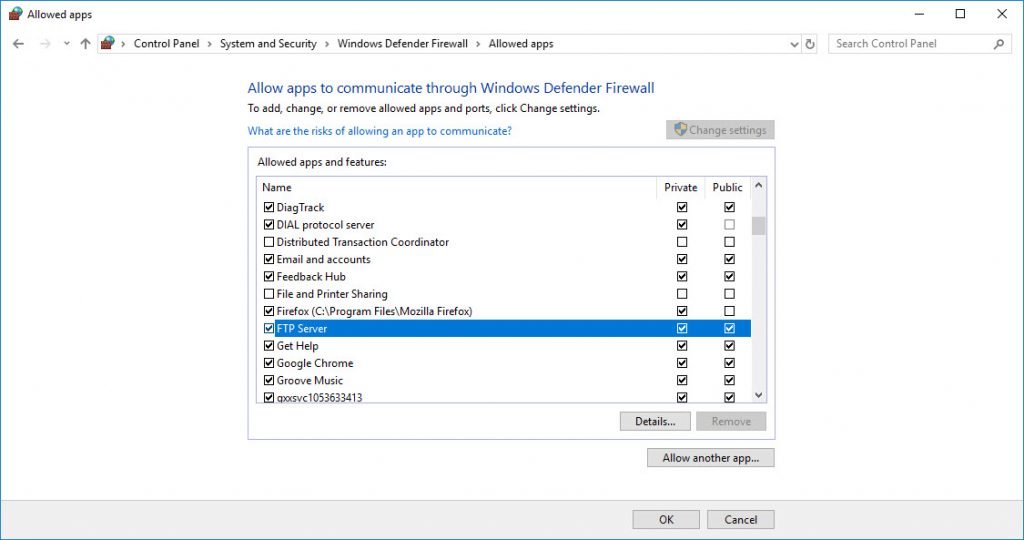
- Open Start Menu, then enter Windows Firewall into the Search box and press Enter.
- Click Allow an app or feature through Windows Firewall.
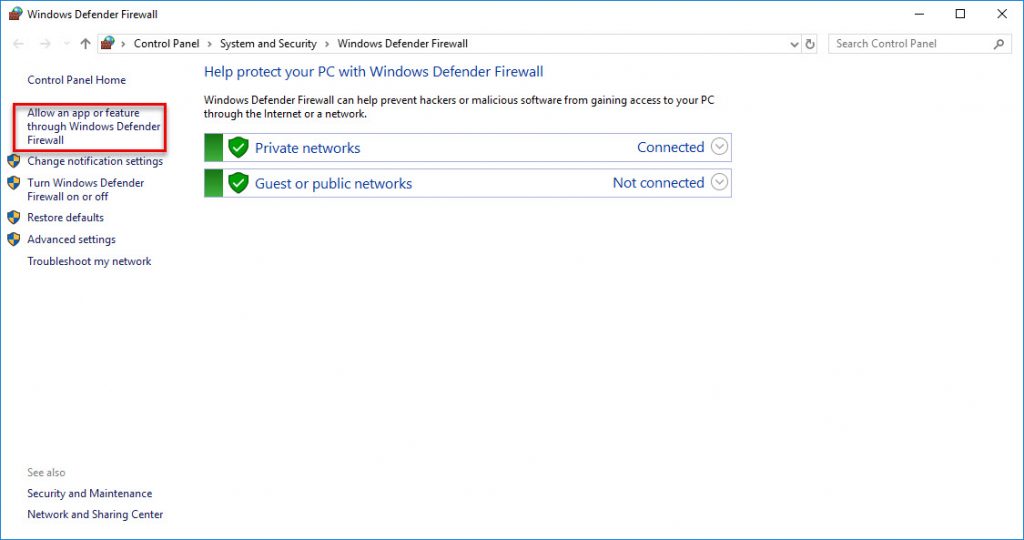
- Click Change Setting.
- Select FTP Server and check both Private and Public option.
- Click OK.
- From now on you can use the FTP client to connect to the FTP Server that you just created on the Local Network.
Leave a Reply