
Overview
- This article will show you how to create Send connector, Database Mailbox, User and Distributed Group to be able to send emails internally .
Diagram
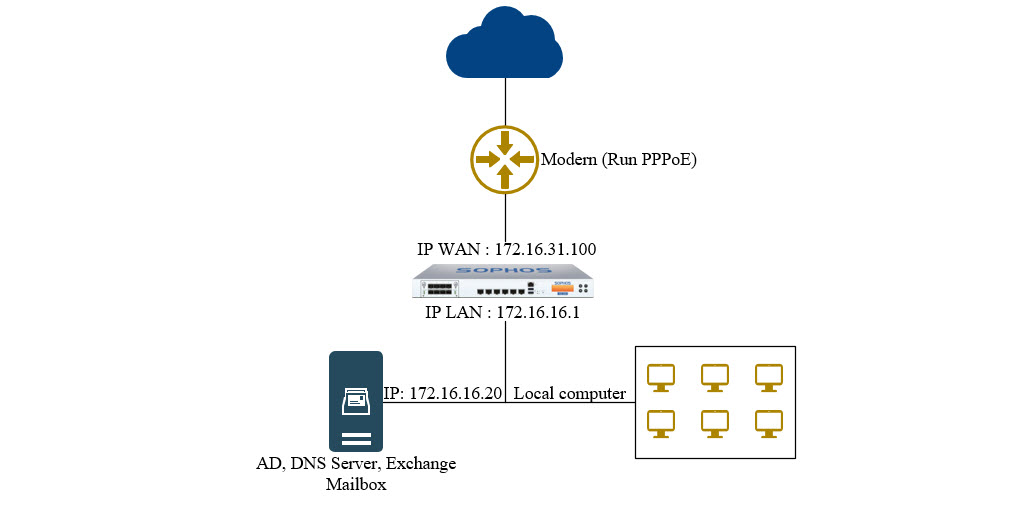
- In diagram, we have 1 modern run PPPoE, 1 Sophos XG Firewall with IP WAN 172.16.31.100/24, IP LAN 172.16.16.1/24, 1 Server with IP 172.16.16.20 and local computer.
- Server and local computer also in LAN area.
Configuring On MailServer
Create Send Connector
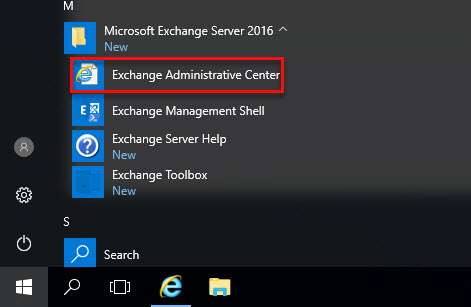
- To open Exchange Administrative Centrer, you can press Windows button > Microsoft Exchange Server 2016 Folder > Exchange Administrative Center or open other brwoser enter link https://localhost/ecp.
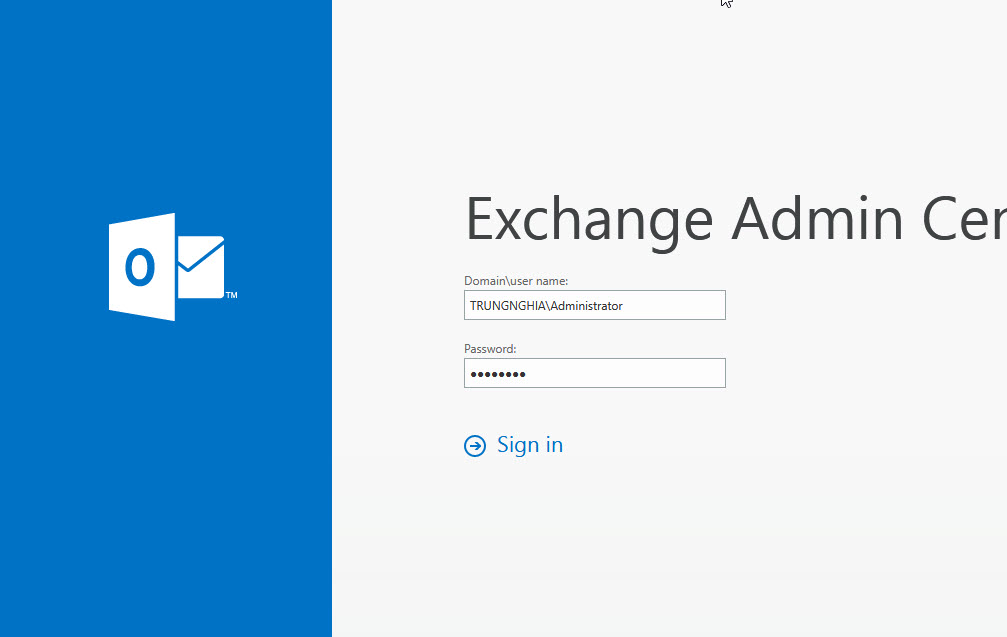
- The IE browser appear, click Continue to this website (Not recommend) to access Exchange Admin Center.
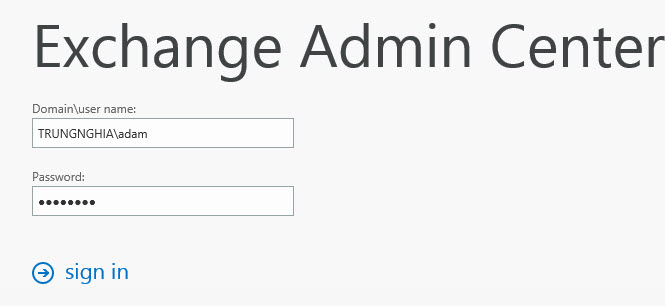
- Login by administrator account, in this example we login by TRUNGNGHIA\Administrator account.
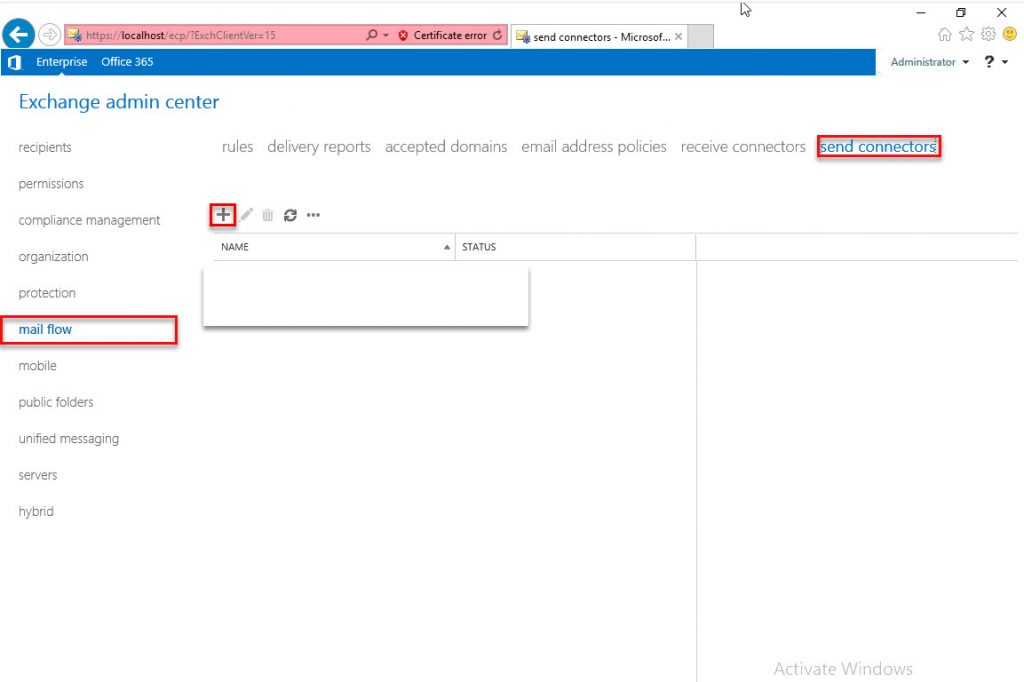
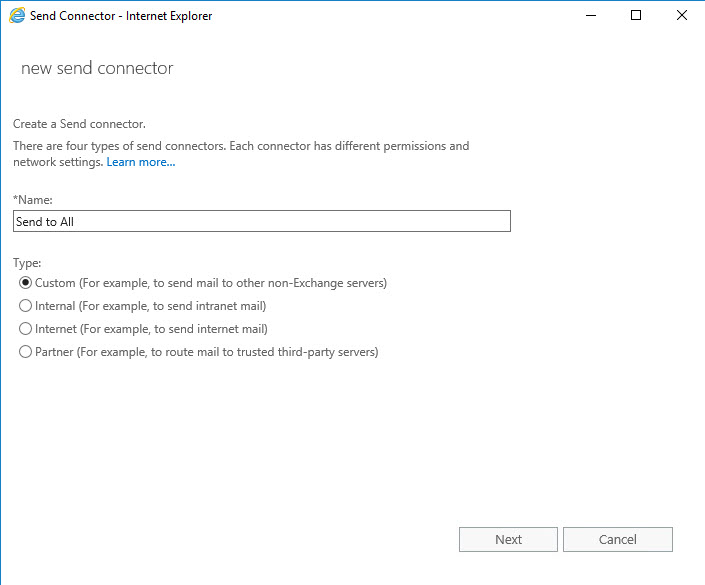
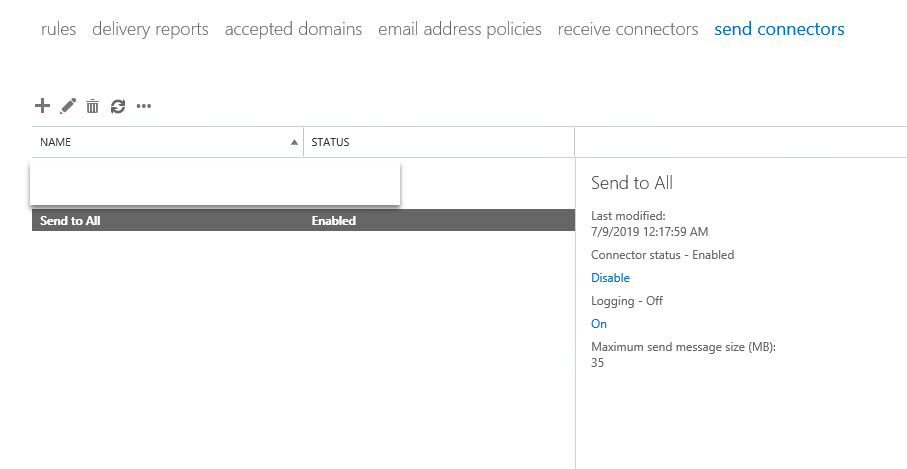
- Next to click mail flow > send connector > icon “+” to create Send Connector.
- Send Connect tab appear, enter Send to All in *Name box and select Custom (For example to send email to other non Exchange servers).
- Click Next.
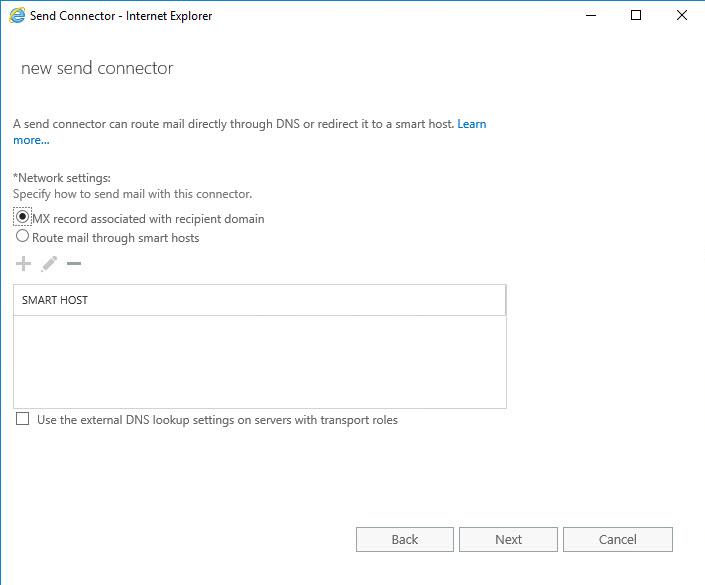
- Select MX record associated with recipient domain and click Next.
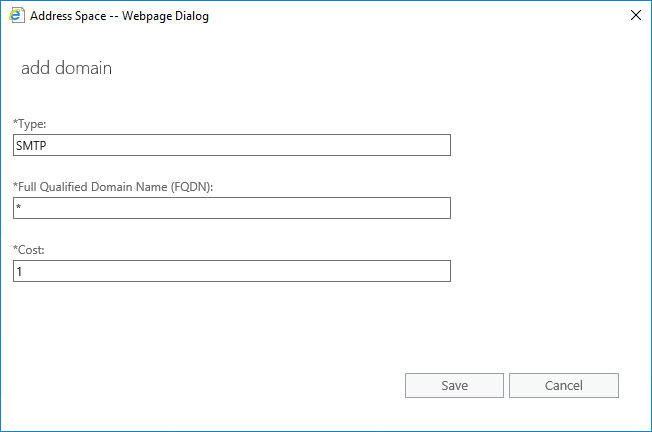
- Click icon “+” tab Address Space appear, fill the paremeter as shown below, click Save > Next.
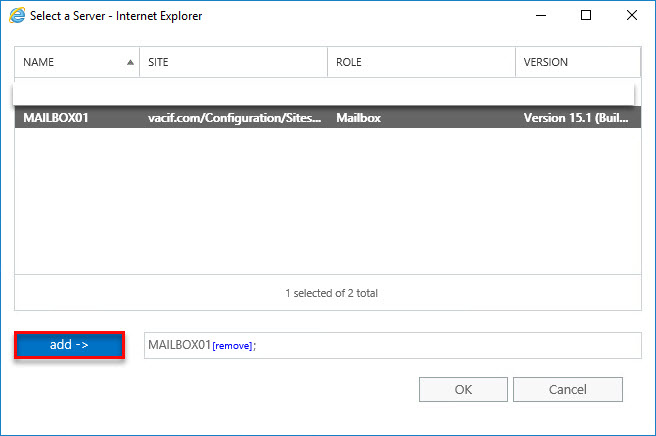
- Click icon “+” tab Select a Server appear, choose MAIL > add > OK and then click Finish.
- The Send Connector is created.
Edit Email Address Policy
- Please note in the Email Adress Policy section. By default the system will retrieve the domain name – your username is the email address, you can re-specify the company’s policy such as Email Adress is the name @domainname or you can use another domain name.
- Click mail flow > email address policies > choose Default Policy > click icon pencil to edit.
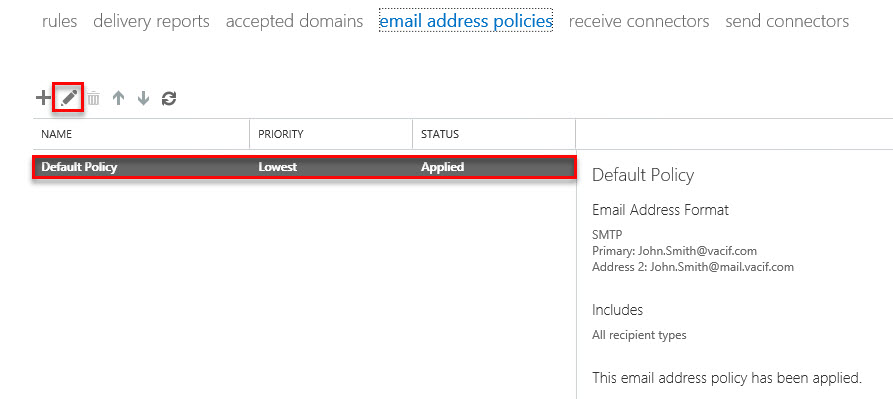
- Tab Email Address Policies appear, go to email address format > choose Address Format that you want > click icon pencil to Edit.
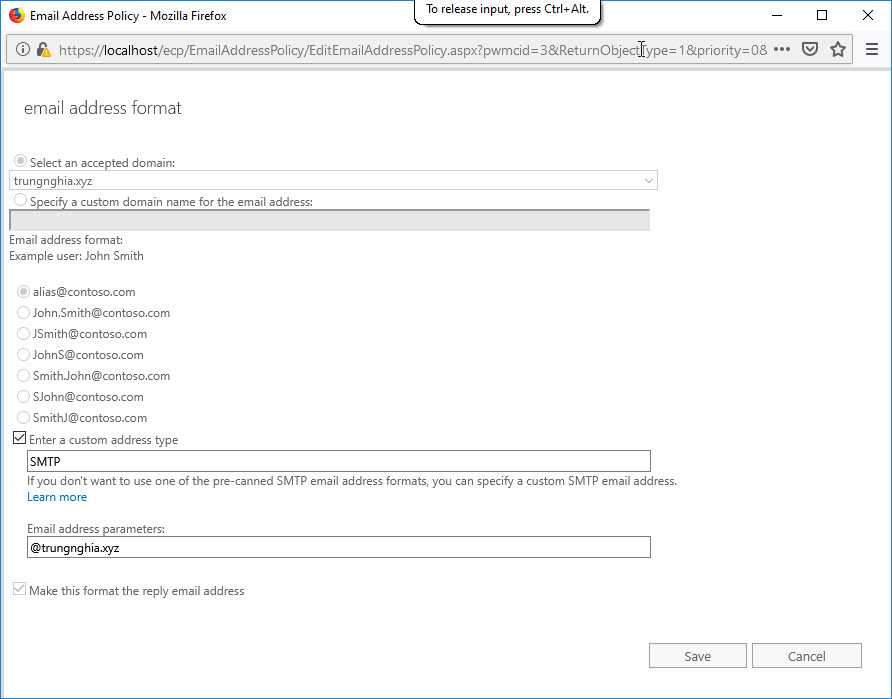
- We can choose email address format that we want or specific it in Enter a custom address type box.
- In addition, we can use another domain by clicking Specify a custom domain name for the email address and enter domain name in box.
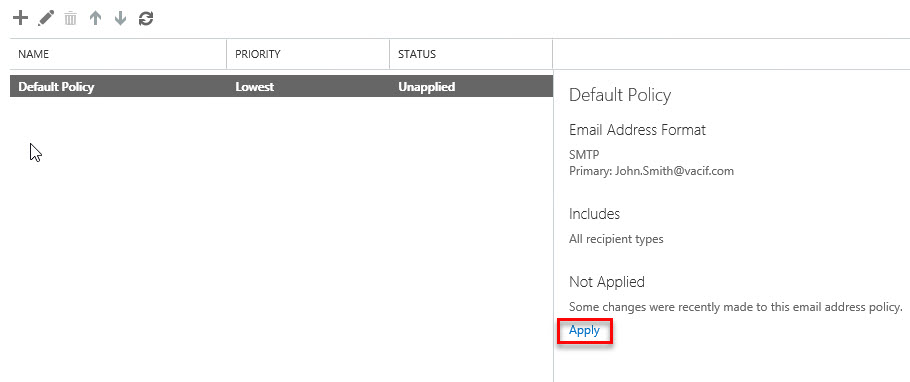
- Click Save twice and click Apply > Yes to Apply.
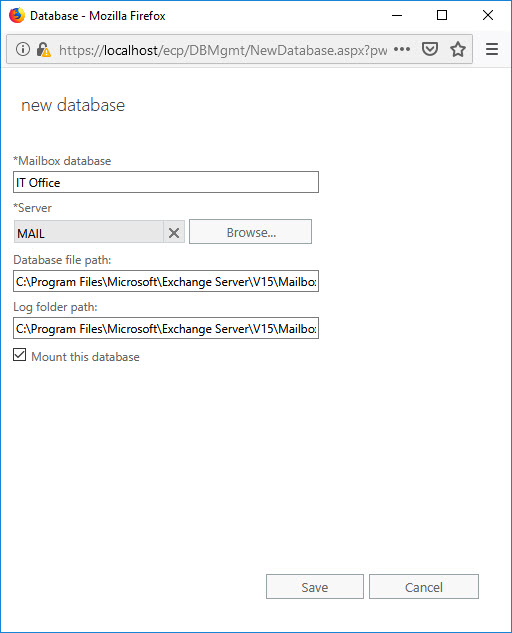
Create Database Mailbox
- By default the system will create a Mailbox Database with random names, we need to plan the user to Databse by name to facilitate later management, the following operations
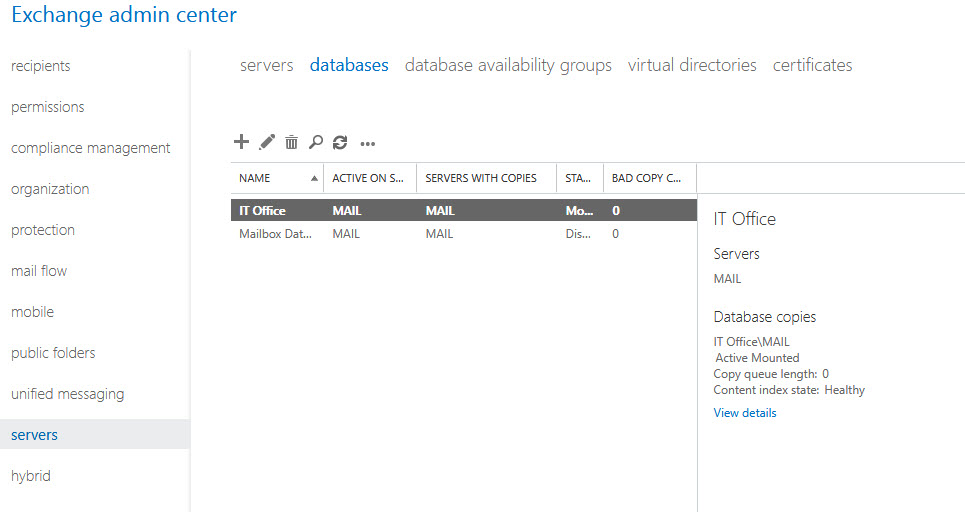
- Go to Server > Datebase > icon “+” to create new database.
- Tab Database appear, fill the paremeter as shown below.
- Because we don’t use default datebase so we don’t mount it as shown below.
- Choose Maibox Database > click icon “…” and choose Dismount.
- Choose Mailbox Database > click icon pencil.
- Mailbox Database windows appear, go to maintenance and check Don’t mount this database at startup and then click Save.
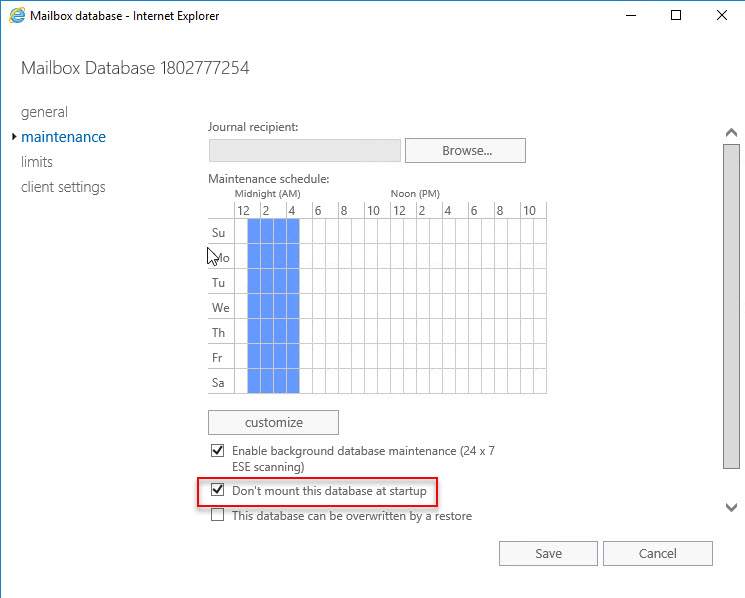
- Please note that the default Database installed should only be Dismount, if you want to delete it completely, you need some actions to avoid affecting the system.
Create User
- To create user go to Recipients > mailbox > click icon “+” > User mailbox.
- Tab User Mailbox appear, enter Alias.
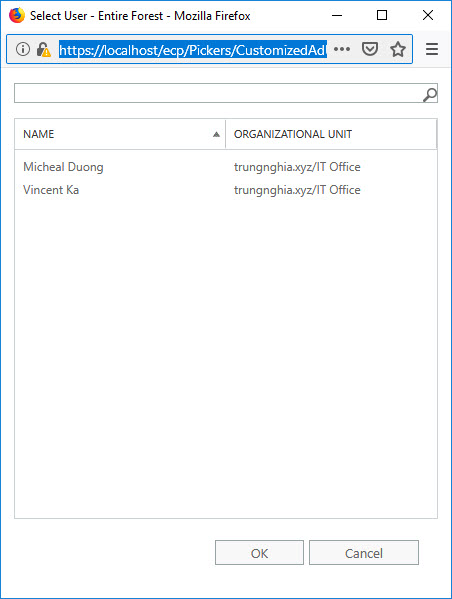
- If we want to create user mailbox from user domain, we click Existing user > Browse and select user that you want.
- If we want to create new user, we click new user and fill the nesscesary paremeters.
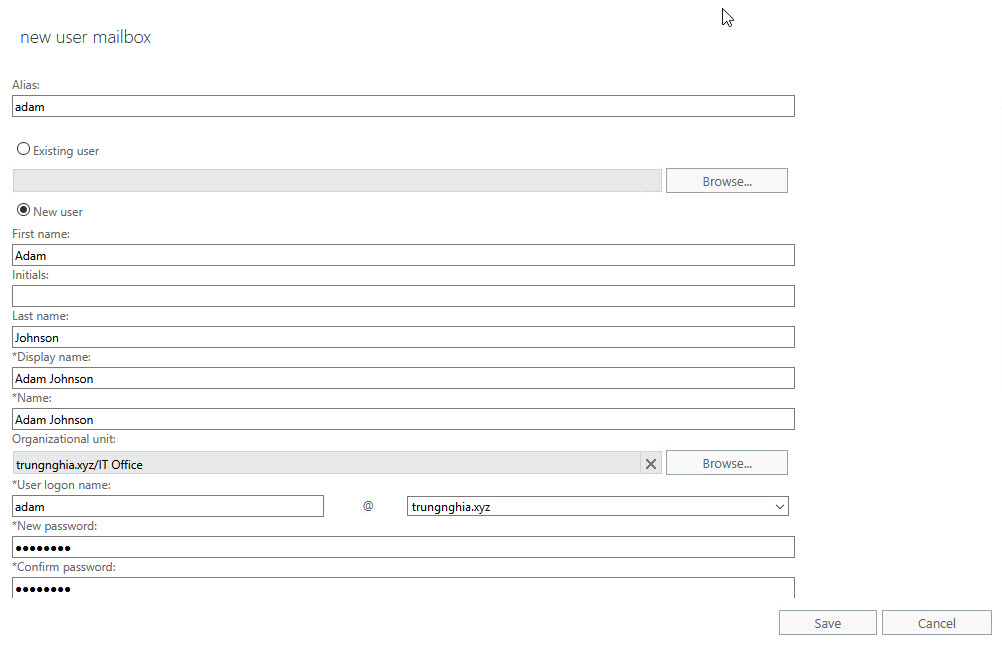
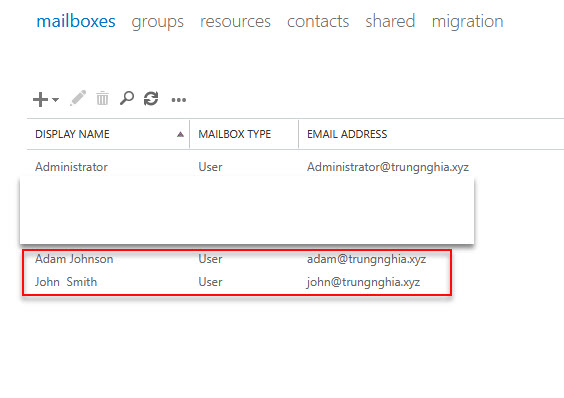
- In this example, we created 2 new users is Adam Johnson (adam@trungnghia.xyz) and John Smith (john@vacif.com).
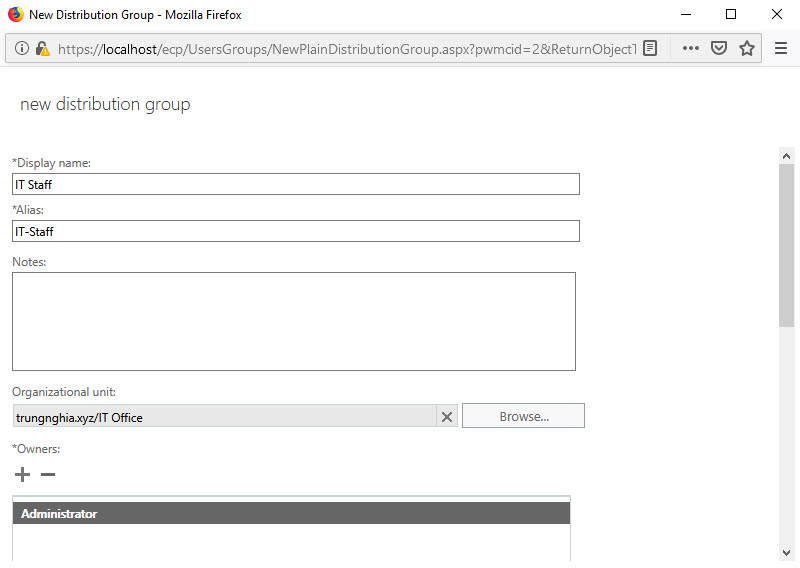
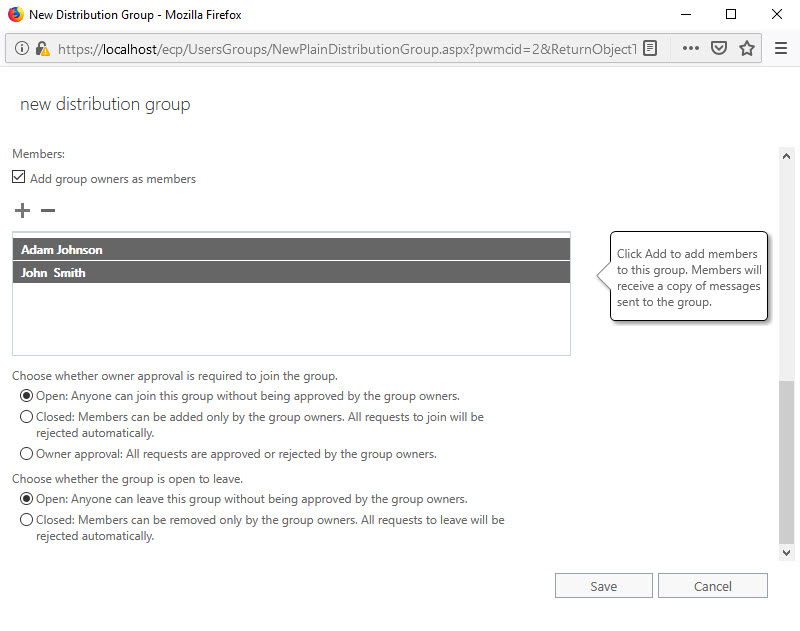
Create Distributed Group
- We create distributed group to contain all user.
- To do this we go to Recipient > Group > click icon “+” > Distribution Group.
- Tab New Distributed Group appear, fill in nesscesary parameters as shown below.
Send email to check
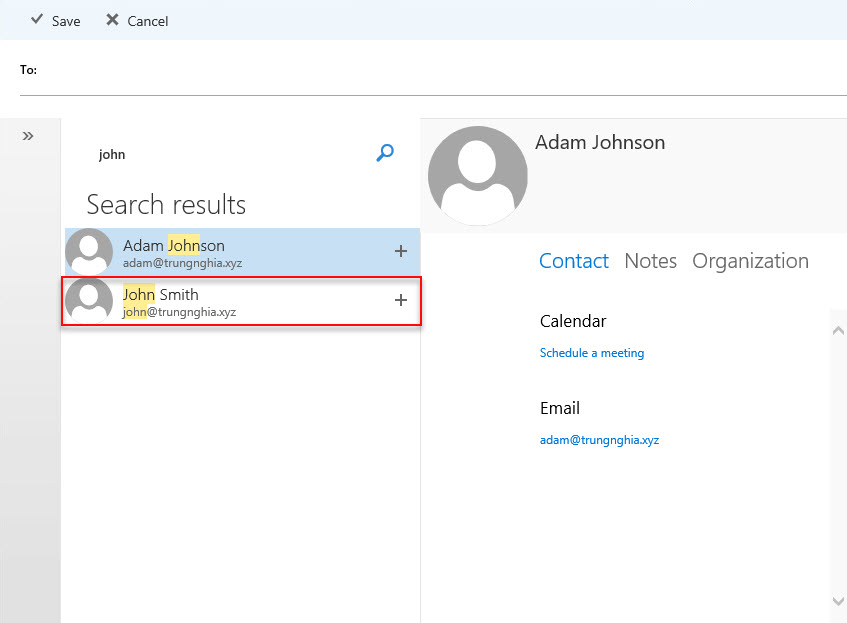
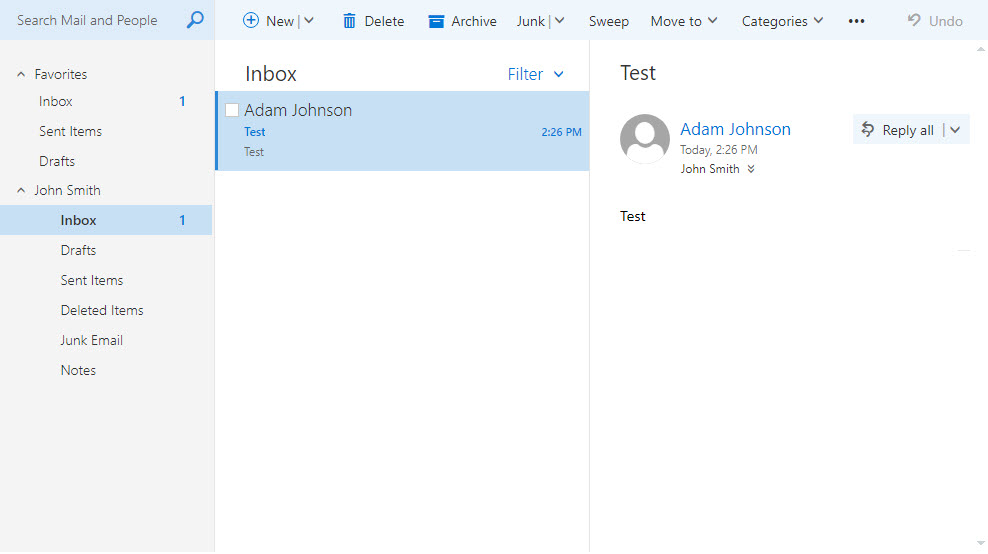
- We log into 2 newly created email accounts to check.
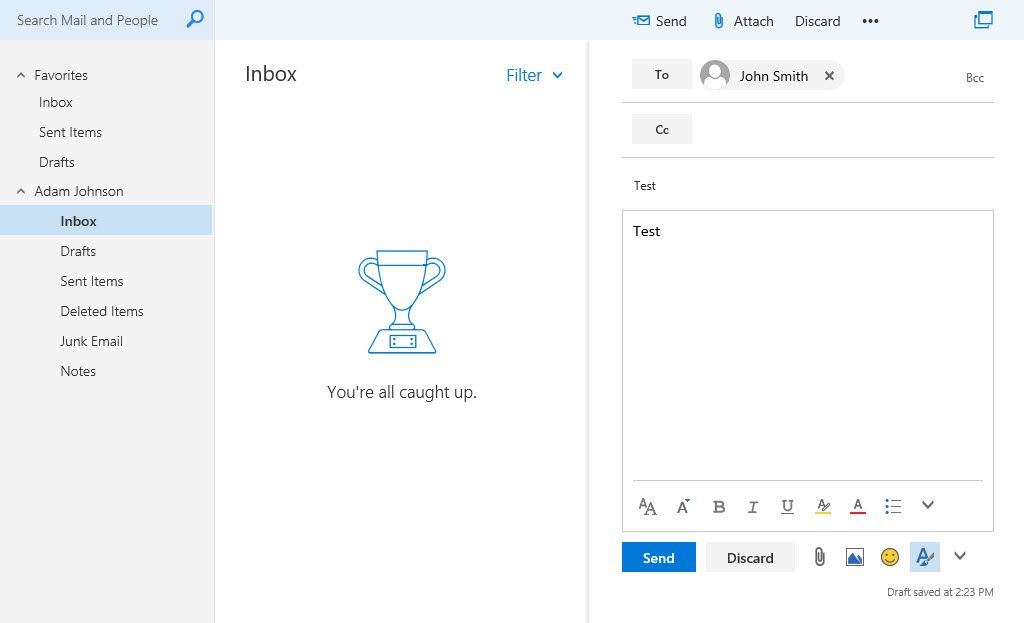
- Login on adam user and send email to john.
- Create new email by click New, click To and enter John, choose it and click Save.
- Enter in Subject and content , then click Send.
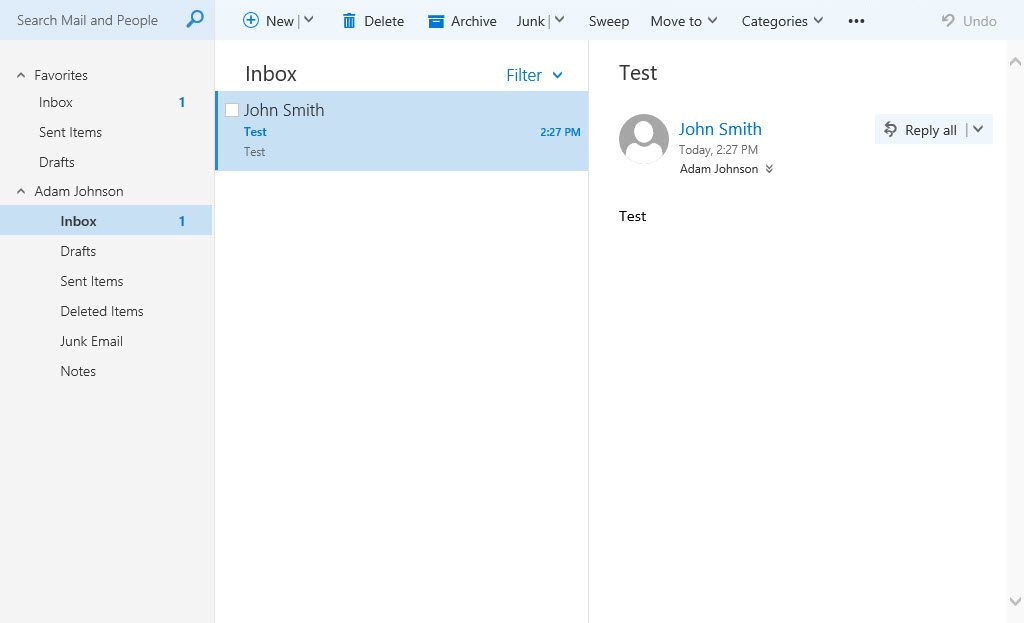
- Do the same with your existing account.
- Go to Inbox of 2 account and check email.
So through this article i showed you how to create send connector, create database, create user mailbox, distribute group and send email in local.
I hope this article can help you, thank for watching !
Leave a Reply