
Overview
- In the previous article, i showed you how to public MailServer out of internet.
- In this article, i show you how to configure Outlook everywhere on Exchange Server 2016 to you can login user mailbox by Outlook application in local.
Diagram
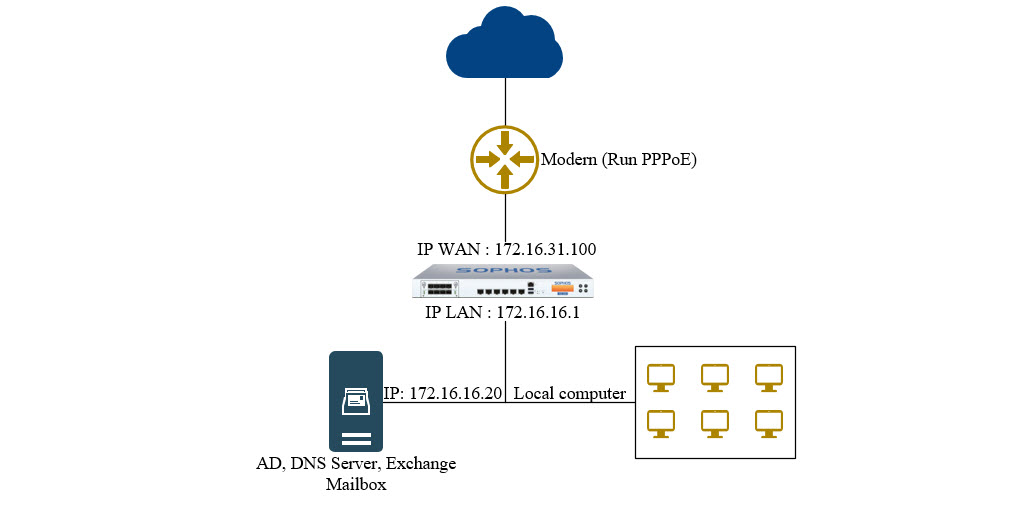
- In diagram, we have 1 modern run PPPoE, 1 Sophos XG Firewall with IP WAN 172.16.31.100/24, IP LAN 172.16.16.1/24, 1 Server with IP 172.16.16.20 and local computer.
- Server and local computer also in LAN area.
Configure Outlook Everywhere for local computer
- First, we will login on Exchange Admin Center by Administartor account.
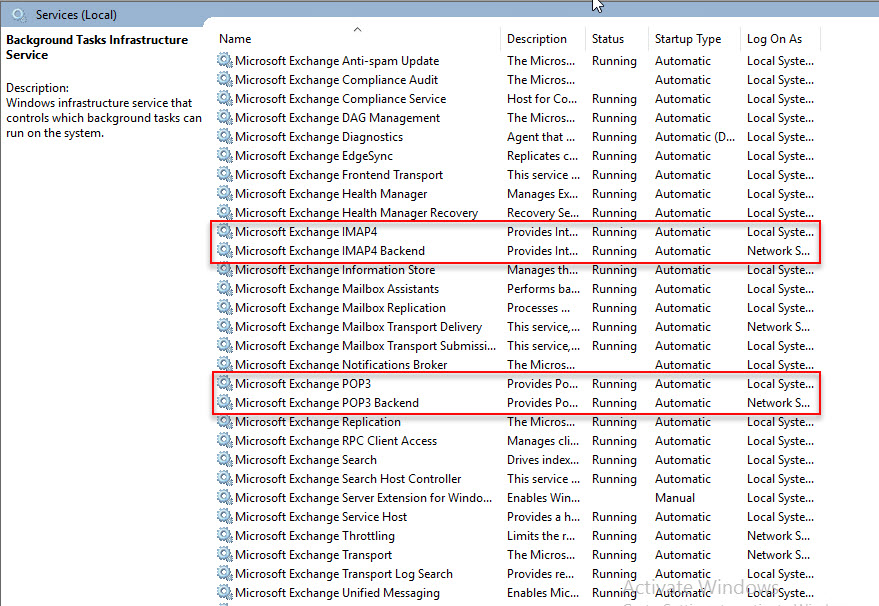
- Next to press Alt + R, type services.msc and then press Enter.
- Services windows appear, we need to ensure that IMAP4 and POP3 services are turned on.
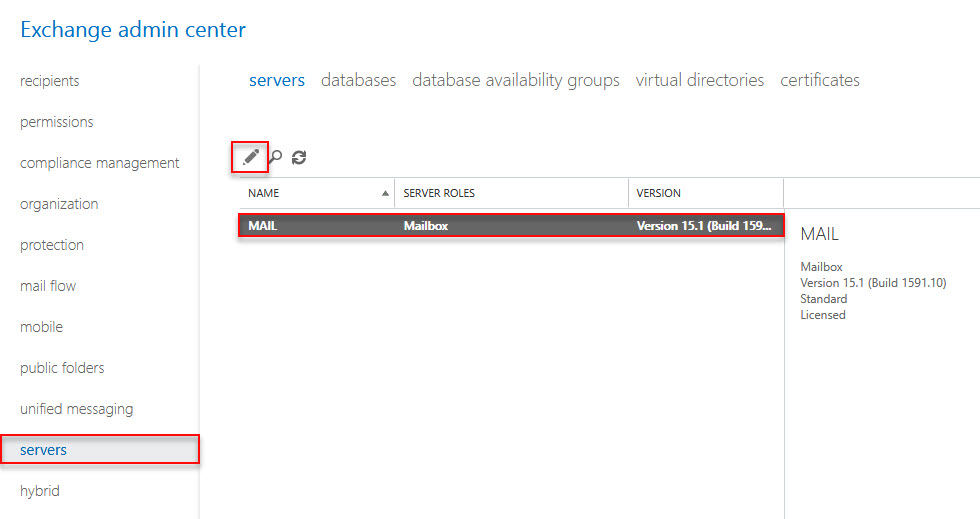
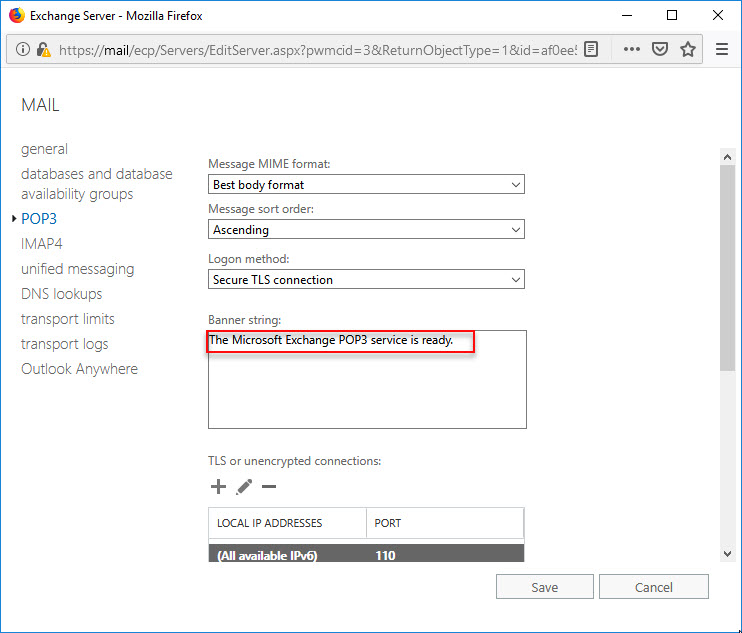
- To check if IMAP 4 already works on Exchange, go to the Servers > edit Mail server we need to check.
- We will go down to the menu “IMAP4” that can see the status of IMAP4 service ready after we start service IMAP4 above.
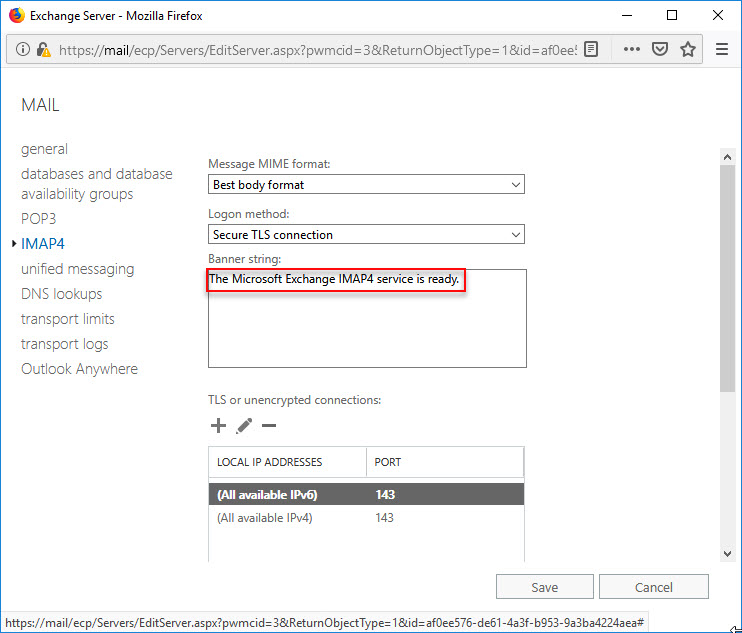
- Do the same with POP3 Service.
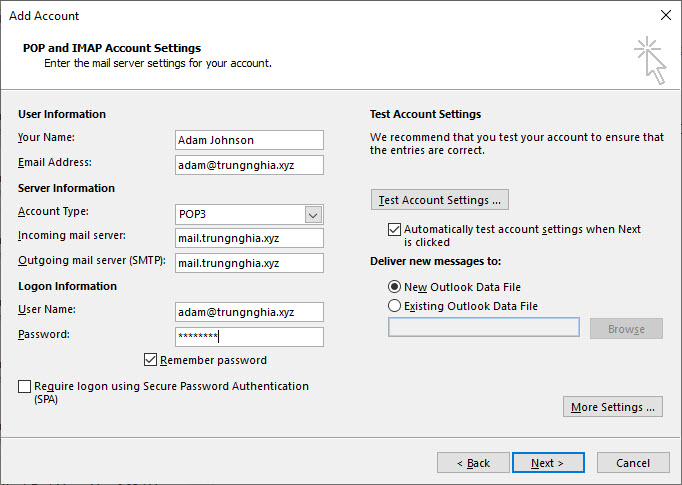
- Next to open Outlook on local computer > Click File > Add Account > select Manual setup or additional server types > Next > select POP or IMAP > Next.
- Add Account (POP or IMAP Account Setting) will appear, in here we login by Adam account that we created in previous article.
- Next to click More Settings and install as follow.
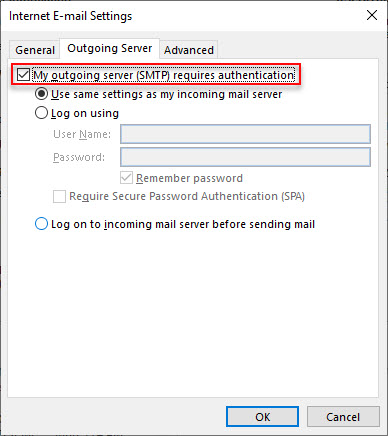
- In Outgoing Server tab, check My outgoing server (SMTP) requires authentication.
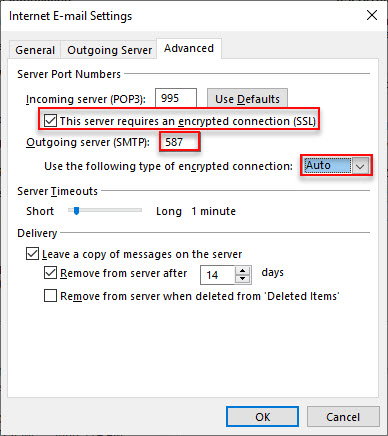
- In Advanced tab, in Incoming Server check This server requires an encrypted connection (SSL).
- In Outgoing server (SMTP): change 25 into 587, in Use the following type of encrypted connection select Auto from drop-down list.
- Click OK to finish.
- Back to Add Account windows, click Next.
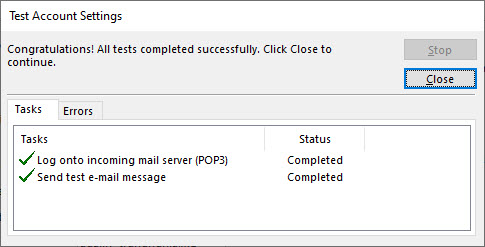
- Test Account Settings windows will appear, notice that the connection to the server and the test email was successful.
- Click Close and Finish.
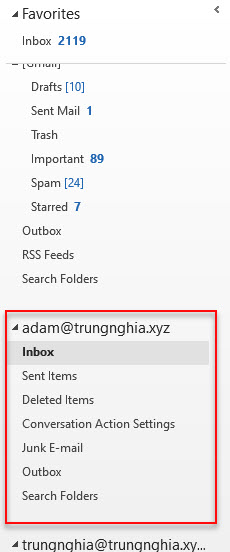
- So we completely login user Adam Johnson by Outlook on local computer.
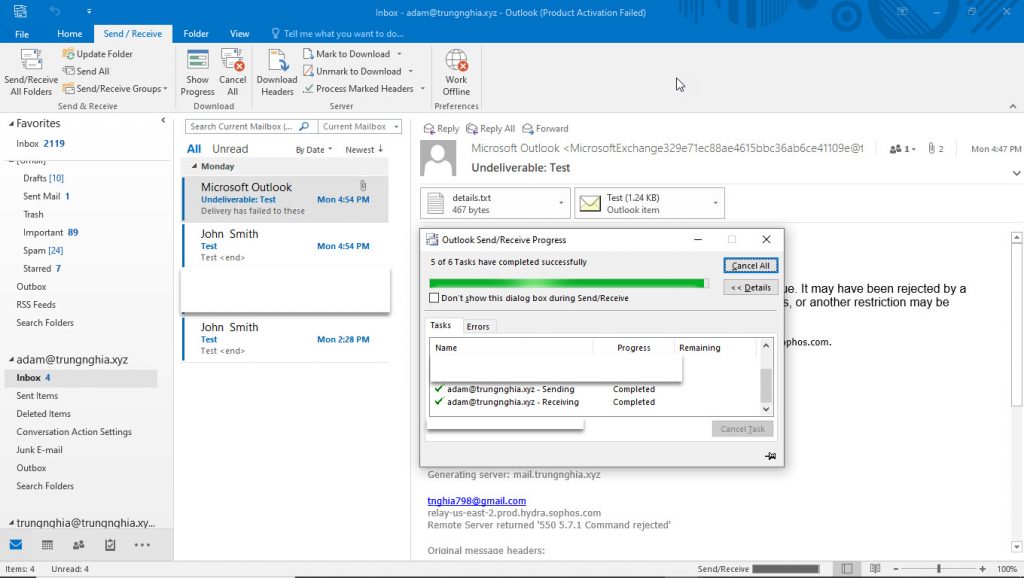
- Finally, to sync all of email, click Send/ Receive > Send/ Receive All Folders, wait a few minutes all of email will be synced to Outlook.
Leave a Reply