
Overview
- This article will guide how to use Microsoft Staffhub.
What’s Microsoft Staffhub ?
Microsoft StaffHub is a cloud-based platform designed for employees and provides the capabilities they need to function effectively and operate at the highest level. This service combines planning, task management, documents, people and tools in a safe place.
For example, baristas, hair stylists, waiters, bus drivers, etc. StaffHub helps you create and manage shifts, share files and exchange important information with team members. It is available for Office 365 for business users and comes with a web manager app and a mobile app for employees. Mobile application that supports both iOS and Android.
Microsoft StaffHub is specially designed for Firstline Worker:
- Manage and update schedules and shifts.
- Assign and track tasks and activities.
- Communication between team members.
- Share important human resources.
- Distributing company news and announcements.
How to use ?
This guide is designed to help you get the most out of Microsoft StaffHub. As a manager, you play an important role in leading your team, managing your work day, and helping people do their best work.
Get started with Microsoft StaffHub
Log into StaffHub at https://staffhub.office.com/ with your Office 365 work account, such as rob@contoso.com.
The first time you log in, the setup wizard will begin. If you have already created a group and want to create a new team, click on your profile at the top right of the screen, “Switch Team” in the drop down menu and “New Team” at the top right of the screen.
Follow the steps in the wizard to create groups and then add members to the schedule.
- Select Add Member on the schedule page.
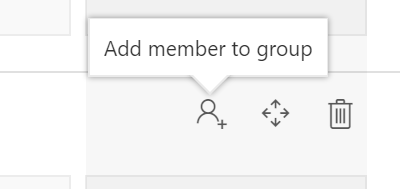
- Enter the employee’s name and phone number > Add.
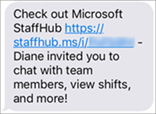
Now you can make changes for them and send invitations to each employee so they can download the Microsoft StaffHub mobile app and view their schedules.
Make sure employees have their Office 365 work accounts and passwords so they can log into the app. If you allow StaffHub to provide accounts themselves, employees can create an account directly in the app.
Add groups to the schedule or name them
When you use Microsoft StaffHub for the first time, a default group is created for you and all employees are assigned to it. This group is not named but you can add a name if you want. Named groups help organize your team members by role or scheduled department. For example, a hotel might have the following groups: “Front desk”, “Room service” and “Parking service”.
- To name the default group: Select the line that says “Enter Group Name”. Go ahead, enter a name for the group.
- To add groups: Select Schedule> Add group.
- Enter the name of the group and add team members.
- Select Add Member and enter the name and phone number of each employee you want to add to the group.
Manage employee schedules in Microsoft StaffHub
All changes are made unpublished and the schedule will not be visible to employees until you publish. When you publish your schedule for the first time, you specify the default calendar period. This is a suitable schedule period. For example, is this week’s schedule different from next week and can employees expect to have the same weekly schedule? You can change this default calendar period at any time on the Team Settings page.
- Select Schedule to open the Schedule page.
- Select the name of the employee you want to schedule > More button on Microsoft StaffHub scheduling page > Add shift.
- Choose a start and end date and time.
- Optionally, you can assign color or add notes to the shift.
- Select Save.
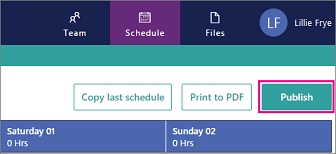
To publish your schedule, select Publish. This will publish the schedule for all employees and send them invitations to view the schedule in mobile apps.
Once your schedule is published, you can make changes and the affected staff will be notified of the changes.
Edit and publish schedules
To create your schedule, after adding team members, assign shifts to members.
Click Share with team to make the schedule available to each team member via the mobile app or right-click on a shift and click “Share” to make a separate shift available for current team members.

The schedule will look like this in the application:
Request and approve vacation time in Microsoft StaffHub
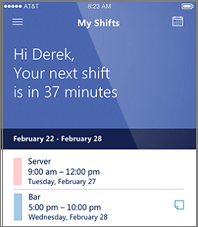
Employees use the Microsoft StaffHub mobile app to request time off. The manager approves or rejects these requests through the Microsoft StaffHub web or mobile application. Once approved, the time off will be automatically locked on the schedule. Managers can also manually block time.
Request time off (staff)
- Open the Microsoft StaffHub mobile app.
- Select the Requests tab.
- Click + > Request time off.
- Select a reason for vacation time (such as holidays or sick days).
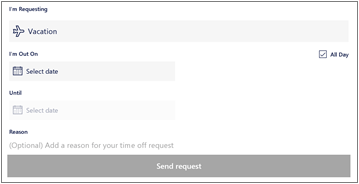
- Enter the date (s) you will turn off and any optional notes.
- Click Send Request.
- On the confirmation page, see the process of the request and whether it was approved or denied by your manager. When your manager approves or rejects the request, the page will update automatically and the shutdown time will show up in the schedule.
Assign break time (manager)
- Select Schedule to open the Schedule page.
- Select the change you want to edit > More button on Microsoft StaffHub scheduling (Image No.9) > Add time off.

- Select the start date and end date.
- Choose a reason for the break. (You can customize the reasons on the Group Settings page).
- Optionally, you can assign colors or add notes to the time that has been turned off. Select Save and the schedule will be updated.
Mobile app approach (manager)
- Open the Microsoft StaffHub app on mobile devices > Requests.
- Click on off time.
- Click Approve or Deny to reply to the request.
- Send an optional message with the answer.
Approve or Deny time to turn off the web application (manager)
- Log in to Microsoft StaffHub.
- On the Schedule page, select any time-off requests. Requests are indicated by a yellow box.
- Enter the optional message and then select Approve or Decline.
- Once approved, the time will automatically be added to the schedule.
Share files in StaffHub
With StaffHub, it’s easy to share files and link with your employees. In the past you have printed documents and placed them on a bulletin board. Now you can upload those documents to StaffHub so they are immediately available to your employees right at your fingertips!
- Select the Files tab > Add a file.
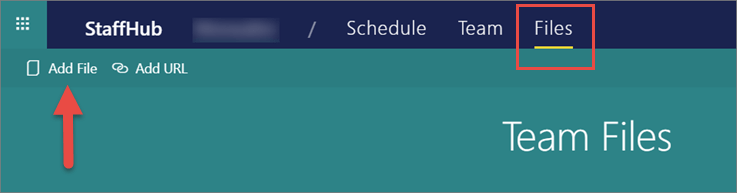
- You can then update the file’s title and add comments to your group. Select Add.
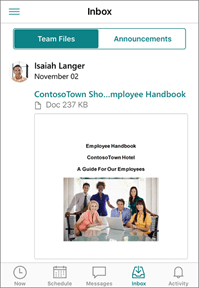
Your staff will see you in the Inbox tab of the Mobile StaffHub app, as shown in the image below:
- To share the link with your group, in StaffHub, select the Files tab> Add URL.
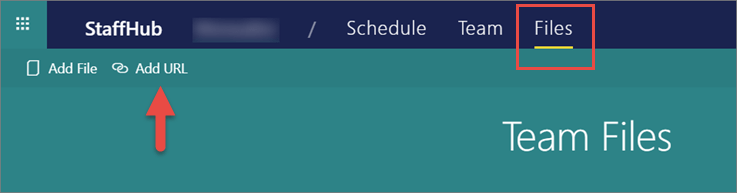
- Enter the URL of the site you want to share. You can also add descriptions and comments. Choose to share the link with your group.
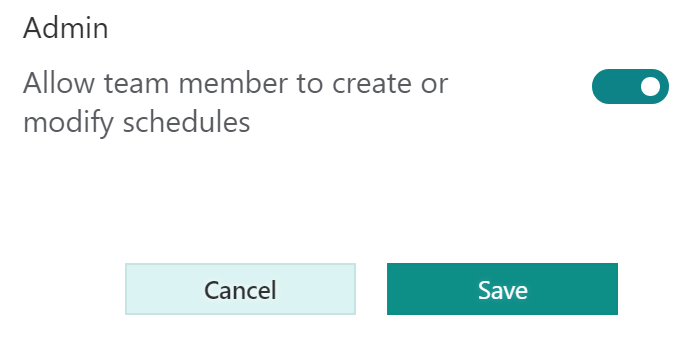
Grant administrator rights (managers) to a group
- Select Team in the top navigation menu.

- Select the group member you want to promote and in the dashboard, turn on Admin. Continue, select Save.
Leave a Reply