
Overview
How to configure
- Login to Sophos XG by Admin account
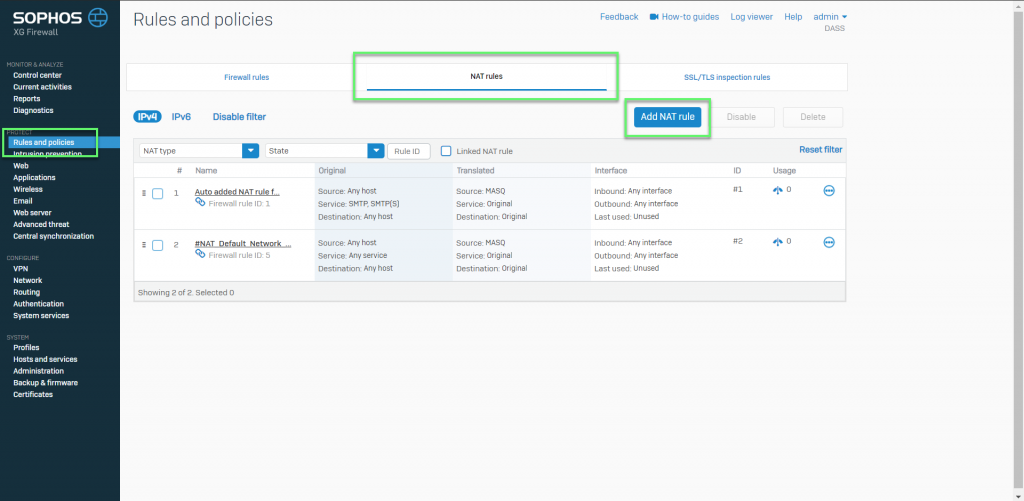
- Rules and policies -> choose tab NAT rules -> Select Add NAT rule
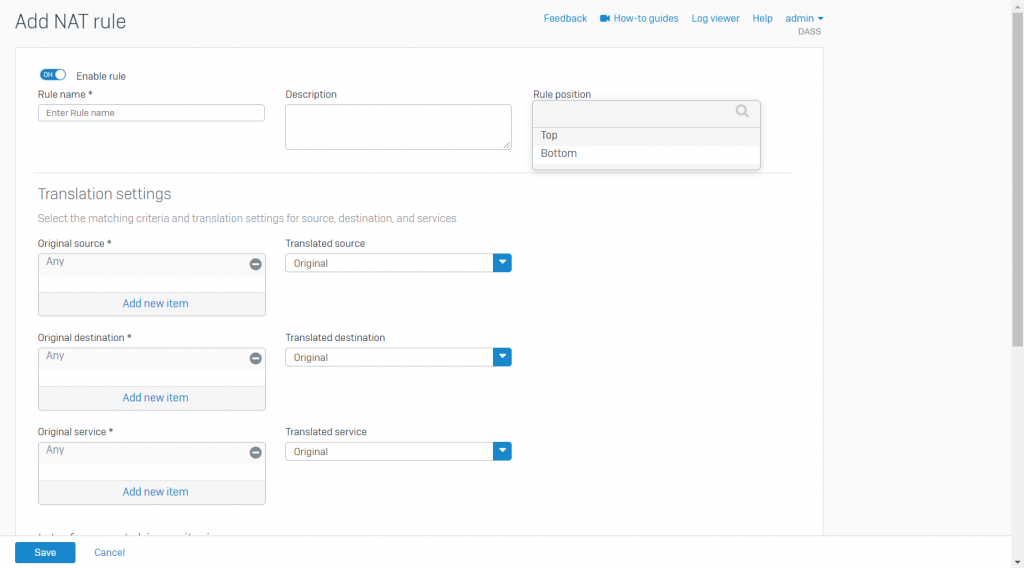
- Enter Rule name
- In position, choose Top
- In Original source: Specify the pre-NAT source objects of outgoing traffic. To create an inbound NAT rule when the inbound IP address is unknown -> Select Any
- Translated source: IP addresses of the original source objects are translated to the IP addresses that you specify
- To masquerade traffic: Select MASQ
- To create an inbound NAT rule: Select Original
- Original destination: Specify the pre-NAT destination objects of incoming traffic
- To create an outbound NAT rule: Select Original
- Translate destination: IP addresses of the destination objects are translate to the IP addresses or FQDN that you specify
- To create an outbound NAT rule: Select Original
- Original service: Specify the pre-NAT services. Service are a combination of protocols and ports
- To create an outbound NAT rule, this is generally set to Any
- Translated service: Original services are translated to the services that you specify
- If you’ve specified more than one original service or set it to Any, set the translated service to Original
- The translated protocol must match the original protocol. You can translate original service ports to a single or equal number of translated service ports
- You can use this to port forward traffic to internal servers, for example, specify TCP port 443 to forward incoming HTTPS traffic to an internal web server
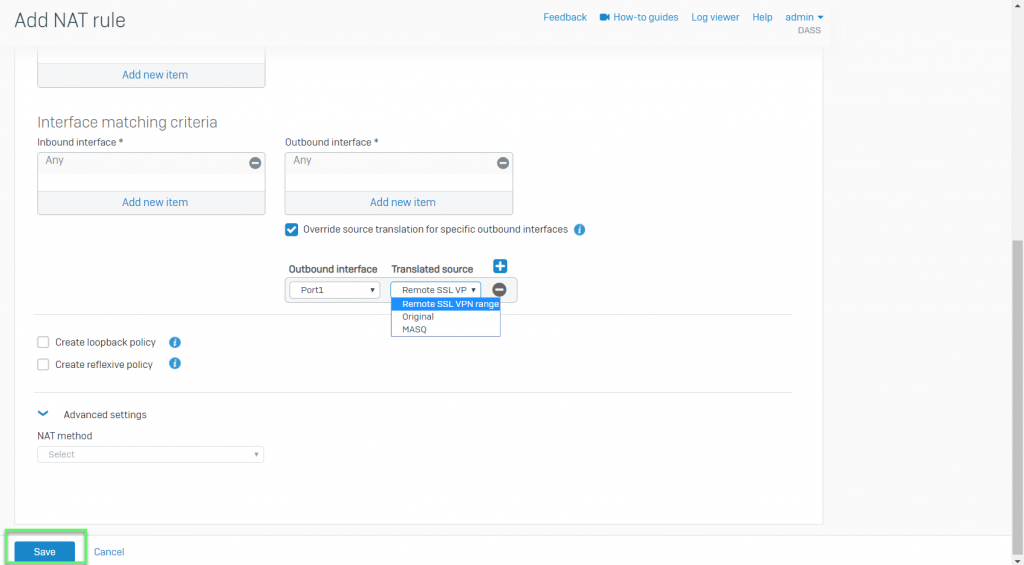
- Inbound interface: Select the interfaces through which traffic specified in this rule enters XG firewall. For VPNs, set this interface to Any, since VPNs are not interfaces
- Outbound interface: Select the interfaces from which traffic specified in this rule exits XG Firewall. For VPNs and for destination NAT rules that translate public IP addresses to private IP addresses, set this interface to Any
- Select Override source translate for specify outbound interface to apply interface-specific source translation. This option applies only to source NAT rules
- Select the Outbound interface and Translated source
- Select Create loopback policy to allow internal hosts to access other internal hosts
- Select Create reflexive policy to create a mirror policy that reverses the matching criteria of the rule from which it’s created
- Select the NAT method to load balance traffic among the translated internal hosts
- Round robin: Requests are served sequentially, starting with the server next to the previously assigned server. Use it when you want to distribute traffic equally and don’t require session persistence
- First alive: Incoming requests are served to the primary server (the first IP address of the range). If the primary server fails, requests are forwarded to the next server and so on. Use it for failover
- Random: Requests are served randomly to the servers with equal load distribution. Use this when you want equal distribution and don’t require session persistence or order of distribution
- Sticky IP: Traffic from a specific source is forwarded to the mapped server. Use this when you want the requests to be processed by the same server
- One-to-one: Requests are sent to the mapped IP addresses. The IP addresses of the original and translated destinations must be equal in number
- Select Health check to enforce server failover. Specify the probe interval, response time-out and the number of retries after which to deactivate the host. Health check is enforced by default for First alive NAT method
- Select the Probe method. You can select ICMP (ping) or TCP protocols
- Enter the Port over which to check
- Specify the Probe interval. It’s the interval between health checks
- Specify the Response time-out. The server must respond within this time period to be considered alive
- For Deactivate host after, specify the number of retries
-> Click Save
Leave a Reply