
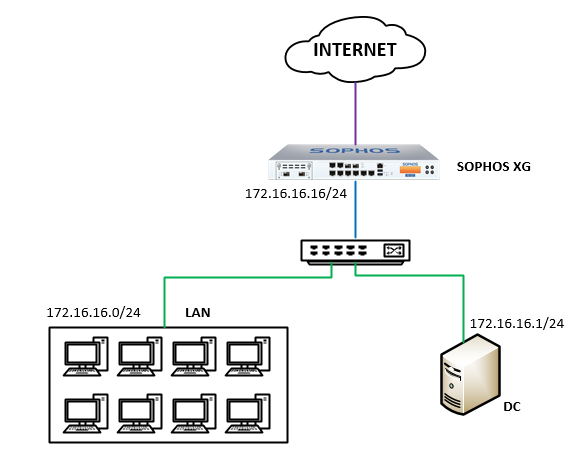
Overview
Sophos General Authentication for user domain in the domain, forcing the user to authenticate the account to access the network, giving the administrator control over the user’s network system
How to configure
Step 1: Add AD Server to Firewall to be able to authenticate users
- Performed on Sophos XG device
- Log in to Sophos XG with Admin account
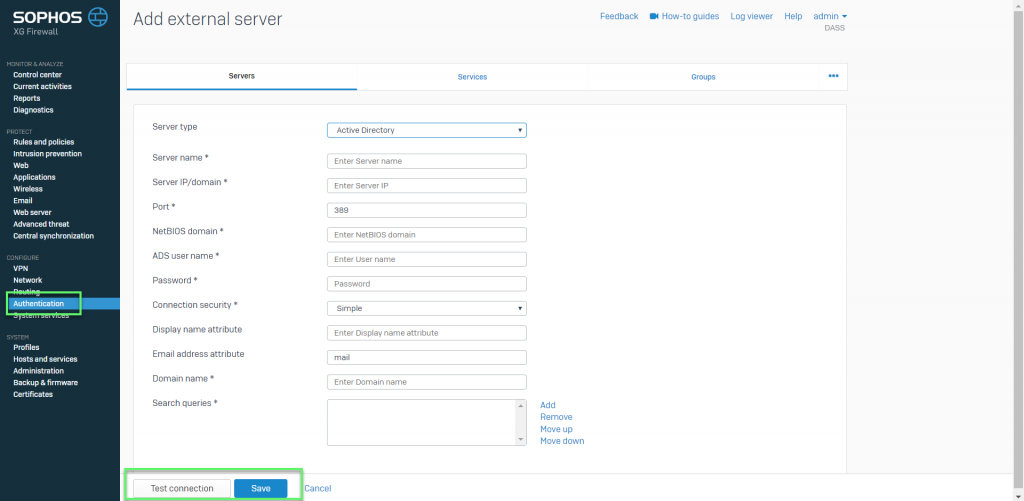
- Authenticate -> Server -> Click Add
- In the Server type: Select Active Directory
- Server name: Name the server you want to manage
- Server IP/ domain: Enter the IP of AD
- Port: 389
- NetBIOS domain: Enter the NetBIOS name of AD
- ADS user name: Enter the administrator
- Password: Enter the password of the administrator account
- Connection security: Select Simple
- Display name attribute: Enter the name for the server you want to manage
- Email address attribute: Enter the email you want (can be left blank)
- Domain name: Enter your domain name
- Search queries: Enter domain name in queries (Ex: dc=vacif,dc=com)
-> Click Test connection -> Click Save
Step 2: Add group contains the users you want to authenticate into the firewall
Click Import icon

Click Start
In the Base DN section: Enter the domain name with the form dc=vacif,dc=com
- Select the group you want to select
- Custom policy for group policy according the needs
-> Click Next to continue
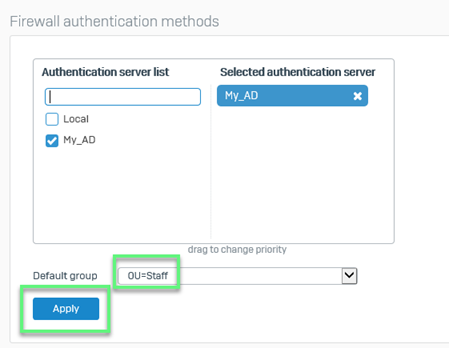
Step 3: Adjust the Service configuration so that the firewall authenticates the AD Server user
Authentication -> Services
In the Firewall authentication methods
- Click your AD and uncheck Local (or you can choose AD and upload it on Local, do not deselect Local)
- In the Default group section: Select the OU or group you have added
-> Click Apply
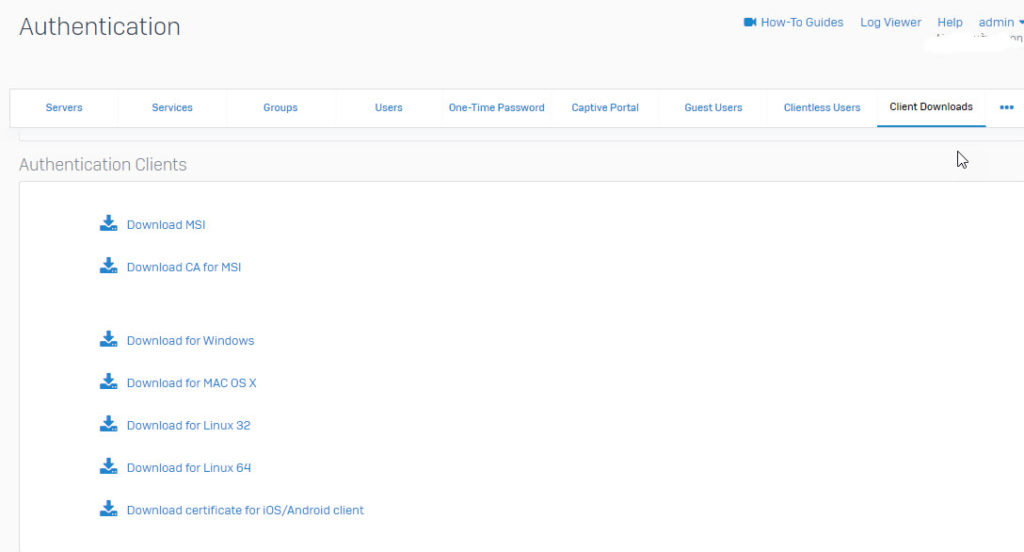
Step 4: Download the General Authentication Client installation file
- Authentication -> Client Downloads
- Select the installation version that is appropriate for the client operating system
Step 5: Install the Authentication Client software on the user’s computer
- Right-click on the downloaded file and select Run as administrator
- When there is a certificate installation request for the computer -> Select Yes
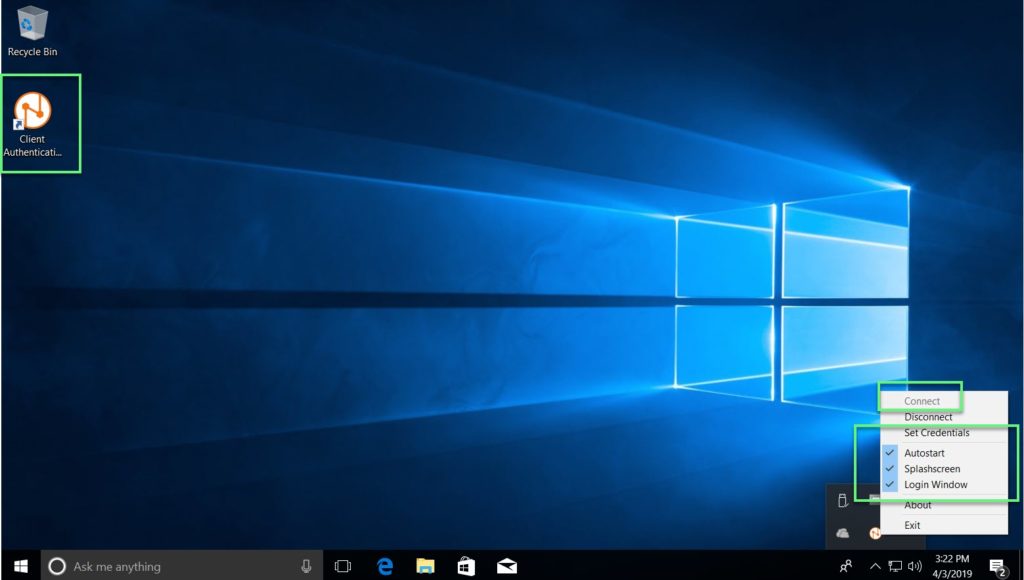
- When the installation process is complete, open the software by double clicking the shortcut on the desktop, or right-click the icon in the lower right corner of the screen
- Select the profiles and click Connect
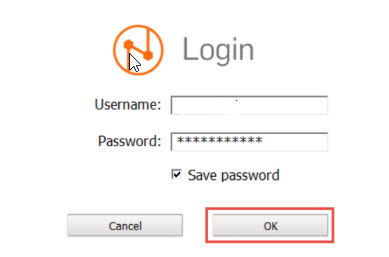
Step 6: Login to authenticate
- Users will log into the user account, then access the user’s network will be controlled through Sophos XG
Step 7: Go to Sophos XG to check in the Current Activities section
Leave a Reply