
Overview
This article describes how to configure IPSec VPN Client to Site so that remote VPN users can access the enterprise File Server system remotely. Configuration is done on Sophos XG firewall device with firmware version 18
** When configuring SSL VPN, to install the application, you must get the installation source from the User Portal. As for IPSec VPN configuration, to install the application, you must use the installation file downloaded from the Admin account, and the Admin will share that installation file for the VPN user to install
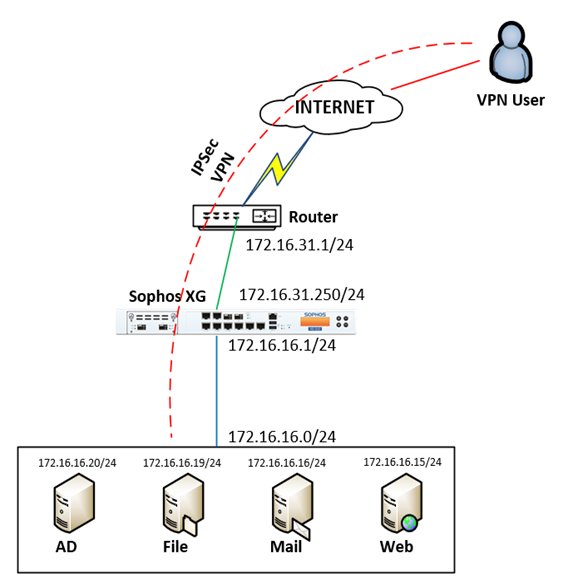
Diagram
Summary of configuration steps
- Configure IPSec VPN Client to Site profile on Sophos XG
- Create IPSec VPN group
- Create IPSec VPN user
- Configure profile for IPSec VPN Client
- Download and install IPSec VPN Client
- Import configuration file to IPSec VPN Client
- Create firewall rule to allow communicate between IPSec VPN and LAN
- Configure NAT Port on Modem or Router
- Configure File Server
- Results
Configuration details
- Configure IPSec VPN Client to Site profile on Sophos XG
Login to Sophos XG by Admin account
1.1 Create IPSec VPN group
** Configuring group creation for IPSec VPN, it’s making easy for administrators to manage and user groups to apply policies according to the needs of the business
- Authentication -> Choose Group -> Click Add
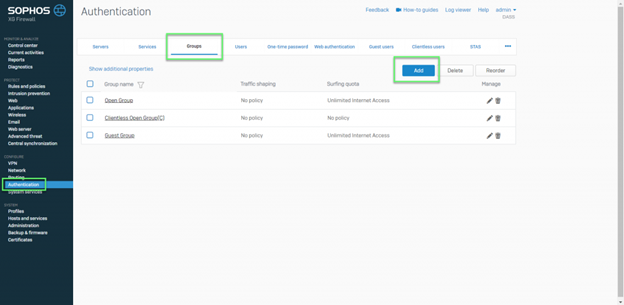
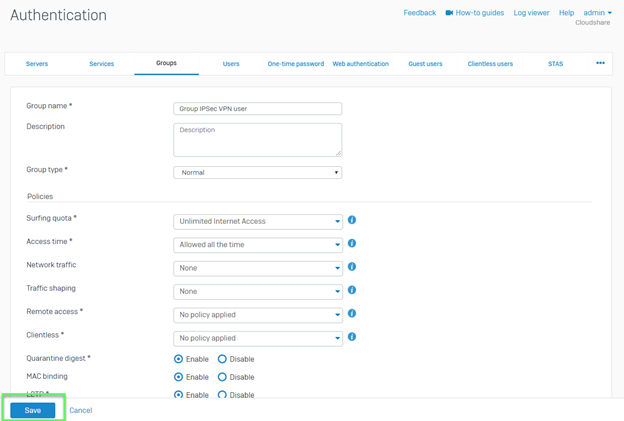
- Create IPSec VPN group
- Group Name: Enter name for IPSec VPN group
- Surfing Quota: Select the network traffic you want
- Access Time: Select the access time you want
-> Click Save
1.2 Create IPSec VPN users
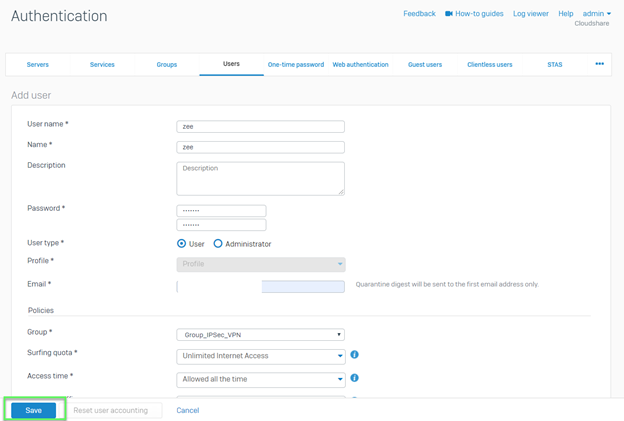
- Authentication -> Choose User -> Click Add

- Create IPSec VPN users
- Username: Enter name for VPN user
- Password: Enter password for IPSec VPN user
- Email: Enter manager’s email
- Group: Choose IPSec VPN group which was created before
-> Click Save
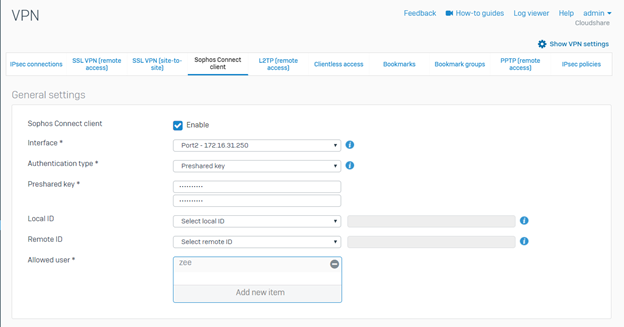
1.3 Configure profile for IPSec VPN Client
- VPN -> Choose Sophos Connect client
- In General settings
- Choose Enable
- In Interface: Choose WAN Port on Sophos XG
- In Authentication type: Choose Preshared key
- In Preshared key: Enter your preshared key
- In Allowed user: Choose IPSec VPN user which was created before
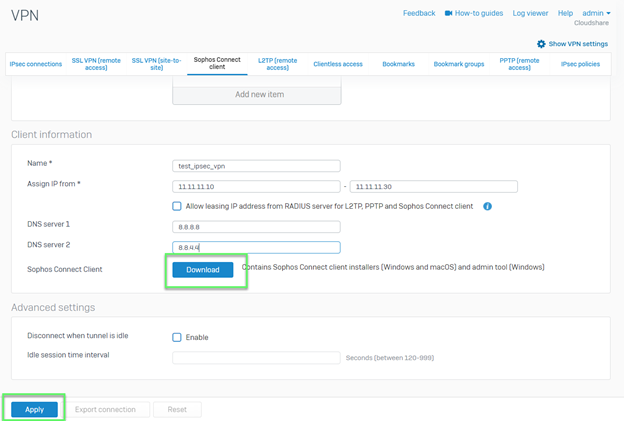
- In Client information
- In Name: Enter connection name
- In Assign IP from: Enter IP range provided for IPSec VPN Client
- In DNS server 1: Enter your DNS
- In DNS server 2: Enter your DNS
-> Click Apply -> Click Download to download IPSec VPN installation software -> Click Export connect to download configuration file
1.4 Download and install IPSec VPN Client
- Extract the installation application file
- Install SophosConnect.msi
- Install scadmin.msi
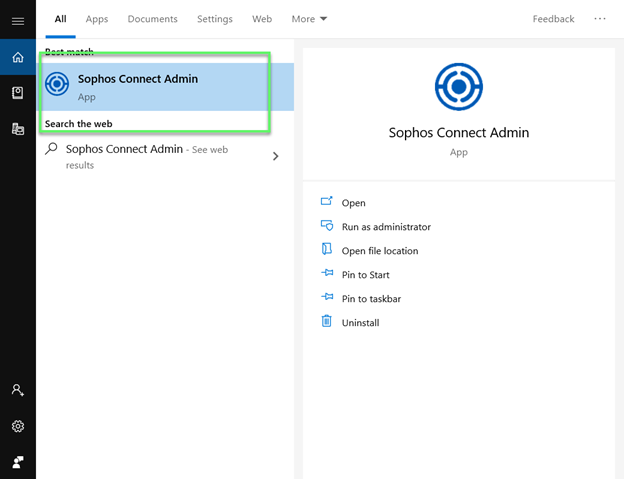
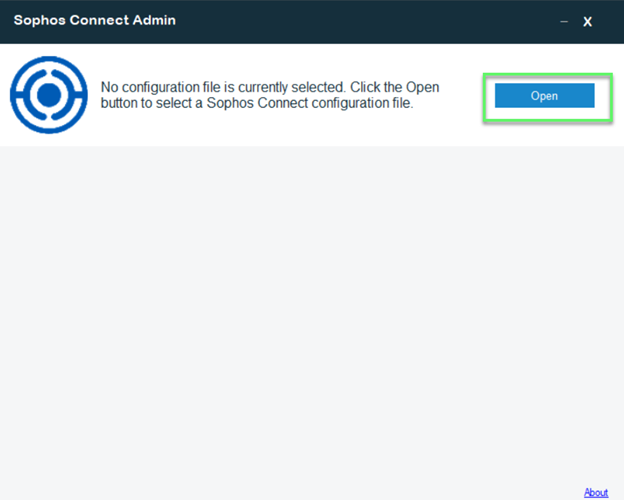
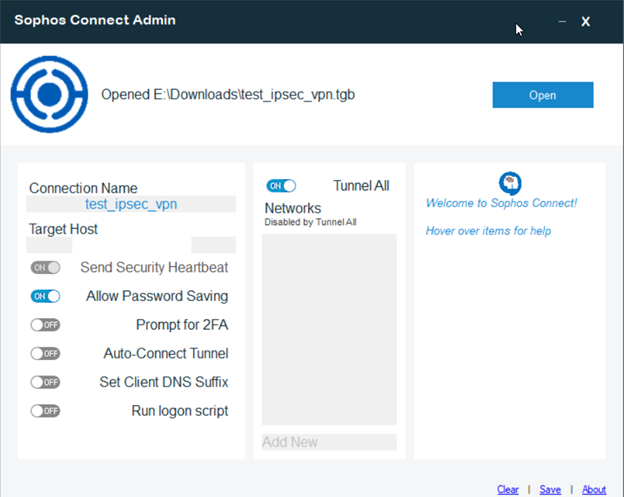
- Open Sophos Connect Admin -> Click Open to get profile which downloaded before
- You can adjust Target Host to IP WAN of Router or Modem
-> Click Save to save profile
** Saved the file with the .scx extension
1.5 Import configuration file to IPSec VPN Client
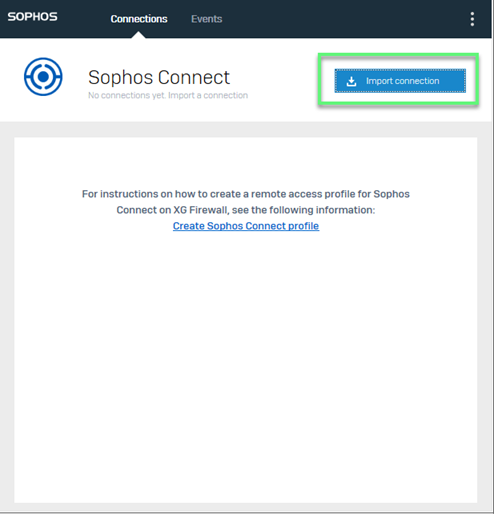
- Open Sophos Connect -> Click Import connection -> Choose .scx file
1.6 Create firewall rule to allow communicate between IPSec VPN and LAN
- Rules and Policies -> Click Add Firewall Rule
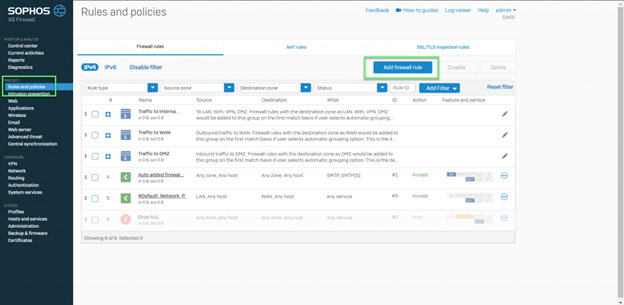
- Enter name
- In Source zones: Choose VPN
- In Source networks and devices: Choose Any
- In Destination zones: Choose LAN
- In Destination networks: Choose LAN network (Local subnet)
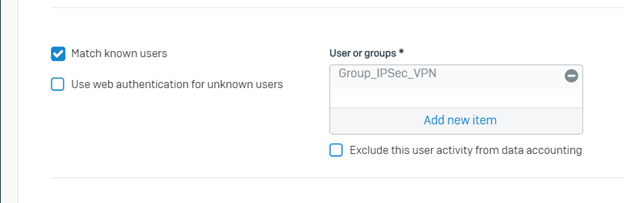
- Choose Match known users
- In Users and groups: Choose IPSec VPN group which was created before
-> Click Save

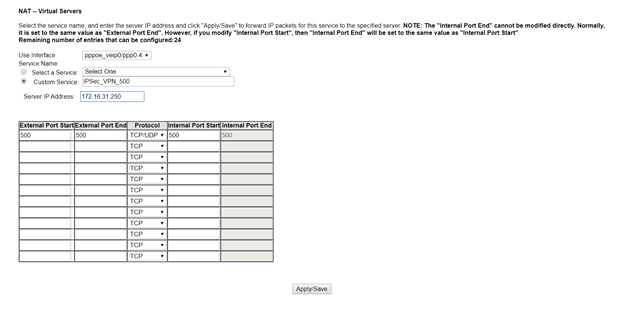
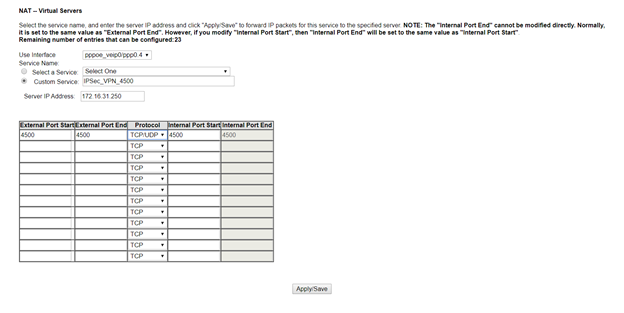
2. Configure NAT Port on Modem or Router
- We will Nat 2 port is 500 UDP and 4500 UDP
3. Configure File Server
- File sharing on File Server, share files folder for all users as well as VPN users to have access to read and write files
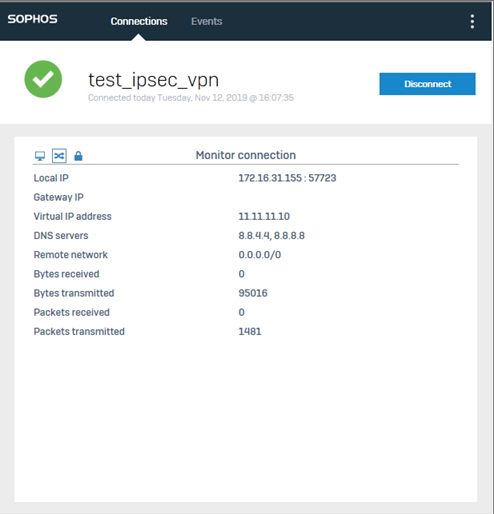
4. Results
- Make connection IPSec VPN Client to Site by opening the application installed on your computer
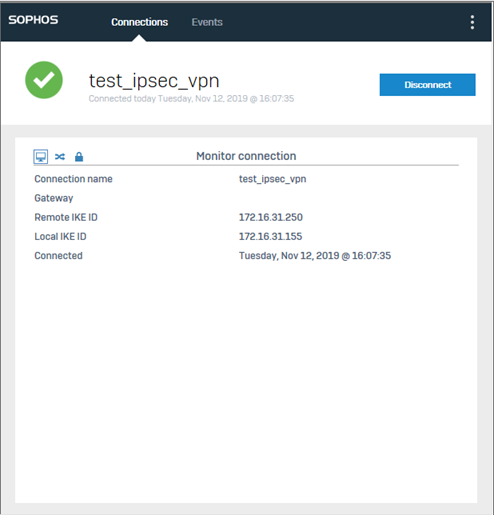
- Check IP address of IPSec VPN Client
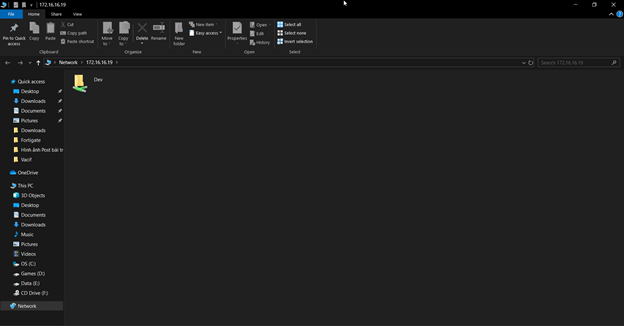
- You access to File Server with File Server’s IP address is 172.16.16.19
- You type in address bar: \\172.16.16.19
-> Done
I enjoy what you guys are up too. This type of clever work and coverage! Keep up the fantastic works guys I’ve you guys to my personal blogroll.