
Overview
All Cisco network devices have SNMP protocol support that allows the monitor tool to connect to monitoring. Zabbix is the tool used to monitor Cisco switches very well. Tutorial articles monitor Cisco switch devices
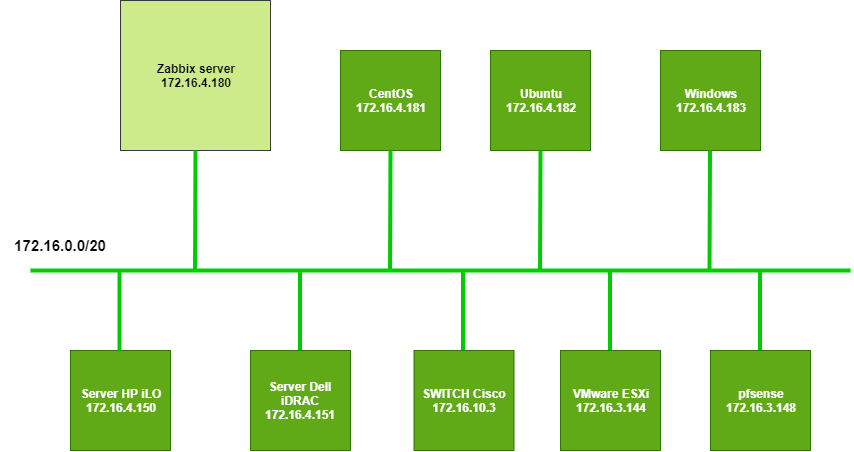
Diagram
How to configure
Configure on switch Cisco
- Login to switch Cisco -> Go to config
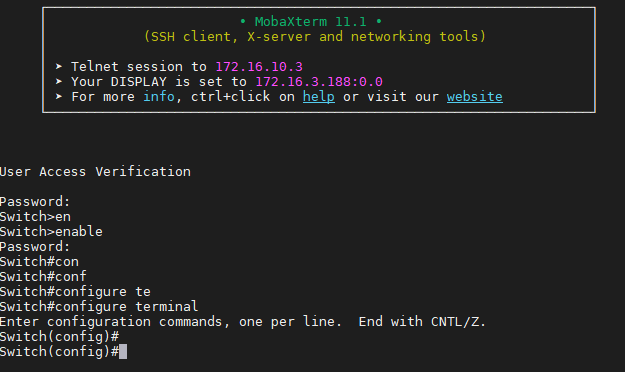
- The SNMP declaration configuration command
snmp-server community public ro
- Enable SNMP on switch Cisco
snmp-server enable traps snmp
- Declare information about the switch (optional description of contact, location switch)
snmp-server contact “NHA”
snmp-server location “NHA”
- Declare the Zabbix server information (IP of Zabbix server, public is the SNMP string declare above)
snmp-server host 172.16.4.180 version 2c public udp-port 162

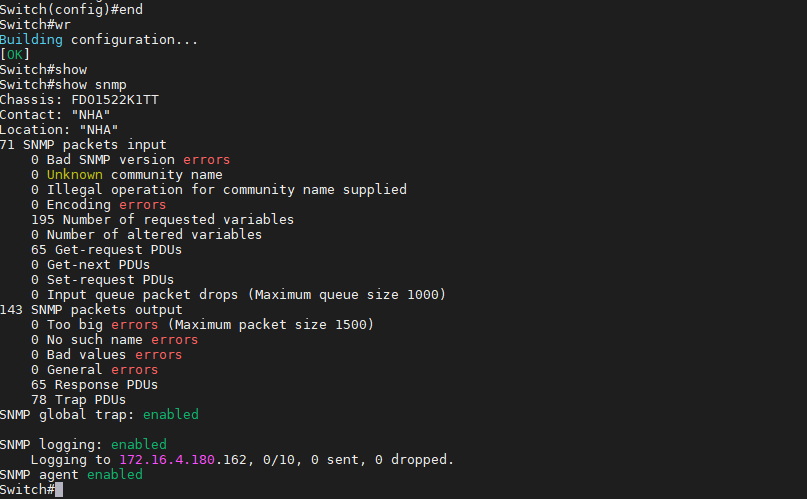
- Save the configuration and use the command to re-check
show snmp
Configure on Zabbix Server
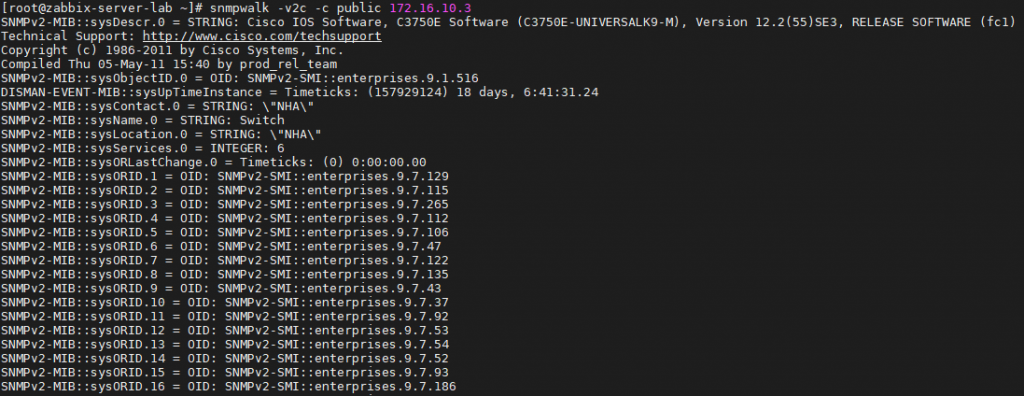
- Check the SNMP information of the switch on Zabbix Server
yum install net-snmp net-snmp-utils -y
snmpwalk -v2c -c public 172.16.10.3
- Login Web interface of Zabbix Server
- Go to Configuration -> Choose Hosts -> Click Create host

- In Host name: Enter host name
- In Groups: Choose Switch
- In SNMP interfaces: Choose IP of switch Cisco

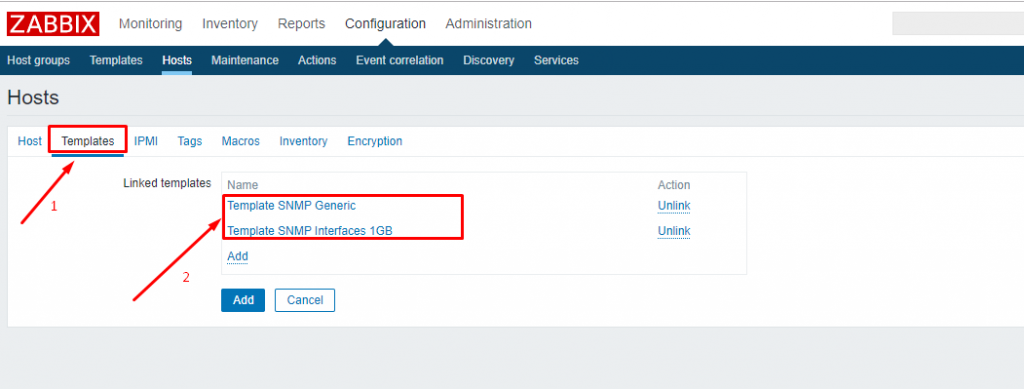
- Navigate through the Templates -> Select Template SNMP Generic and SNMP Interface 1 GB -> Click Add
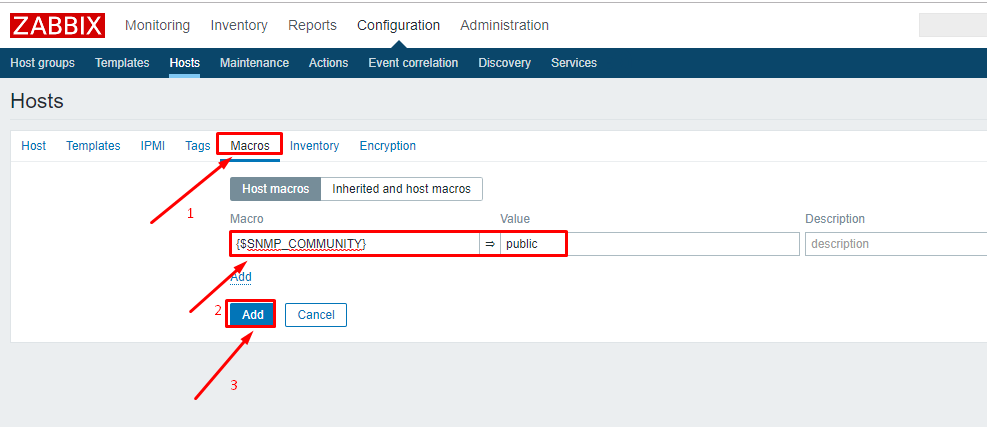
- Go to Macros -> Enter the syntax {$SNMP_COMMUNITY} => public (public is the snmp community configured on the switch)
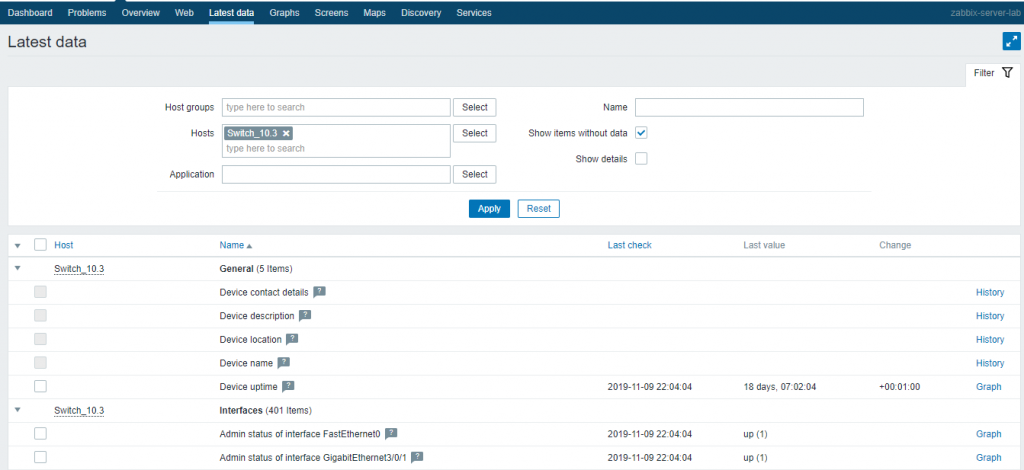
- When add host successfully

Hello, thank you for the column.
Is it ok that we use UDP 162 port on Cisco and UDP 161 port on Zabbix?
I’m not sure about this.
Let’s me check again.
Thanks