
1.Purpose of the article
In this article, I will show you how to configure IPSec VPN Site to site between two Sophos Firewall devices with one of the two devices behind another Sophos Firewall device.
2.Network diagram
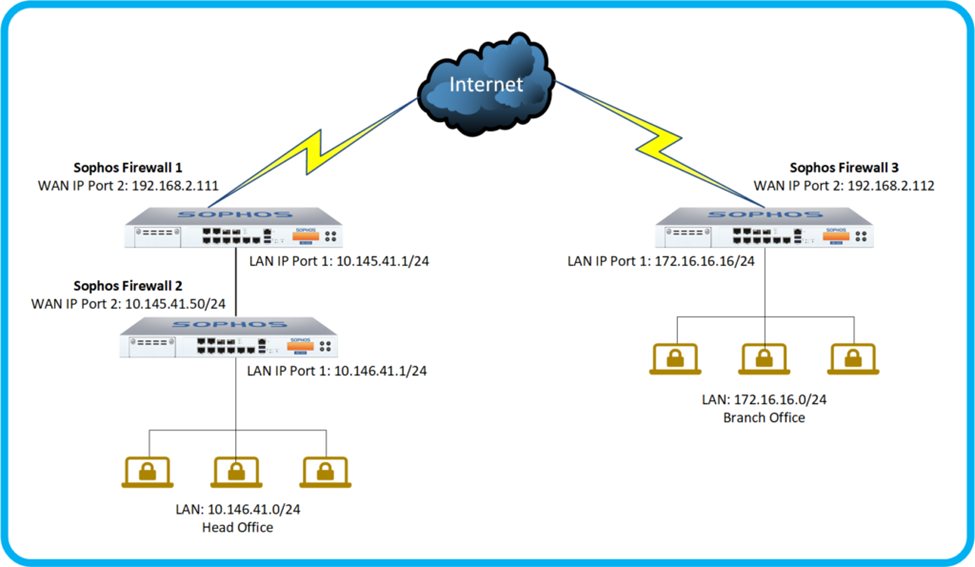
Network diagram details:
Head Office:
- At the head office site we will have an external and an internal firewall model with 2 devices Sophos Firewall 1 is the external firewall and Sophos Firewall 2 is the internal firewall.
- The internet connection is connected at Port 2 of Sophos Firewall 1 device with IP 192.168.2.111.
- The LAN network of the Sophos Firewall 1 device is configured at Port 1 with IP 10.145.41.1/24 and has DHCP configured to allocate to devices connected to it.
- At Sophos Firewall 2 WAN port will be Port 2 and it will be connected to Port 1 of Sophos Firewall 1, Port 2 on Sophos Firewall 2 is set static IP as 10.145.41.50/24.
- The LAN network of the Sophos Firewall 2 device is configured at Port 1 with IP 10.146.41.1/24 and has DHCP configured.
Branch office:
- The internet connection is connected at Port 2 of Sophos Firewall 3 device with IP 192.168.2.112.
- The LAN is configured at Port 1 with IP 172.16.16.16/24 and configured with DHCP to allocate IPs to connected devices.
3. Scenario
Based on the above diagram, we will configure IPSec VPN Site to site between the Sophos Firewall 2 device at the Head Office site and the Sophos Firewall 3 device at the Branch Office site so that both LANs of the two sites can communicate with each other.
4.Configuration steps
Sophos Firewall 1:
- Create a profile for the IPSec service.
- Create Profile for IP WAN of Sophos Firewall 2.
- Implement NAT IP WAN of Sophos Firewall 2 with IPSec service to the internet.
Sophos Firewall 2:
- Create profiles for Local and Remote subnet.
- Create an IPSec connection.
- Create policy to allow traffic between 2 zone LAN and VPN.
- Enable PING and HTTPS services on VPN zone.
Sophos Firewall 3:
- Create connection for Local and Remote subnet.
- Create an IPSec connection.
- Create policy to allow traffic between 2 zone LAN and VPN.
- Enable PING and HTTPS services on VPN zone.
Check the result.
5.Configuration guide
5.1.Sophos Firewall 1
5.1.1.Create profile for IPSec service
The IPSec VPN Site to site connection will use the ports UDP 500 and UDP 4500.
We need to create profiles for these two services.
To create, go to SYSTEM > Hosts and services > Services > click Add.
Create with the following parameters:
• Name*: IPSec S2S VPN
• Type*: select TCP/UDP.
• Protocol: select UDP.
• Source port: 1:65535.
• Destination port: 500
• Press the + icon to add 1 row.
• Protocol: select UDP.
• Source port: 1:65535.
• Destination port: 4500.
• Click Save to save.

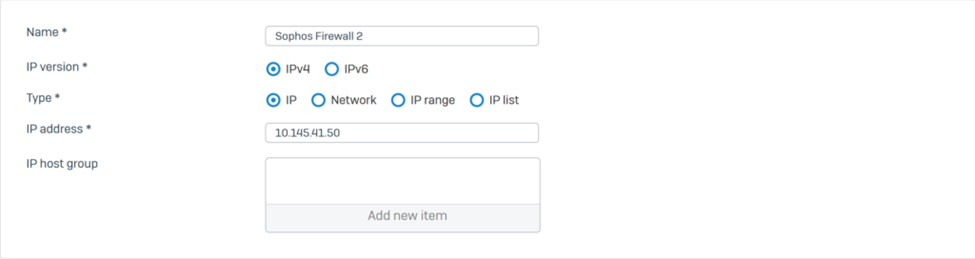
5.1.2.Create a profile for Sophos Firewall 2
To create go to SYSTEM > Hosts and services > IP Host > Click Add.
Create with the following information:
• Name*: Sophos Firewall 2.
• IP version*: select IPv4.
• Type*: select IP.
• IP address*: enter the WAN IP of Sophos Firewall 2 as 10.145.41.50.
• Click Save to save.
5.1.3. Implement NAT IP WAN of Sophos Firewall 2 with IPSec service out to internet
To NAT we go to PROTECT > Rules and policies > Add firewall rule > Server access assistant [DNAT].
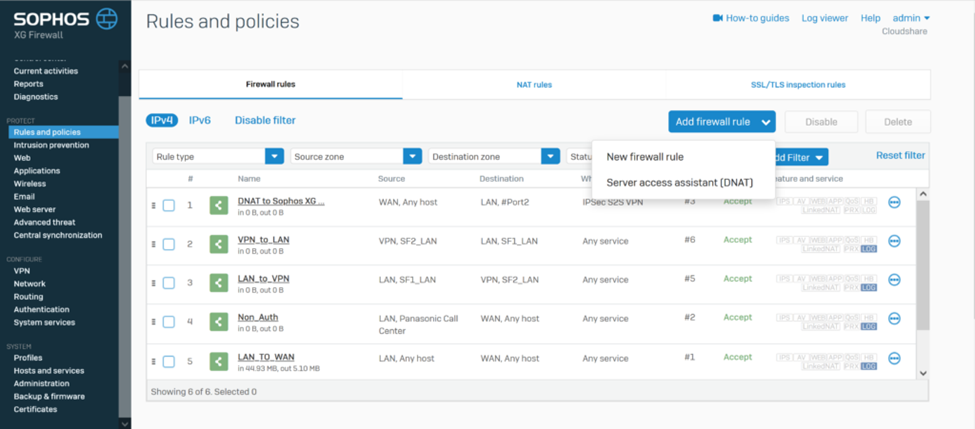
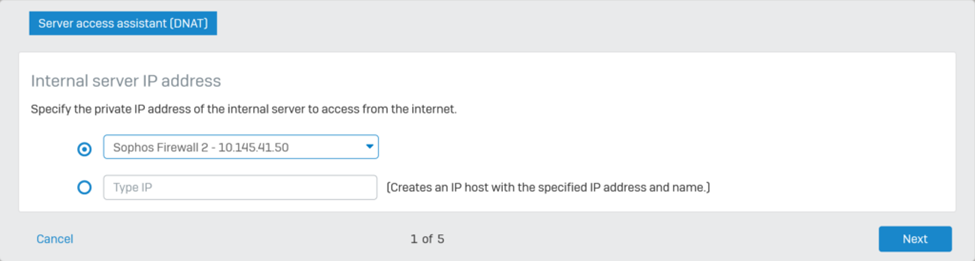
After clicking on Server access assistant [DNAT] a configuration panel pops up.
In the Internal server IP address we tick Select IP host and select Sophos Firewall 2 – 10.145.41.50 from the drop-down list.
Click Next to continue.
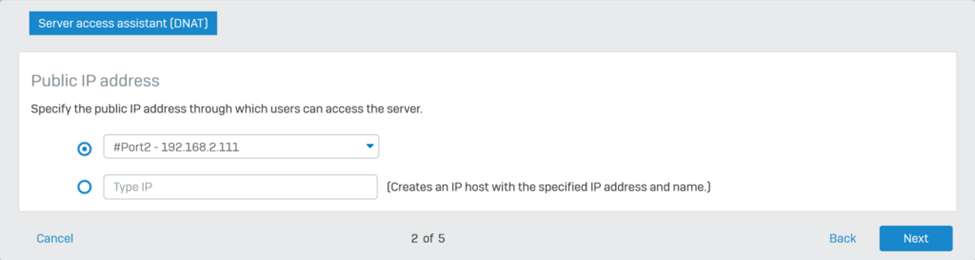
In Public IP address select public ip address or WAN interface and select #Port 2 – 192.168.2.111 from drop-down list.
Click Next to continue.
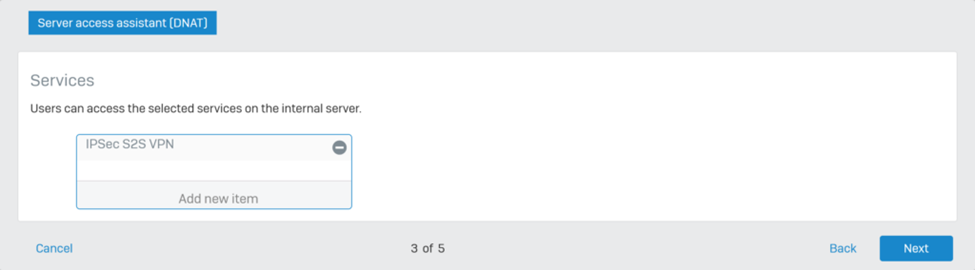
In Service click Add new item and select IPSec S2S VPN profile.
Click Next to continue.
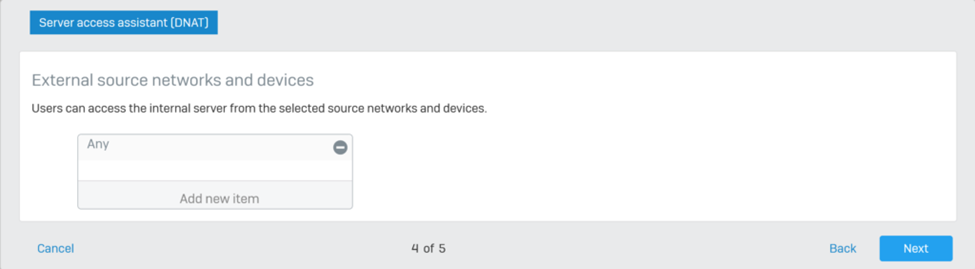
In External source networks or devices, keep the Any option and click Next.
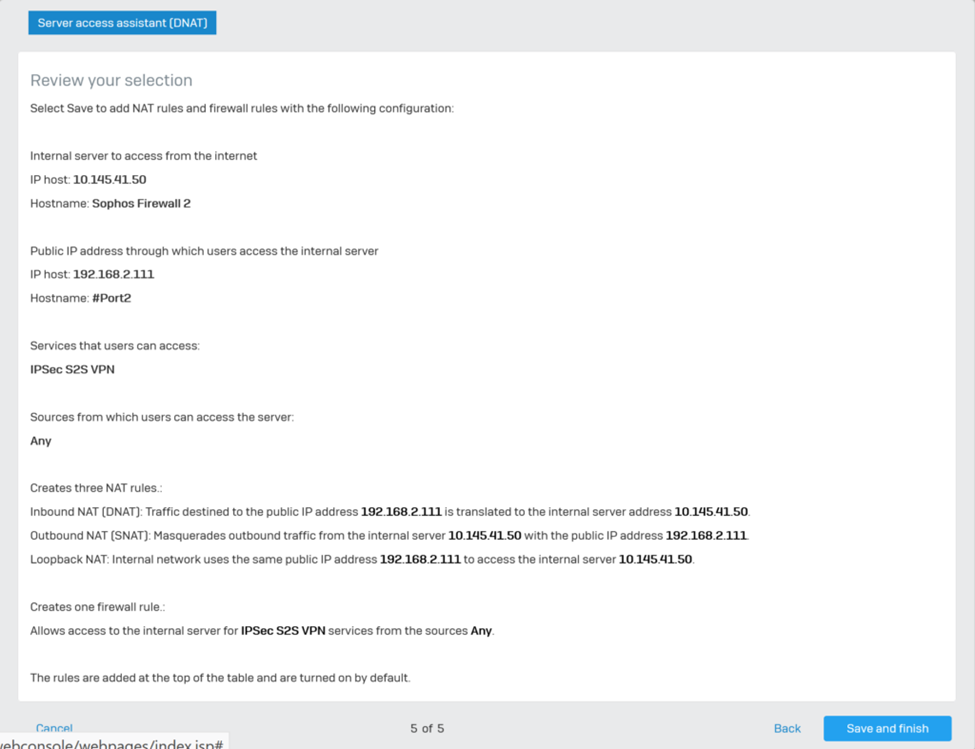
The last step is to review the previously selected options, if you have chosen correctly, click Save and finish to complete.
5.2.Sophos Firewall 2
5.2.1.Create profiles for Local và Remote subnet
We will create profiles for Local and Remote subnet.
To create, go to SYSTEM > Hosts and Services > IP Host > click Add.
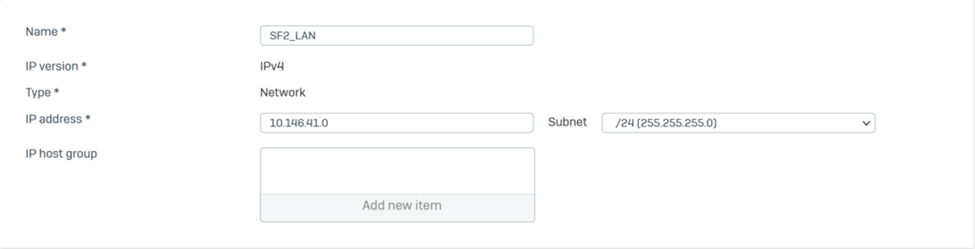
Create a profile for the Local subnet with the following parameters:
• Name*: SF2_LAN.
• IP version*: IPv4.
• Type*: Network.
• IP address*: 10.146.41.0 Subnet /24[255.255.255.0]
• Click Save to save.
Similar to the above steps, we will create a profile for the Remote subnet according to the following parameters:
Name*: SF3_LAN.
IP version*: IPv4.
Type*: Network.
IP address*: 172.16.16.0 Subnet /24[255.255.255.0]
Click Save to save.

5.2.2.Create IPSec connection
To create us go to CONFIGURE > VPN > IPSec connections > click Add.
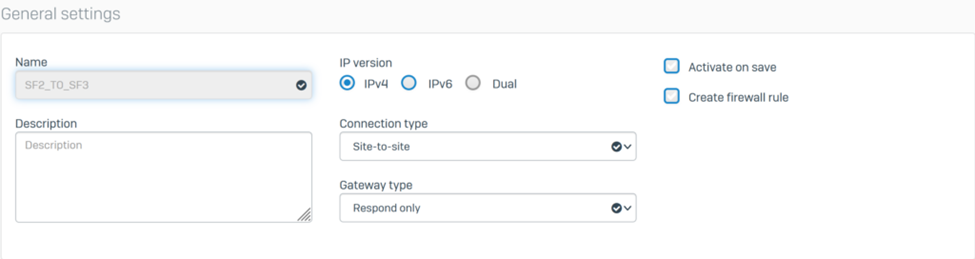
In General we configure with the following parameters:
• Name: SF2_TO_SF3.
• IP version: IPv4.
• Connection type: Site-to-site.
• Gateway type: Respond only.
• Active on save: uncheck.
• Create firewall rule: uncheck.
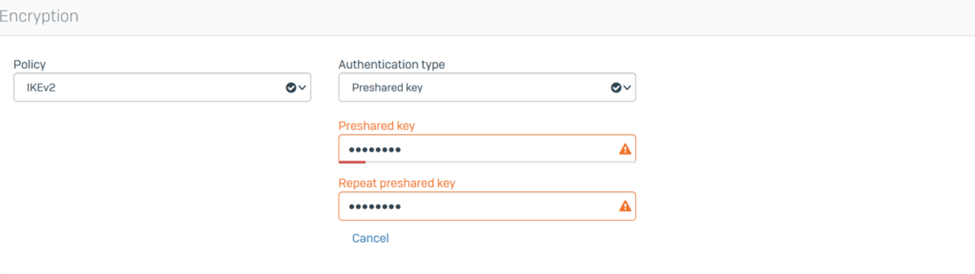
In Encryption we configure with the following parameters:
• Policy: select IKEv2.
• Authentication type: select Preshared key.
• Preshared key: enter the connection password.
• Repeat preshared key: re-enter the connection password.
In Gateway settings we configure the following parameters:
Local Gateway:
• Listening interface: select Port2 – 10.145.41.50.
• Local ID type: select IP address.
• Local ID: enter 10.145.41.50.
• Local subnet: select the SF2_LAN profile.
Remote Gateway:
• Gateway address: enter the WAN IP of Sophos Firewall 3 as 192.168.2.112.
• Remote ID type: select IP address.
• Remote ID: enter 192.168.2.112.
• Remote subnet: select the SF3_LAN profile.
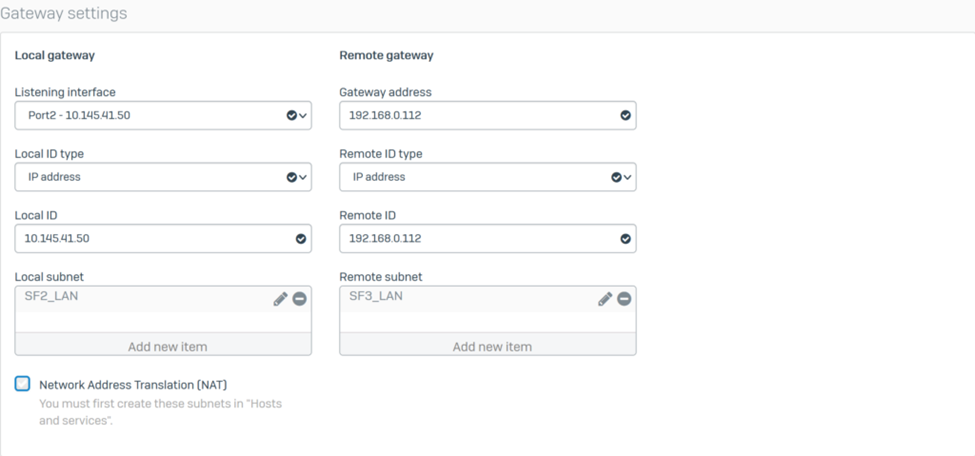
Click Save to save.
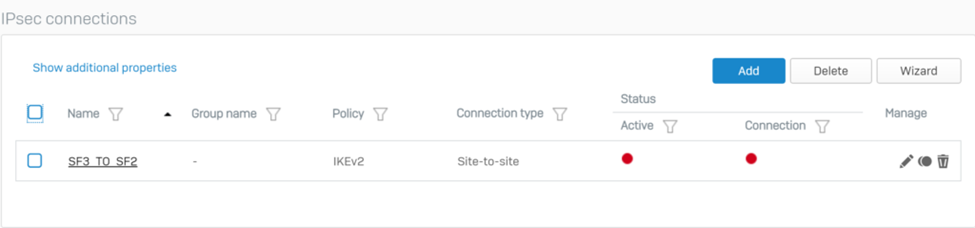
After clicking Save, the IPSec connection will be created as shown below.
However, this connection is still not enabled, to turn it on, click the circle icon in the Active column and click OK.
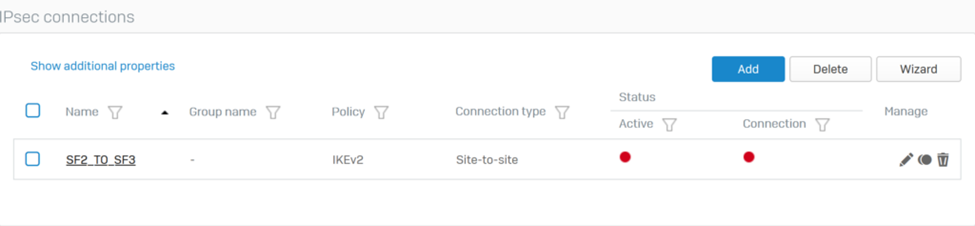
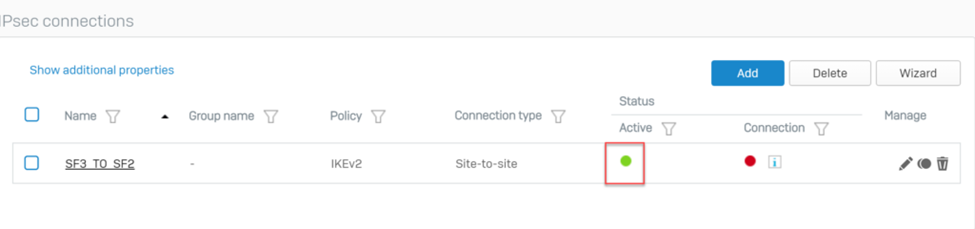
Now the circle icon in the Active column turns green, which means that the connection has been successfully turned on.

5.2.3.Create a policy to allow traffic between 2 zone LAN and VPN
By default, the firewall will block all traffic between zones.
So we need to create a policy to allow traffic to go back and forth between the LAN and VPN zones.
To create, go to PROTECT > Rules and policies > Add firewall rule and create a policy as shown below.
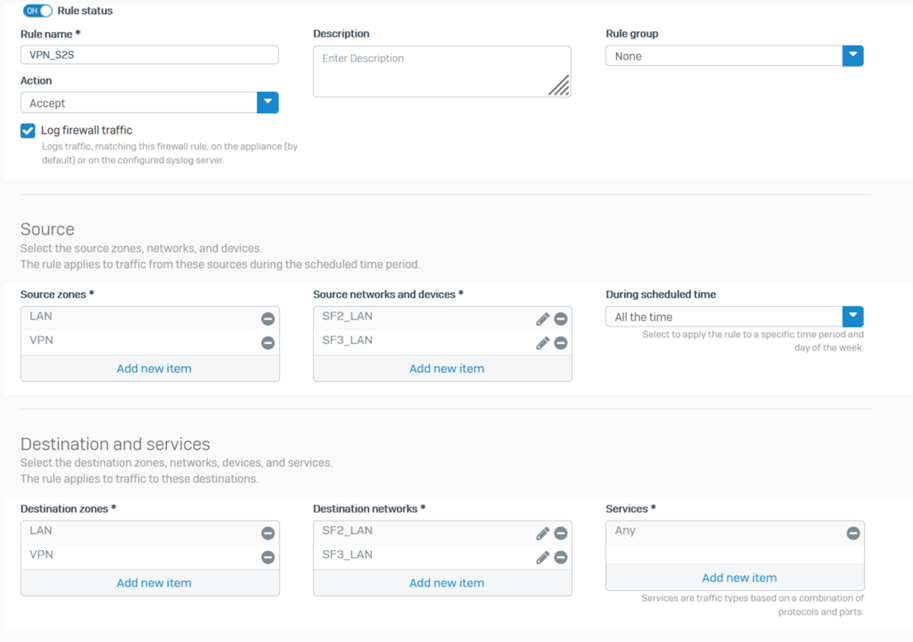

Click Save to save.
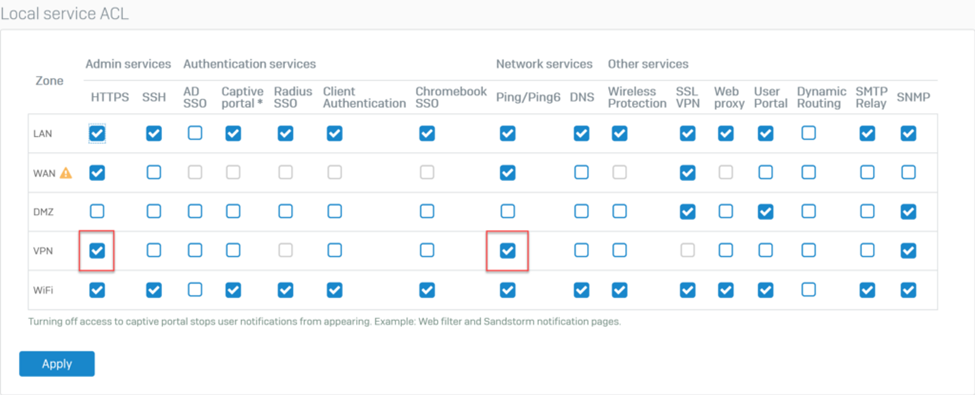
5.2.4.Enable PING và HTTPS services on VPN zone
By default, the VPN zone will turn off all services.
To enable go to SYSTEM > Administration > Device Access.
Select 2 HTTPS and Ping / Ping6 services in the VPN zone row and click Apply to save.
5.3.Sophos Firewall 3
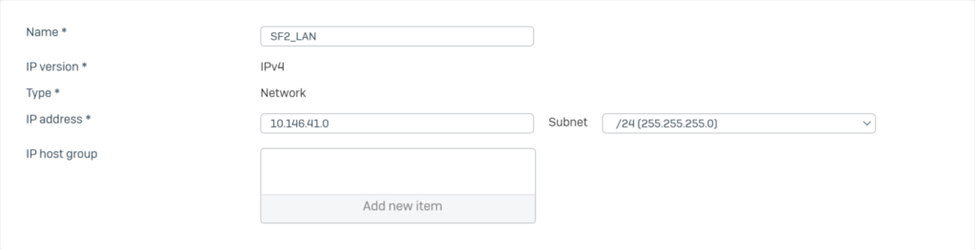
5.2.1.Create profile for Local and Remote subnet
We will create profiles for Local and Remote subnet.
To create, go to SYSTEM > Hosts and Services > IP Host > click Add.
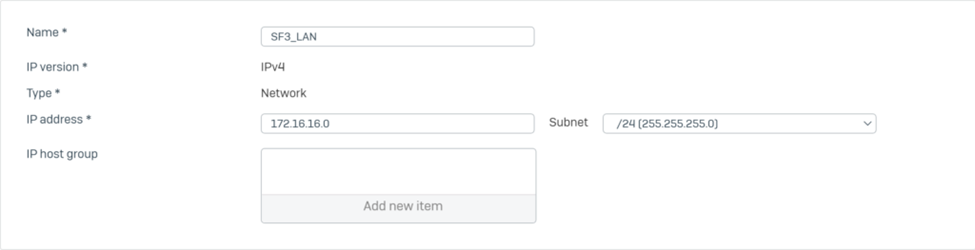
Create a profile for the Local subnet with the following parameters:
• Name*: SF3_LAN.
• IP version*: IPv4.
• Type*: Network.
• IP address*: 172.16.16.0 Subnet /24[255.255.255.0]
• Click Save to save.
Similar to the above steps, we will create a profile for the Remote subnet according to the following parameters:
Name*: SF2_LAN.
IP version*: IPv4.
Type*: Network.
IP address*: 10.146.41.0 Subnet /24[255.255.255.0]
Click Save to save.
5.2.2.Create IPSec connection
To create us go to CONFIGURE > VPN > IPSec connections > click Add.
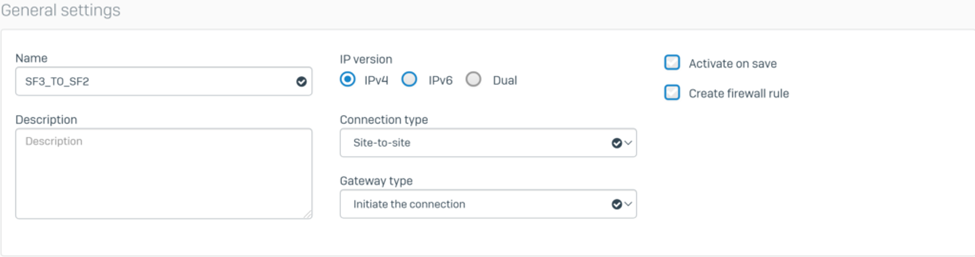
In General we configure with the following parameters:
• Name: SF3_TO_SF2.
• IP version: IPv4.
• Connection type: Site-to-site.
• Gateway type: Initiate the connection.
• Active on save: uncheck.
• Create firewall rule: uncheck.
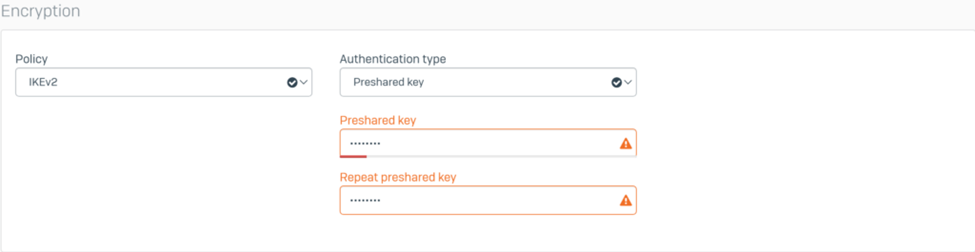
In Encryption we configure with the following parameters:
• Policy: select IKEv2.
• Authentication type: select Preshared key.
• Preshared key: enter the connection password.
• Repeat preshared key: re-enter the connection password.
• Note that the preshared entered must be the same as the preshared entered in Sophos Firewall 2.
In Gateway settings we configure the following parameters:
Local Gateway:
• Listening interface: select Port2 – 192.168.2.112.
• Local ID type: select IP address.
• Local ID: enter 192.168.2.112.
• Local subnet: select the SF3_LAN profile.
Remote Gateway:
• Gateway address: enter the WAN IP of Sophos Firewall 1 as 192.168.2.111.
• Remote ID type: select IP address.
• Remote ID: enter 10.145.41.50.
• Remote subnet: select the SF2_LAN profile.
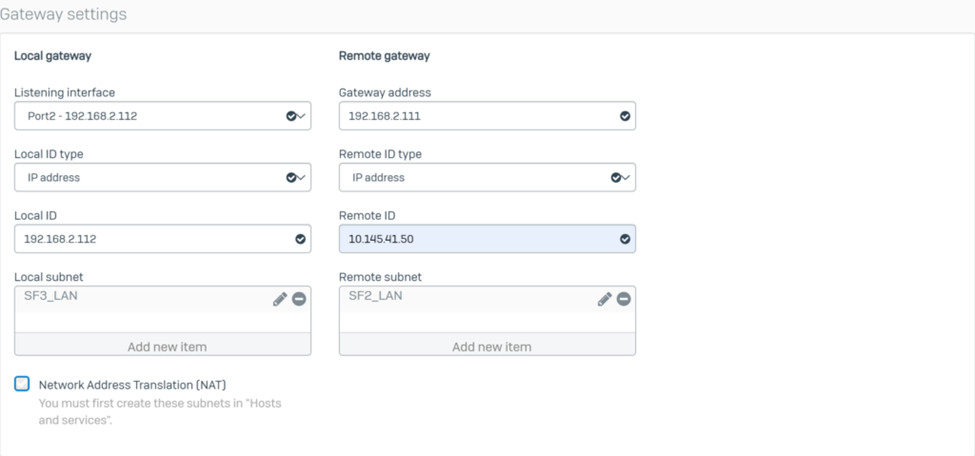
Click Save to save.
After clicking Save, the IPSec connection will be created as shown below.
However, this connection is still not enabled, to turn it on, click the circle icon in the Active column and click OK.
Now the circle icon in the Active column turns green, which means that the connection has been successfully turned on.
After successfully turning on the connection, the IPSec connection on Sophos Firewall will automatically send a signal to Sophos Firewall 2 to establish an IPSec VPN Site to site connection between the two devices.
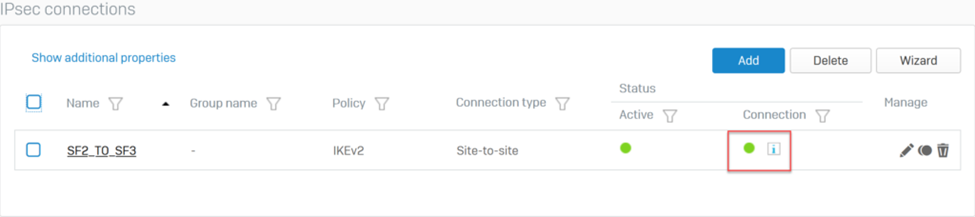
At this point, the circle icon in the Connection column turns green, indicating that an IPsec connection between the two devices has been formed.

At Sophos Firewall 2, the circle icon in the Connection column will also turn green.
5.2.3.Create policy to allow traffic between 2 zone LAN and VPN
By default, the firewall will block all traffic between zones.
So we need to create a policy to allow traffic between the two LAN zones and the VPN.
To create, go to PROTECT > Rules and policies > Add firewall rule and create a policy as shown below.

Click Save to save.
5.2.4.Enable PING and HTTPS services on VPN zone
By default, the VPN zone will turn off all services.
To enable go to SYSTEM > Administration > Device Access.
Select 2 HTTPS and Ping / Ping6 services in the VPN zone row and click Apply to save.

5.4. Check the result
I will use 1 computer at each site to ping each other to check the results.
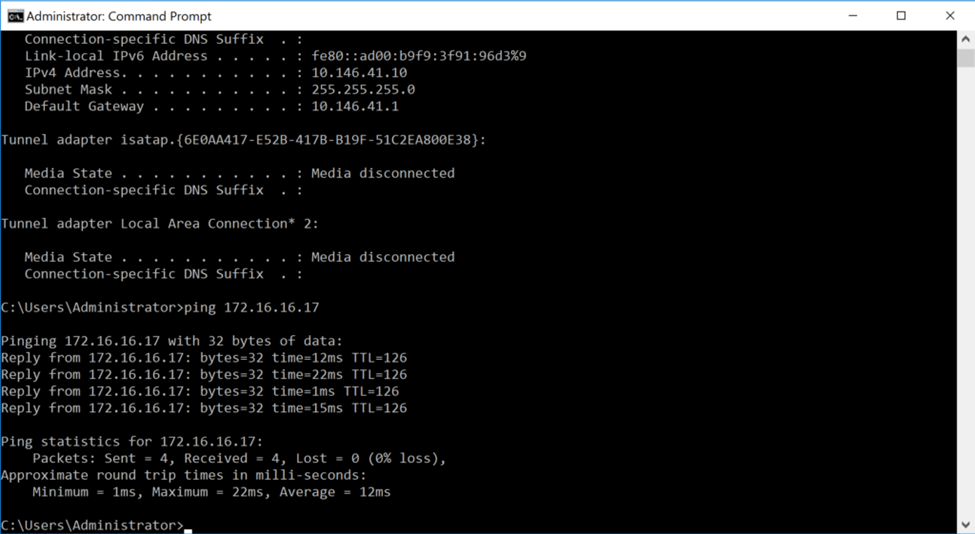
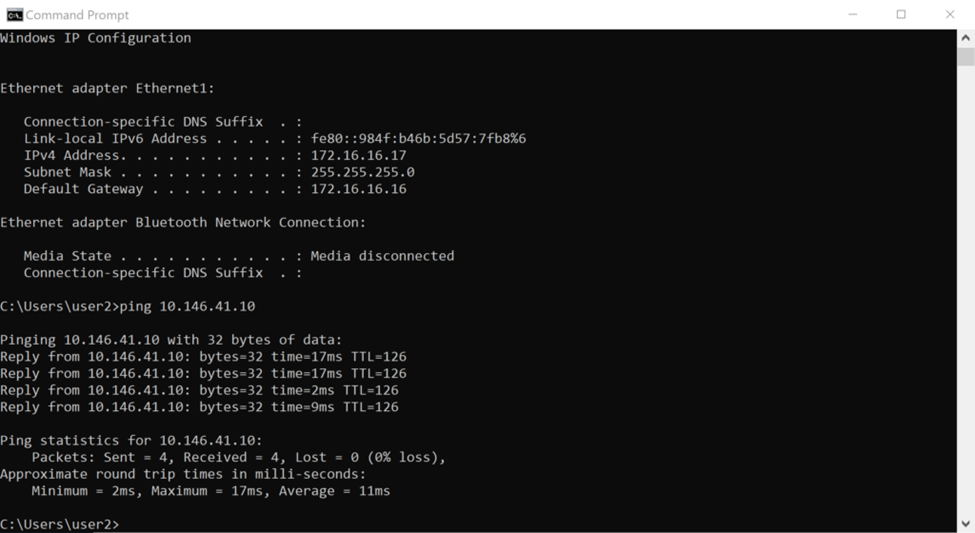
At the Head Office site I have prepared a server with IP 10.146.41.10/24 and at the Branch Office site I have prepared a Windows 10 machine with IP 172.16.16.17/24.
Ping result from IP server 10.146.41.10/24 to Windows 10 machine.
Successful ping result.
Ping result from Windows 10 machine IP 172.16.16.17 to server.
Successful ping result.
Leave a Reply