
1.Overview
With the Password protect files for secure sharing feature, you can set passwords for important files when sending outside the business, increasing data protection. You can use this feature when enabled in the Device Encryption policy. This feature is only available in Central Device Encryption 2.0 and can only be used for Windows.
This article will show you how to use the Enable right-click context menu feature in Password protect files for secure sharing.
2. Instruction
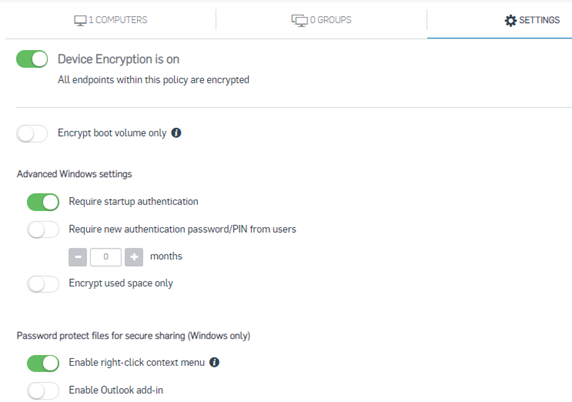
Step 1: Enable right-click context menu in Device Encryption policy.
When you create Device Encryption policy in Settings tab > Password protect files for secure sharing > Enable Enable right-click context menu.
If you turn on this option, a Create password-protected file option appears on the right-click menu. Users can attach password-protected files to emails when sending sensitive data to recipients outside your corporate network. Files are wrapped in a new HTML file with encrypted content.
Recipients can open the file by double-clicking it and entering the password. They can send the received file back and protect it with the same or a new password, or they can create a new password-protected file.
Step 2: Create a password to protect the file.
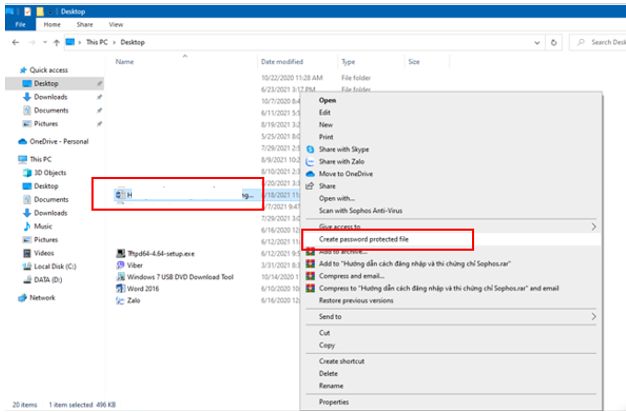
After the Device Encryption policy is applied to the device and has finished encrypting the drives, you can create a password for an important file when sending it by right-clicking on the file and selecting Create password-protected file.
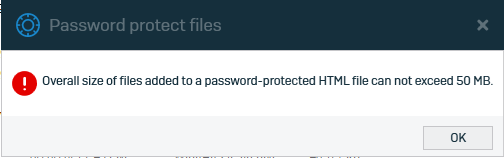
Note: Enable right-click context menu is only used with files under 50MB. If a file larger than 50 MB is selected, the following message will appear.
With the folder, you should compress it and then set a password.
You proceed to enter the password for the file. You should set a password with difficulty including letters, numbers, capital letters, and special characters.
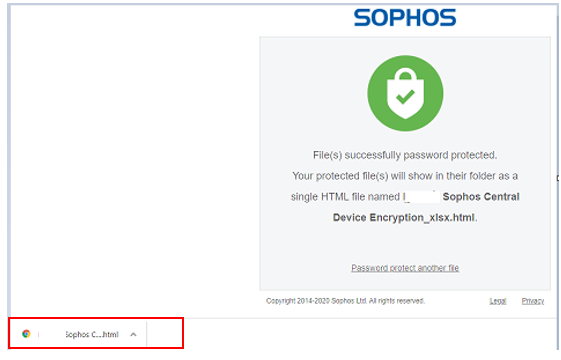
Click Create.
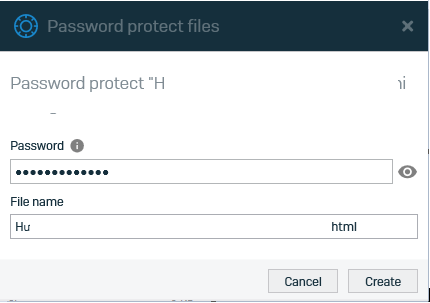
After setting the password, the new file will be converted to html format, the original file will still be in the old format. You will send this html file.

You can send this file via chat channels or email.
Step 3: The recipient opens the file.
When the recipient receives the file, chooses to open the file, you will be redirected to a web page to enter the password to open the file.
Note: The password to open the file should not be sent together in the recipient’s email or chat channel, so it should be sent separately through another method for more security.
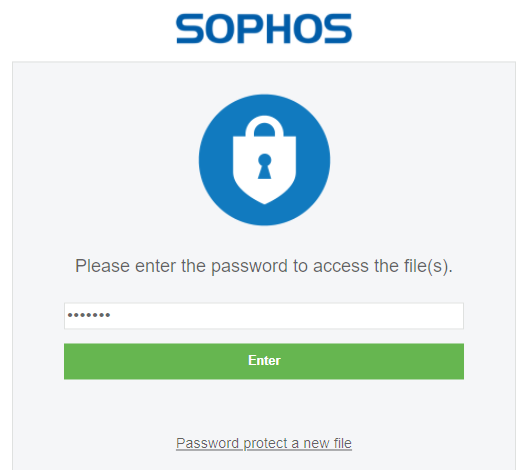
After entering the password the file will be downloaded in its original format and can be read normally.
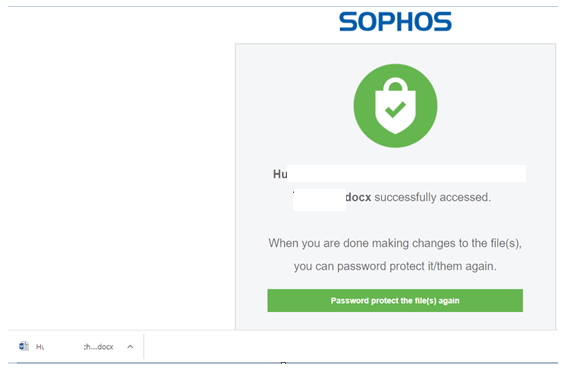
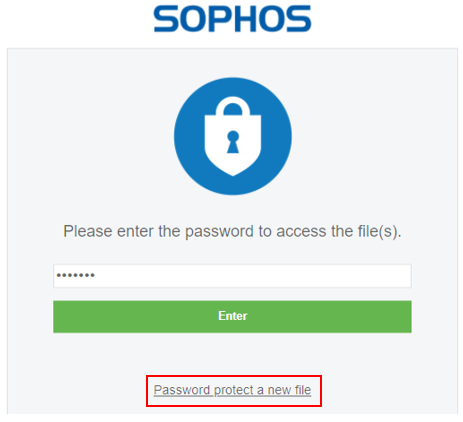
The receiver can also create a password for the file by entering the password interface to open the file and select Password protect a new file.
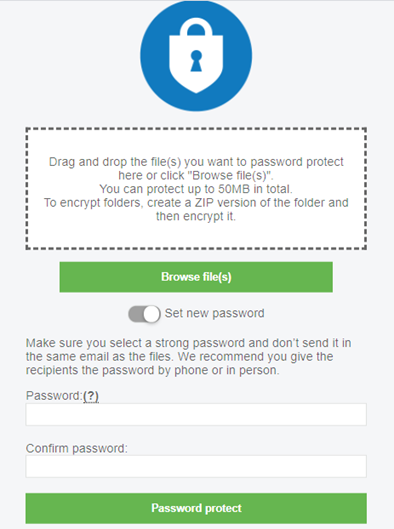
Select Browse file > select the file to set password > Set Password and Confirm password.
Finally, click Password protect, the file will also convert to html format.
Leave a Reply