
STEP 1: SETUP IPsec VPN AT THE HEADQUATER OFFICE
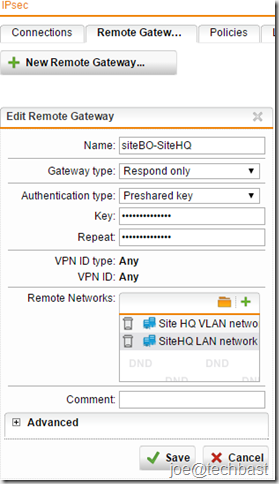
- The first, you must define Remote Gateways for site-to-site VPN tunnels. Go on the Site-to-site VPN > IPsec> Remote Gateways tab.
- Click New Remote Gateway button to create new gateway.
- Make the following settings:
- Name: Descriptive name of remote gateway
- Gateway type: select the type of gateway mode:
- Initiate Connection: Select if the remote endpoint has a static IP address so that a connection to the remote gateway can be initiated by the gateway.
- Respond Only: Select if the IP address of the remote endpoint is unknown or cannot be resolved through DynDNS. The gateway is not able to initiate a connection to the remote gateway but waits for incoming connections to which it only needs to respond.
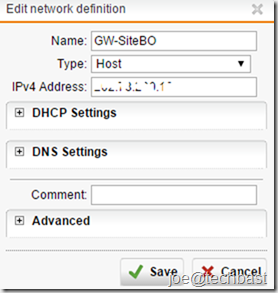
- Gateway (if selected initial connection): you must create gateway of site branch office.
- Authentication type: can select such as
- Preshared key: Authentication with Preshared Keys (PSK)
- RSA key: Authentication using RSA keys
- Local X.509 certificate
- Remote X.509 certificate
- VPN ID type: Depending on the authentication type you must select VPN ID type and VPN Identifier. you can select among the following VPN ID types:
- IP address
- Hostname
- Email address
- Distinguished name: only when you selected local X.509 Certificate authentication.
- Any: default when you selected Respond only gateway type.
- Remote Network: add network need to remote of Branch Office site.
- Make advance setting if necessary
- Click “Save”
2. To create an IPsec Connection, proceed as follows:
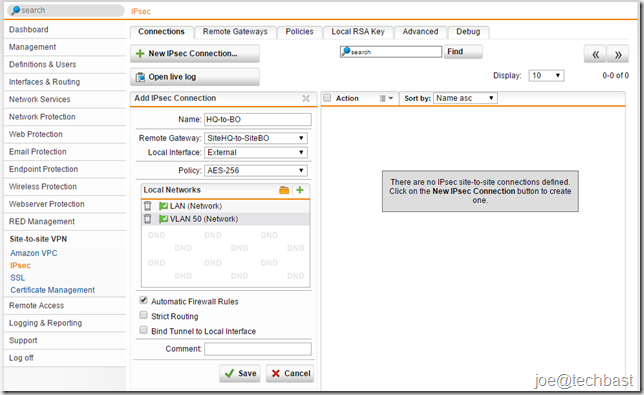
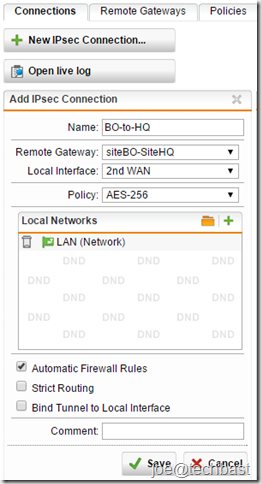
- On the Site-to-site VPN > IPsec> Connections tab, you click button “New IPsec Connection” to create new connection
- Make the following settings:
- name: Descriptive name for IPsec connection
- Remote Gateway: select remote gateway created above.
- Local interface: select interface using connect VPN IPsec.
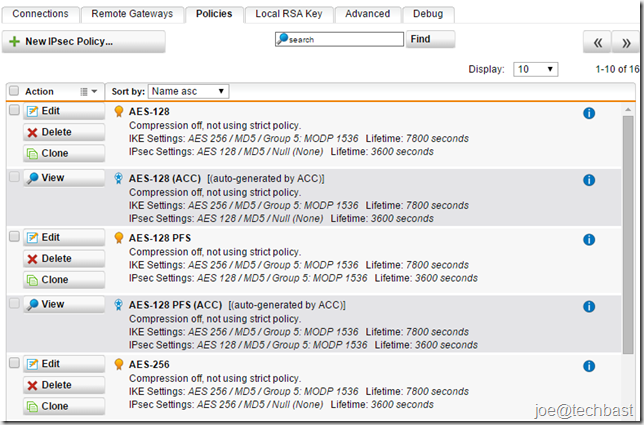
- Policy: You can define new policy at the Site-to-site VPN > IPsec> Policies tab. Or use default policy such as:
- Local Network: select network local of Head Quarter site.
- Click “Save”.
3. When you configure finished you can see status IPsec at the site-to-site VPN
STEP 2: SETUP IPsec VPN AT THE BRANCH OFFICE
Configuring same as the Head Quarter Office.
- Configuring Remote gateway
2. Configuring IPsec connection
Note: select policy same as policy of Head Quarter Office.
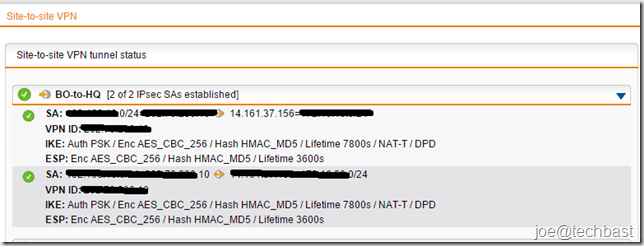
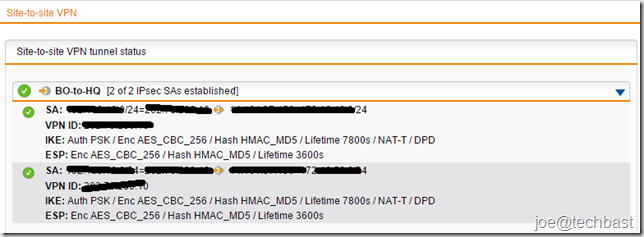
3. Views status Site-to-site VPN IPsec when configuration finished:
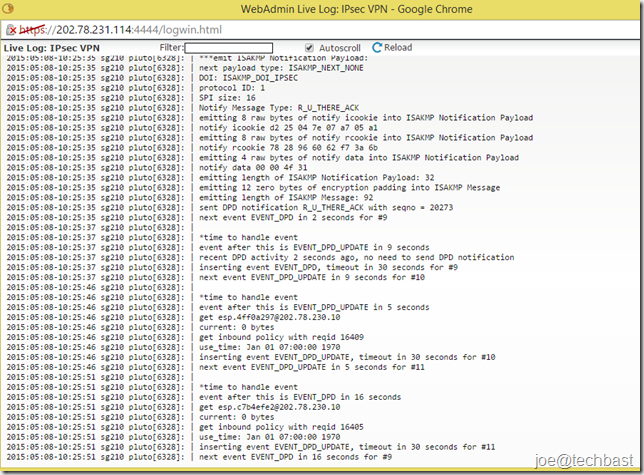
- Views live-log see proceed connection
- Before
- After
Done! I hope this guide can helps everyone. Thanks.


Please help we are using centurylink cloud and they offer site to site vpn which in our other location we are using sophos utm please help me set this up i am lost
Hi Chad Tew,
You can configuration with the custom IPsec Policy in Sophos UTM.
https://www.centurylinkcloud.com/knowledge-base/network/creating-a-self-service-ipsec-site-to-site-vpn-tunnel/
Please help with Site to Site Setup. UTM TO UTM
At “◾Remote Network: add network need to remote of Branch Office site.” , do I need to add the network of the remote site, or do I need to fill in the network of the local site?
Der Artikel am sich war gut nur eine Frage. Was ist dieses GW-SiteBO? Ich hab das bei mir nicht gefunden und habe keine Ahnung von dem Programm, da einzige Grund warum ich mit Sophos beschäftige wegen eines Schülerpraktikums ist. Schon mal danke im vor raus. LG Finn
GW-SiteBO is the IP Public of Branch Office: Gateway (if selected initial connection): you must create gateway of site branch office.
Click the Green Plus (+) Icon beside the GW-SiteBO,
=> Type: Host
=> IPV4 Address: the public IP of Branch office
=> Save
my site to site connection is stablished but i can not reach or ping ips in the remote network
when creating Remote networks: which ipv4 address i should add ??