Overview
- This article provides the steps to block Coc Coc Browser and Zalo chat on Sophos XG Firewall.
- To block Coc Coc and Zalo we first enable Security Heartbeat and Synchronized Application Control
Configuring.
- How to enable Security Heartbeat
- This article provides the steps to enable Security Heartbeat on Sophos XG Firewall.
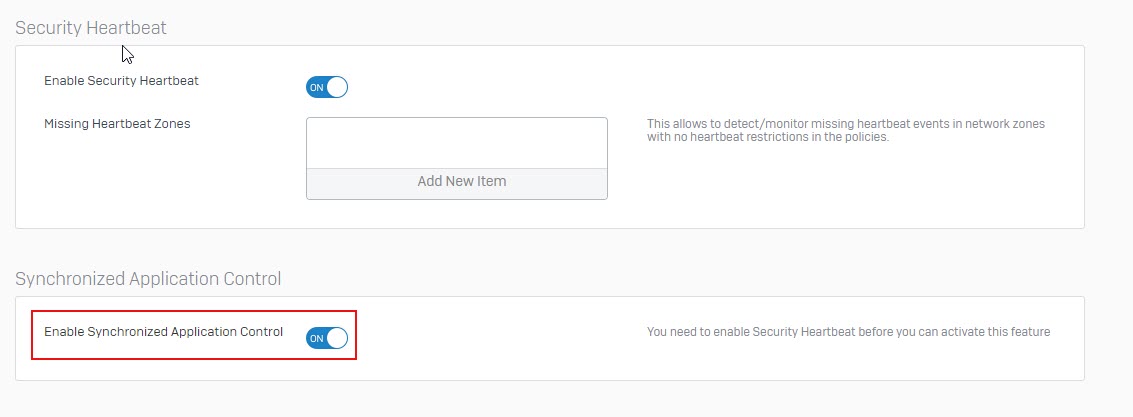
- Enable Security Heartbeat
- Login to Sophos Admin Console.
- Click Synchronized Security.
- Add the Email Address and Password for the Sophos Central Admin account to sync with the firewall. Click Register.
- Security Heartbeat is now enabled.
- Verify if Security Heartbeat is enabled
- Login to the Sophos Central Admin account that is synchronized with the XG Firewall.
- Go to Settings in the left hand navigation.
- Click Registered Firewall Appliances. The serial number of the firewall synced with the Sophos Central account should now show up.
- How to configure Synchronized Application Control (SAC)
- Overview
- Synchronized Application Control (SAC) is an extension of Application Control (AC), therefore, AC has to be enabled in the firewall rule controlling the traffic. Every application that utilize TCP connection and is related to an executable, is reported by the endpoint. Clients needs to install endpoint protection or intercept X or both, then attend the Early Access Program (EAP) if needed. Only connections that are not known by the IPS application control are reported by SAC.
- This article illustrates a detailed description on how to configure Synchronized Application Control.
- Sophos Central Account is needed to enable SAC. The SAC feature on Sophos XG Firewall receives information from the endpoints via the heartbeat, therefore, security heartbeat feature is needed.
- How to configure SAC
- After registering the Sophos XG Firewall with Central Account, go to Synchronized Security and under Synchronized Application Controlsection, tun the Enable Synchronized Application Control feature ON.
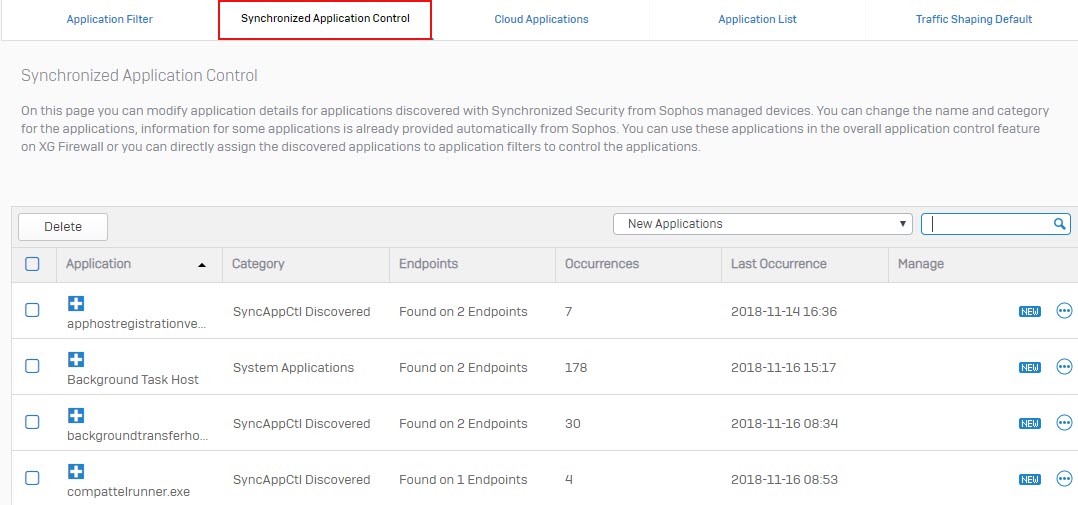
- As soon as Sophos XG Firewall receives the next heartbeat, the applications not known to IPS application control are listed in synchronized application control under Applications > Synchronized Application Control.
- Applications detected can be then customized by providing appropriate name, category.
- Based on the application category then appropriate policies can be enforced.
- Note
- Only applications or connections using TCP are reported by the endpoint. UDP connections are not be reported.
- At least 8 bytes data packets are needed to identify the threat/intrusion and to enforce the policy on the reported connections.
- A single application might run on multiple executable, therefore multiple executable might be reported by a single application. This might cause mismatch as some connections might already be handled by IPS application control.
- Configuring block Coc Coc browser and Zalo.
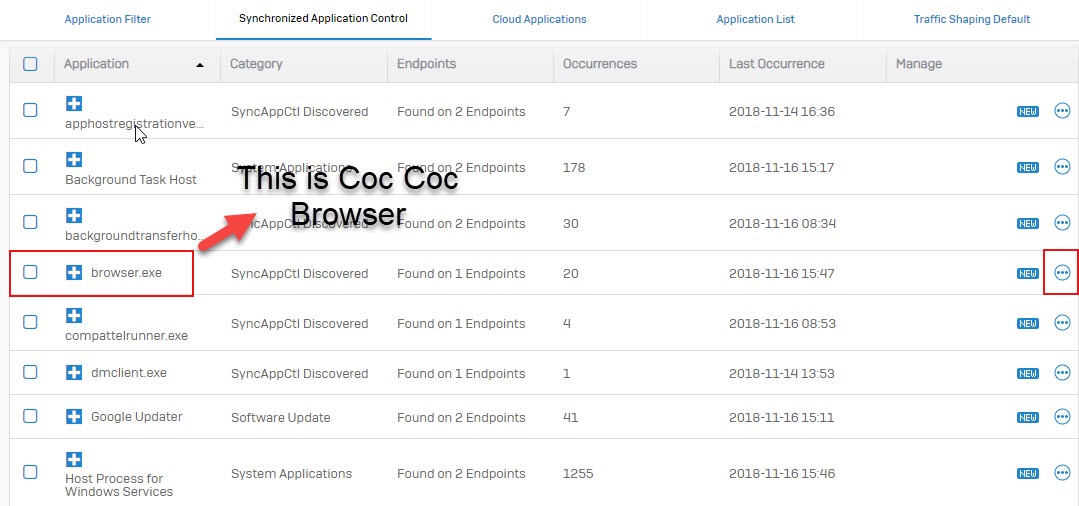
- Download and install browser Coc Coc after use Coc Coc to access website on client.
- At this time, the Sophos XG firewall has detected the recently used Coc Coc browser.
- On Sophos web admin, click Application -> Synchronized Application Control to see and click icon -> Customize to edit.
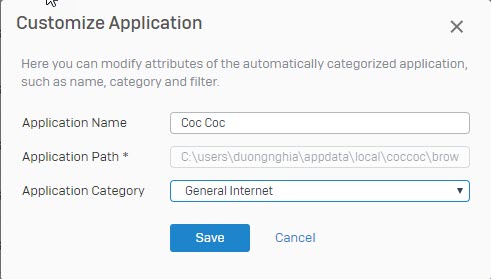
- Enter the parameters like Application Name is Coc Coc, Application Category : General Internet and click Save.
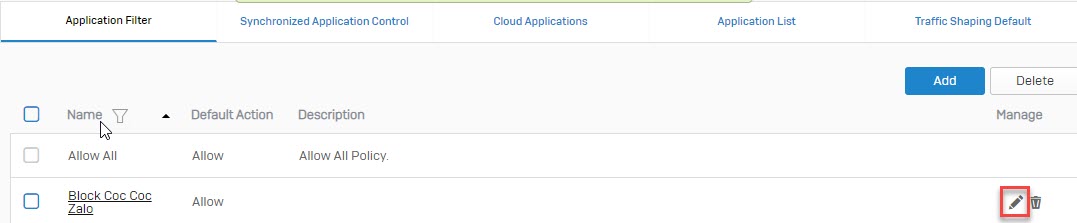
- In Application, click Application Filter -> click Add to create Rule.
- Enter the parameter and click Save.
- Click the pencil icon on the right hand side of the rule created to config rule.
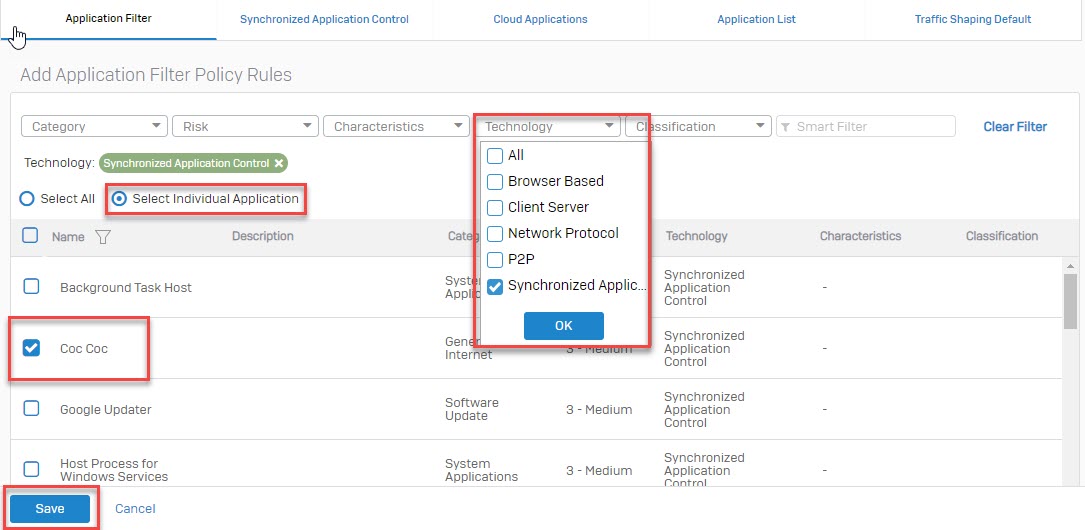
- Click Add to add sofware that we need blocking.
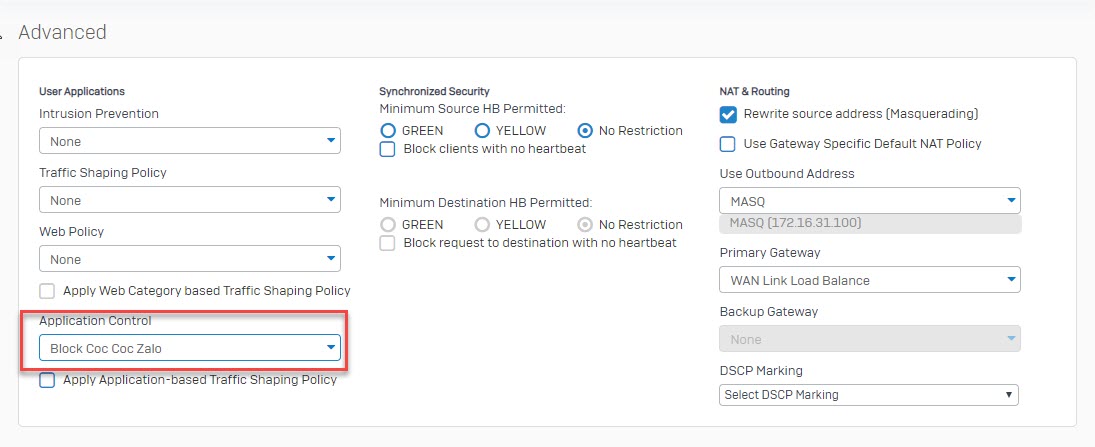
- Click Technology -> select Synchronized Application Control and select Coc Coc.
- Click Save to Save.
- In Application Filter, click ‘x’ in Synchronize Application Control and click Category select Instant Message.
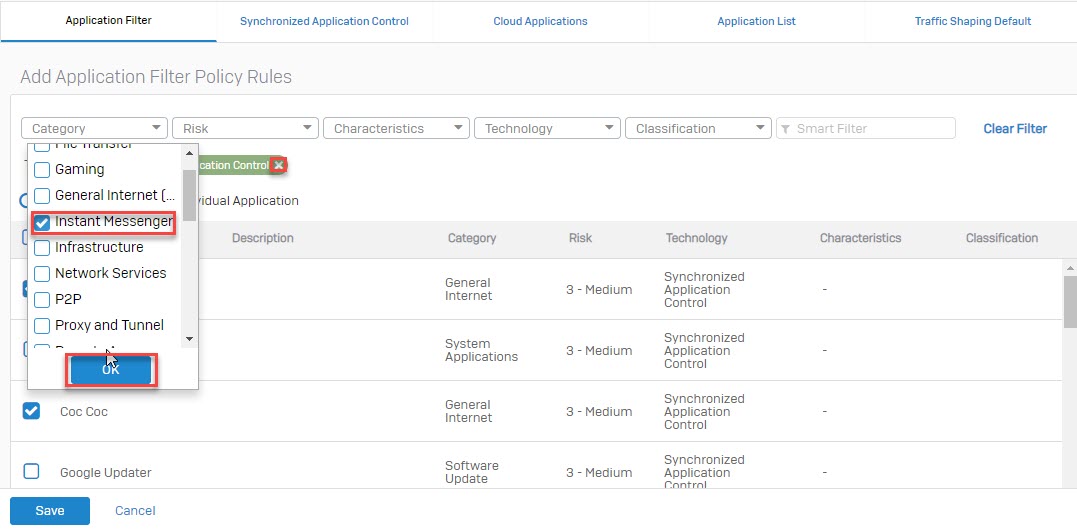
- Find and seclect Zalo, select Deny and click Save to Save Rule.

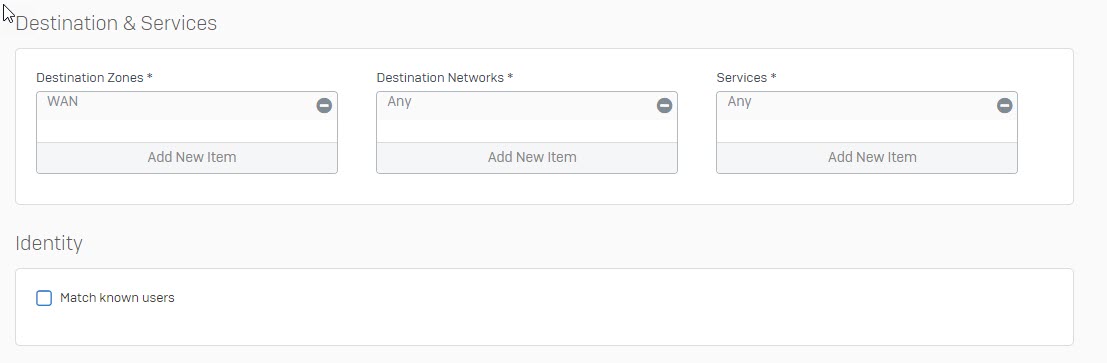
- Go to Firewall -> Add Firewall Rule -> User/Network to create Firewall Rule and apply Application Rule create.
- Enter the parameter as shown below.
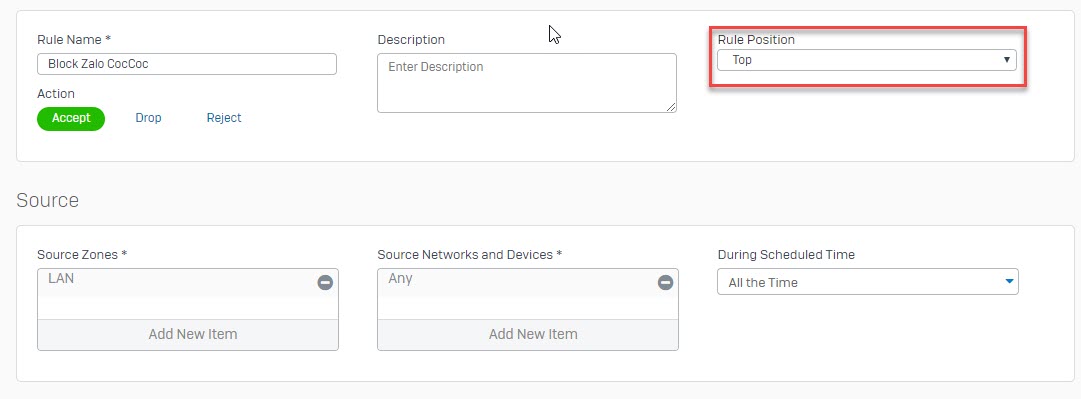
- Click Save to Save rule.
- I hope that this tutorial will help you solved the problem.
- Thank for watching.
Leave a Reply