
Overview:
- This guide is intended to help you install and get up,running with Sophos iView v2 and connect a Sophos Firewall to the Sophos iView for detailed reporting and diagnostic information.
Reports for Device Type:
- iView v2 provides reports for following device types:
- Sophos Firewall OS
- Sophos UTM 9
- CyberoamOS
Licensing:
- Sophos iView licenses are available in multiple tiers based on storage requirements and support terms offering great value for any size organization.
- A limited capacity (100GB) version is available at no charge for evaluation, or for small customers who don’t need to store data for extended periods. Paid licenses are available for 500 GB, 1TB, 4 TB, 8TB, and unlimited storage requirements.
- After Device Registration and License Activation, the Storage Subscriptions in iView are perpetual while the Support Subscriptions need to be renewed periodically.
| Sophos iView License | Storage Limit | Recommended CPU ** | Recommended Memory (vRAM) | Network Interface support (Minimum / Maximum) |
Approximate event capacity |
|---|---|---|---|---|---|
| iView Light* | 100 GB | Dual core | 4 GB | 1 / 4 | Short-term evaluation only |
| iView 500 GB | 500 GB | Dual core | 4 GB | 1 / 4 | Up to 300 events per second |
| iView 1 TB | 1 TB | Dual core | 4 GB | 1 / 4 | Up to 300 events per second |
| iView 4 TB | 4 TB | Quad core | 4 GB | 1 / 4 | Up to 600 events per second |
| iView 8 TB | 8 TB | Quad core | 4 GB | 1 / 4 | Up to 600 events per second |
| iView Unlimited |
Unlimited (16 TB recommended) |
Quad core# | 8 GB | 1 / 4 | Up to 2000 events per second |
Event capacity varies with CPU family and hardware specs
* Free for evaluation purpose
** CPU frequency 2.7 GHz or equivalent
# CPU frequency 3.1 GHz or equivalent
Install iView
Download
- iView v2 is available as Virtual Appliance or as Software Appliance (on custom hardware).
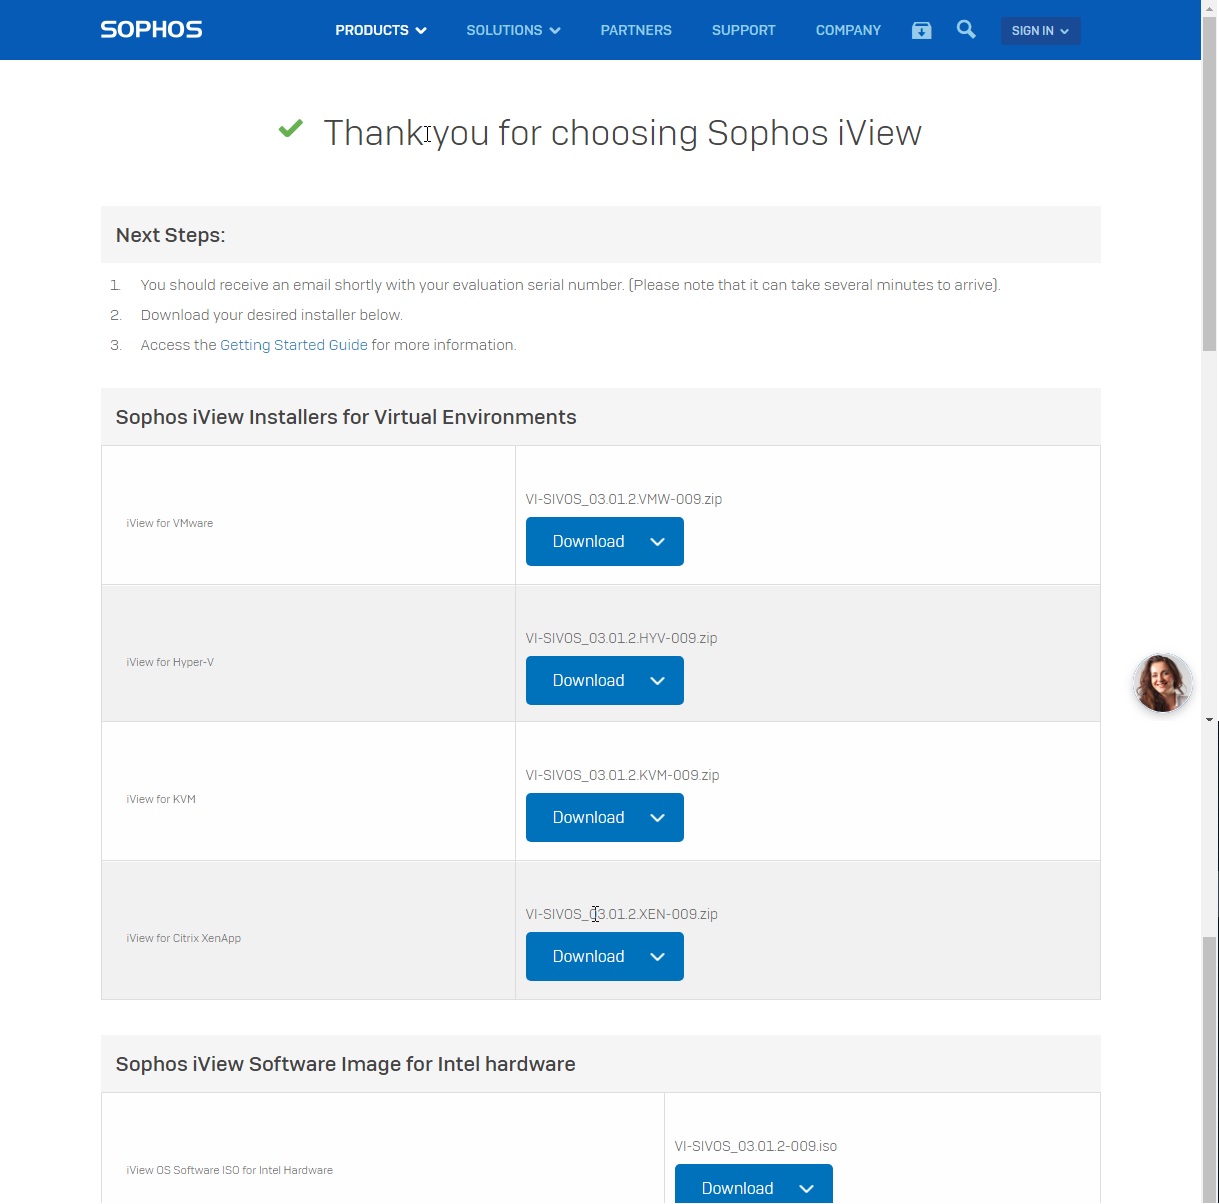
- 1.Click the link – https://sophos.com/en-us/products/next-gen-firewall/free-trial/iview.aspx to register for MySophos account (or login your sophos account and do step 3) and download the virtual or software appliance for Sophos iView v2.
- 2.To register for MySophos Account, fill in the required details as highlighted in the image below and click Submit.
- After download the virtual image for your iView appliance, as highlighted in the image below:
Deploying a Virtual or Software Appliance
- Virtual Appliances:
- VMware Virtual Machine (VMware Workstation, ESXi_Server)
- Xen Virtual Machine
- Hyper-V Virtual Machine
- KVM Virtual Machine
- Import the VM file into your hypervisor of choice, and set the hardware specs for your Sophos iView VM.
Software Appliances (ISO File)
- The downloaded ISO file can be installed on the custom hardware using an Installer. To create the Installer, refer the next section.
- Creating an Installer
- For Software installs, you’ll start with an ISO. Write the ISO to a standard USB thumb drive to start the installation.
- On Windows:
- 1. Download and run the Win32 Disk Imager utility (http://sourceforge.net/projects/win32diskimager/)
- 2. Run the utility, and browse for the downloaded ISO file. The application will default to looking for .IMG files. Be sure to change the file filter to (*.*), then locate and select the iView ISO file.
- 3. Select the USB thumb drive you wish to install the ISO on. The thumb drive should be at least 1GB in size, and writing the ISO to it will erase any data it currently contains.
- 4. Once the process is complete, your thumb drive is ready to use.
- On OSX:
- 1. Open the Disk Utility included on OSX.
- 2. Locate the thumb drive in the list of disks.
- 3. On the partitions tab, change the volume scheme to “1 partition”, and the format to “Free Space”, then click apply.
- 4. You’ll need to convert the downloaded ISO file into a new format. Open a terminal window, and navigate to the path where the ISO is stored.
- 5. Run the command: hdiutil convert -format UDRW -o VI-SIVOS_ 02.00.0-092.iso The converted ISO will be /can be named iview.img.dmg
- 6. Next, locate the device path of the USB device, by running diskutil list. For example, let’s say your USB thumb drive’s path is /dev/disk9 but be sure to use the actual path of your thumb drive.
- 7. Next, write the converted ISO to your thumb drive, with the following command: dd if=./iview.img.dmg of=/dev/rdisk9 bs=1m Note: – The of= path adds an “r” in front of the device path name. This is deliberate, and enables RAW disk access. You may leave the r out, but the process will go much more slowly. – You may need to run “sudo dd ” for the imaging to work on your system.
- 8. Wait a few minutes for the process to complete. When you return to a command prompt, the thumb drive will be ready, and can be ejected.
- 9. If you run into problems, see http://borgstrom.ca/2010/10/14/os-x-bootable-usb.html for more detailed instructions.
Installation process
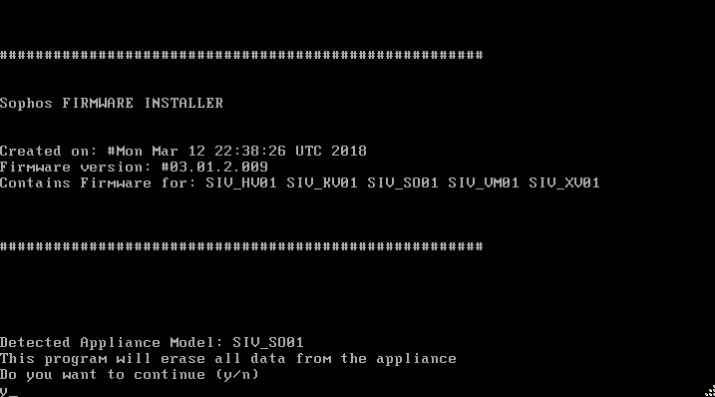
- Since this is a Software Appliance, you may need to change BIOS settings for the thumb drive to boot, if you are installing on your own hardware. You will also need to connect a monitor and keyboard, or a serial cable to the system to complete. You will need to respond to two prompts to begin the installation.
Booting
- When prompted, press y to start the install. The install progress will be shown on the screen, as it continues.

- Once the install is complete, remove the thumb drive, and reboot the device. Give it a couple minutes for the first boot to complete, and the system to be ready and running iView.
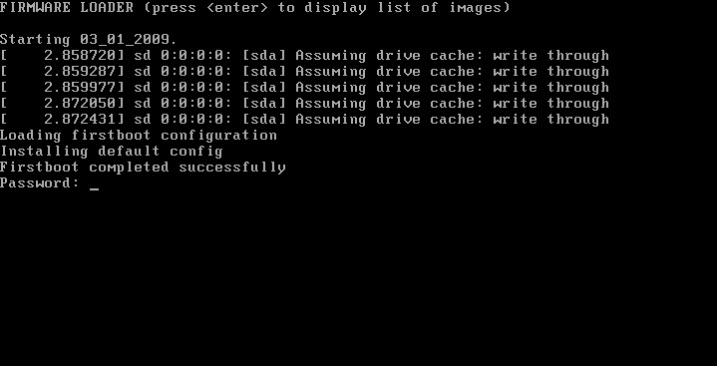
- At this point, the system is now running iView.
First-Time Device setup
Basic Setup
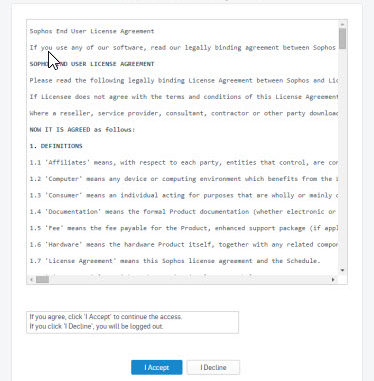
- Open the Web Admin UI from http://172.16.16.18 or https://172.16.16.18:443 using initial credentials admin /admin. The End User License Agreement is displayed, carefully read the agreement and click I Accept to continue.
- Click Basic Setup and complete the device’s Basic Setup so that device will be able to connect to the Internet for Activation.
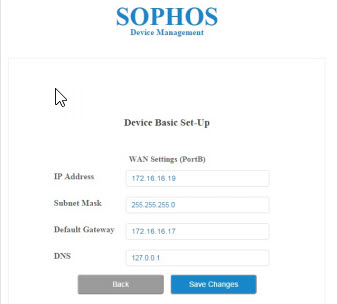
- Note:
- To active device successfully, make sure the WAN, DNS and Default Gateway are configured correctly to reach to the internet connection.
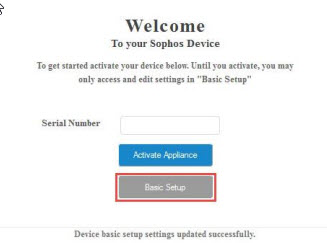
Device Activation
- You should have received an email with the Serial Number on the email address provided while downloading the iView v2 Partner Beta image.
- After Basic Setup is done, enter the Serial Number and click Activate Appliance. Your device will be activated successfully.
Device Registration
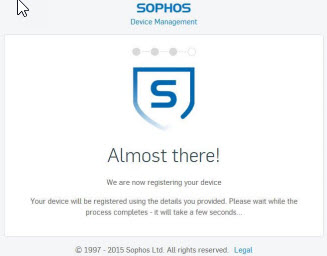
- After Activation, click Register Device to register your device.
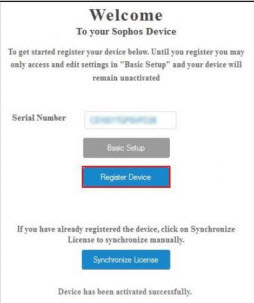
- As highlighted in the image below, under ‘I have an account already’ section, provide the login credentials you configured while registering for MySophos Account

- Click Continue and your device will be registered.
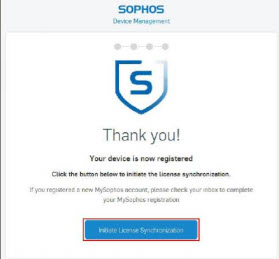
Synchronize License
- After Registration, click Initiate License Synchronization to start license synchronization on the device
Integrate with Sophos Firewall
On XG Firewall
- Login to Web admin console by your account.
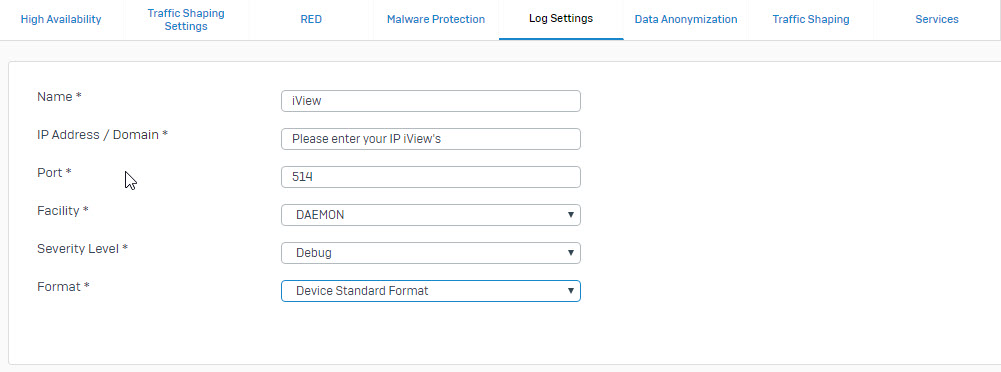
- Go to System Services -> Log Settings and click Add under Syslog Servers.
- Fill in the settings as described below
- Name: A common name for the server.
- IP Address/Domain: The IP or domain name of the Sophos iView appliance.
- Port: 514 (Default).
- Facility: Daemon (information of services running in device as daemon).
- Severity Level: Debug (The device logs all information at the severity level selected and above, selecting Debug will give you all severity levels).
- Format: Device Standard Format.
- Click Save to save.
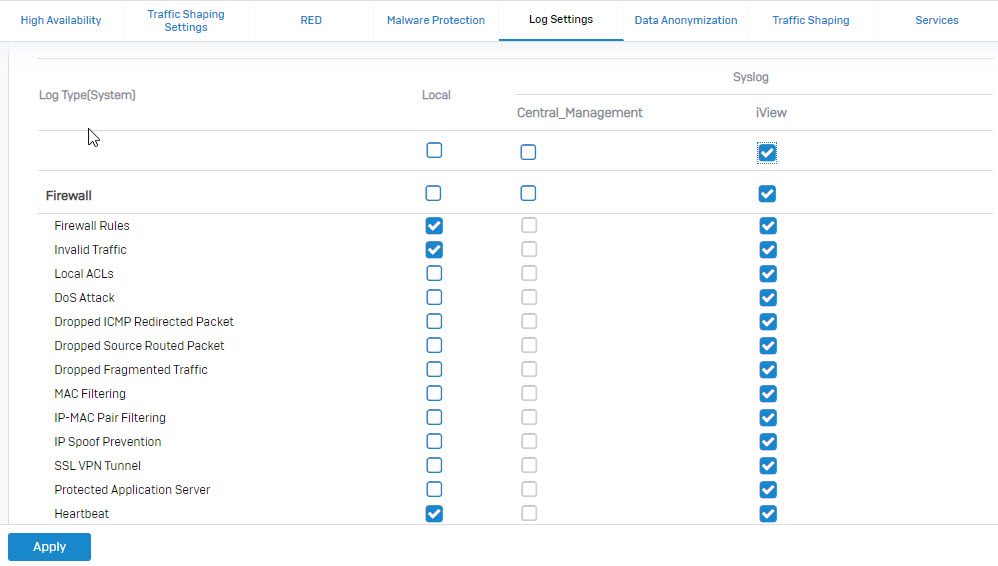
Enable logging on Syslog Server
- Go to System Services > Log Settings and enable the added syslog servers to receive log and Click Apply.
Sophos iView configuration
- Browse to the IP address of the Sophos iView: <http://<IP address of the Sophos iView>. Sophos iView automatically detects the added SF devices and prompts administrators when they log in.
- Enter the Device Name. Select the Device Type from the drop down list and click Save.

- Result : All log from Sophos XG Firewall will sync to Sophos iView.
- For see it click Report on Sophos iView.
I am continuously browsing online for tips that can benefit me. Thank you!
Thanks for watching!