
Overview
Currently businesses are constantly expanding production and business, so remote and continuous data connection is safe and an urgent requirement. However, not all businesses can pay for the cost of leasing a separate channel for internal connections between the office and the branch. To save costs, VPN is the solution that is always chosen by businesses. In addition to cost savings, VPN also helps businesses secure their important data by encrypting data with IPSec protocol and now SSL
Guide to config
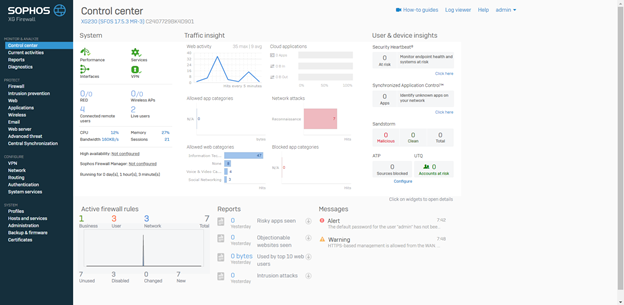
- Log on to Sophos XG by Admin account
- Authentication -> Group -> Click Add
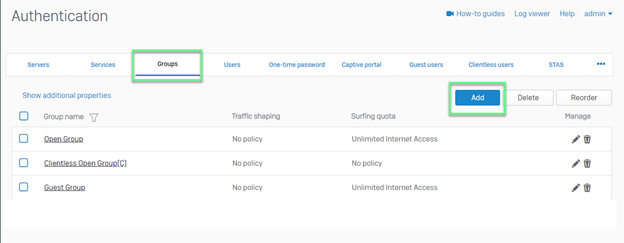
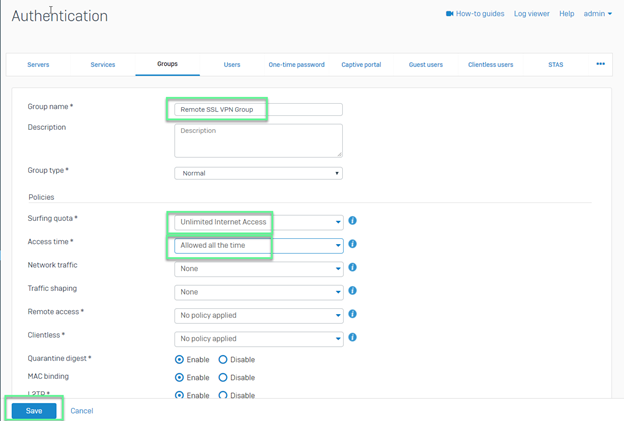
- Create SSL VPN Group
- Group Name: Enter Remote SSL VPN Group
- Surfing Quota: Choose Unlimited Internet Access
- Access Time: Choose Allowed all the time
-> Click Save
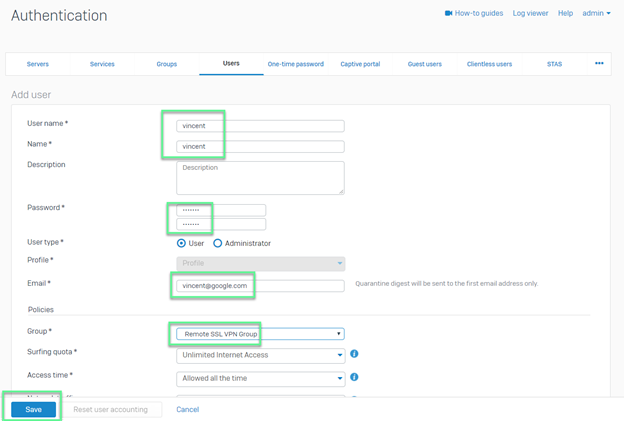
- Create SSL VPN users
- Username: Enter vpn’s user
- Password: Enter SSL VPN user’s password
- Email: Enter user’s email
- Group: Choose SSL VPN group which was created before
-> Click Save
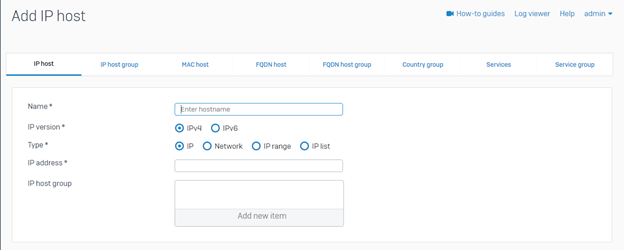
- Hosts and Services -> Choose IP Host
- With configuration define the intranet layer
- Name: Enter Local subnet
- Type: Choose Network
- IP Address: Import LAN’s IP
-> Click Save
- With IP configuration defined for SSL VPN Clients
- Name: Enter Remote SSL VPN range
- Type: Choose IP range
- IP Address: Import IP range which you want
-> Click Save
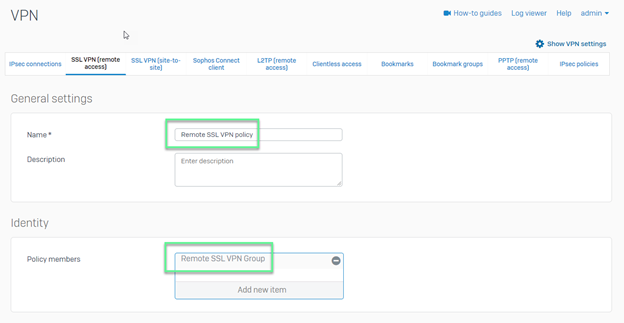
- VPN -> SSL VPN (Remote Access) -> Click Add
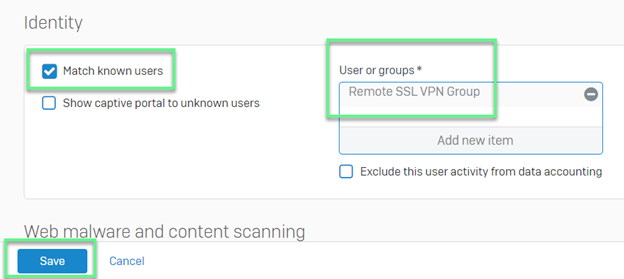
- Name: Enter Remote SSL VPN policy
- Policy members: Choose Remote SSL VPN Group
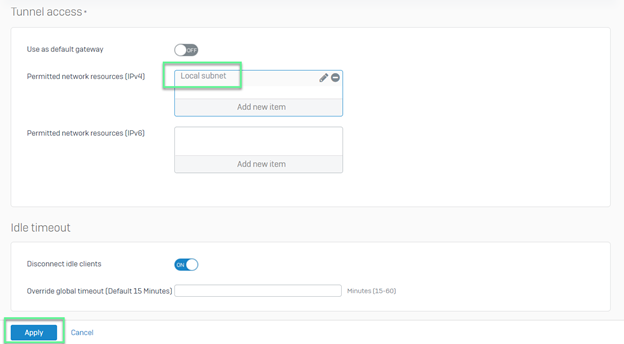
- Permitted network resource (IPv4): Choose Local subnet
-> Click Apply
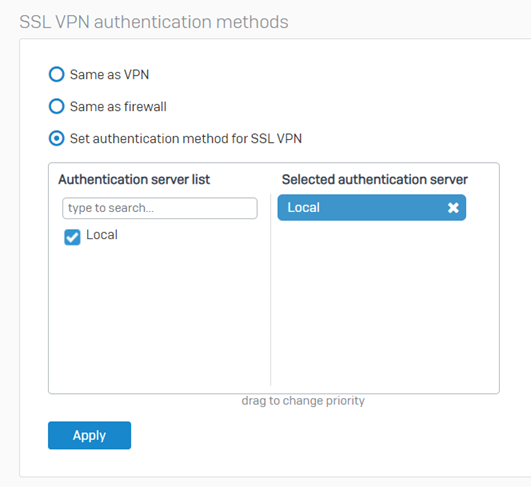
- Authentication -> Services -> Check in SSL VPN Authentication Methods -> In Selected Authentication Server, choose Local
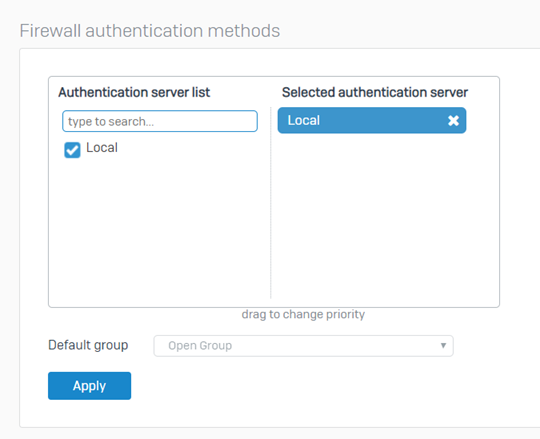
- Authentication -> Services -> Check in Firewall Authentication Methods -> In Selected Authentication Server -> Choose Local
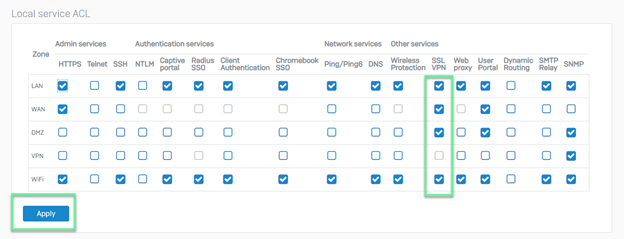
- Administration -> Device Access -> Tick in SSL VPN at WAN and LAN -> Click Apply
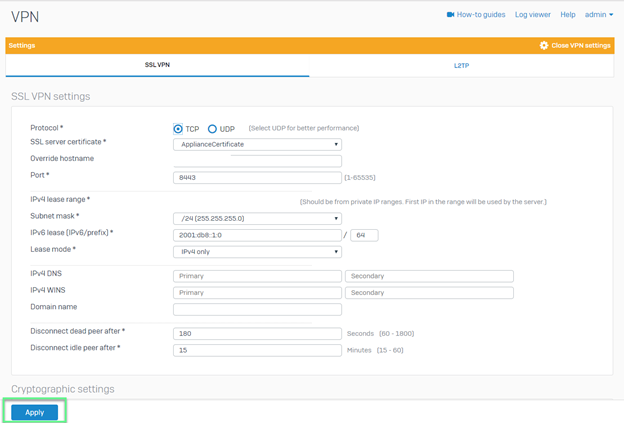
- VPN -> Show VPN settings
- Override hostname: Enter the IP of the end of the SSL VPN tunnel at the site -> Nhấn Apply
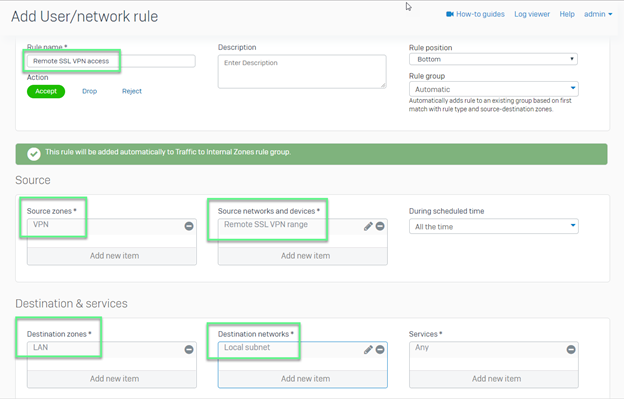
- Firewall -> Click Add Firewall Rule -> Choose User/Network Rule
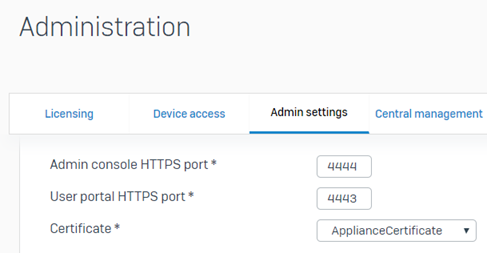
- Log on Sophos User Portal: https://ipfirewall:4443
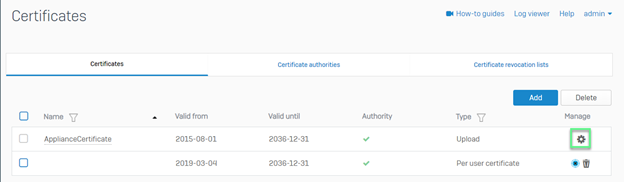
** If you can not download file on User Portal -> Choose Certificates -> Choose Certificates Authorities -> Choose Default to edit Default certificates -> Fill out all information -> Click Save
-> Click Regenerate certificate
- Choose Download Client and Configuration for Windows -> Install file which was downloaded -> Double click in SSL VPN icon

-> Connect VPN with username and password of SSL VPN user which was created before
Leave a Reply