
Purpose of the article
- This article describe how to configure SSL VPN remote users to have access over a site-to-site IPsec
Diagram and Scenario
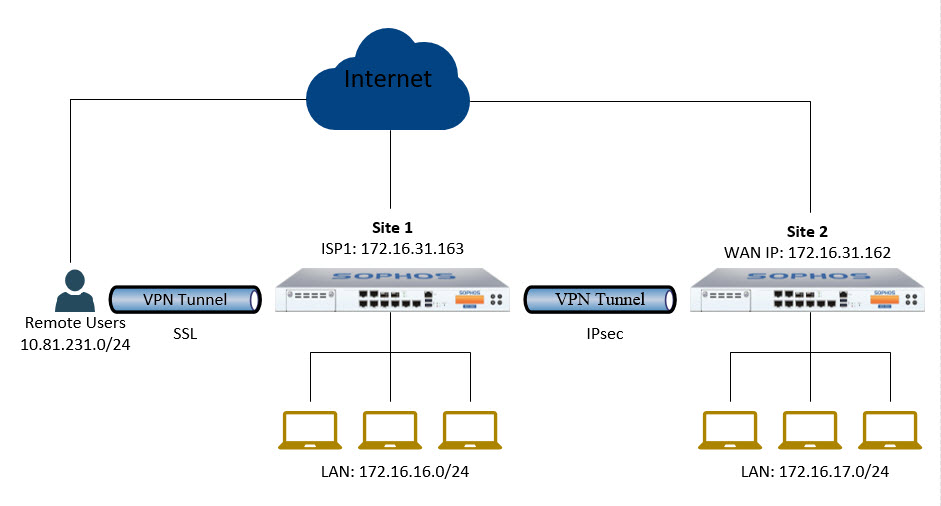
- We will configure SSL VPN on Site 1 to Remote Users can remote access into Site 1 via SSL VPN.
- After configuring SSL VPN and user will access successfully into Site 1 and ping the Site 1 LAN but the users cannot ping the Site 2 LAN.
- To ping Site 2 we will create connection IPsec VPN between Site 1 and Site 2 access subnet of SSL VPN remote users can access Site 2 via IPsec tunnel.
Configuring
Configuring SSL VPN connection on Site 1
Create SSL VPN group and user
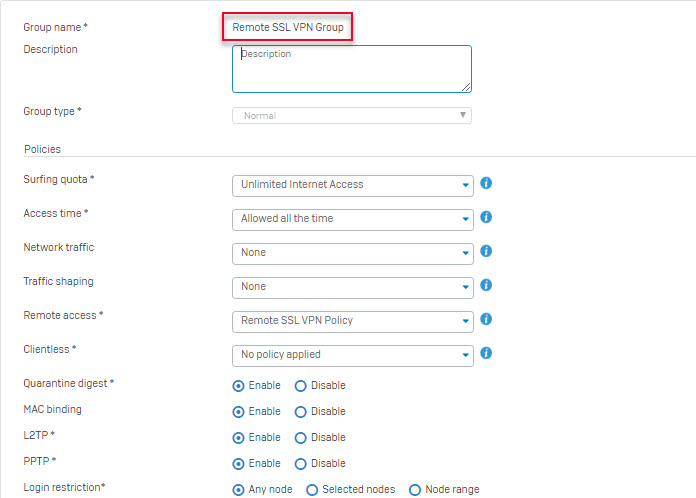
- Go to Authentication > Group and create a group for SSL VPN users.
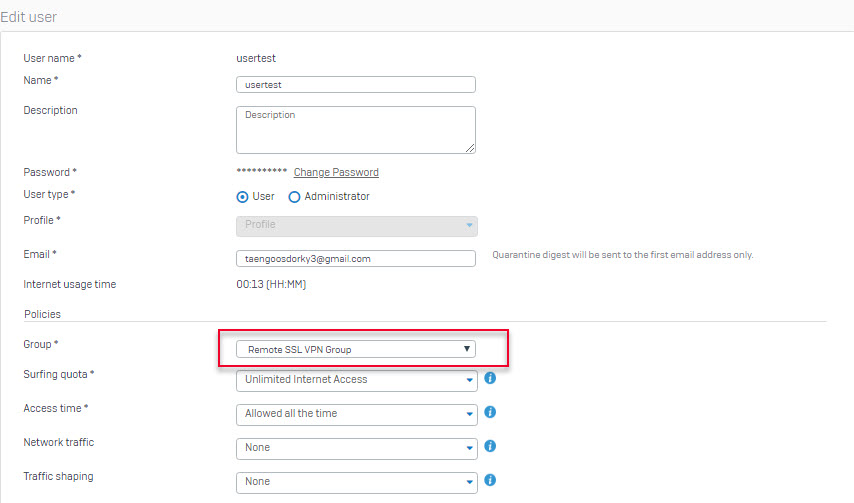
- Go to Authentication > Users and create SSL VPN remote users.
Create local subnet and remote SSL VPN subnet
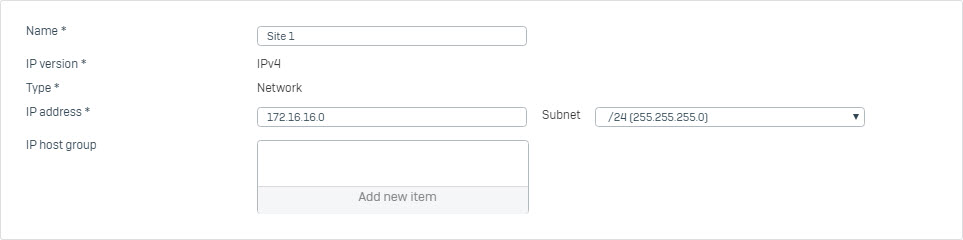
- Go to Hosts and Services > IP Host and create local subnet behind Site 1.

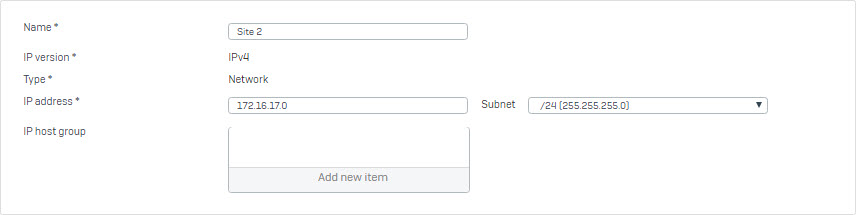
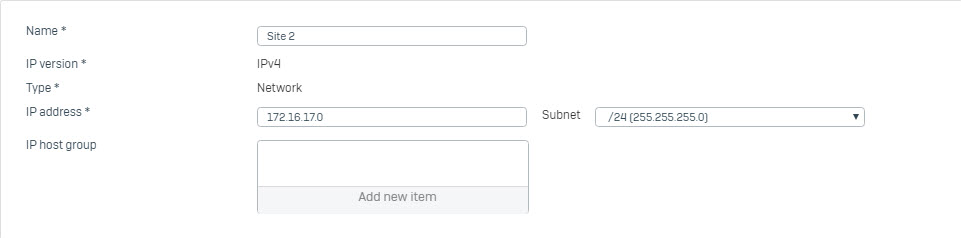
- Go to Hosts and Services > IP Host and create local subnet behind Site 2.
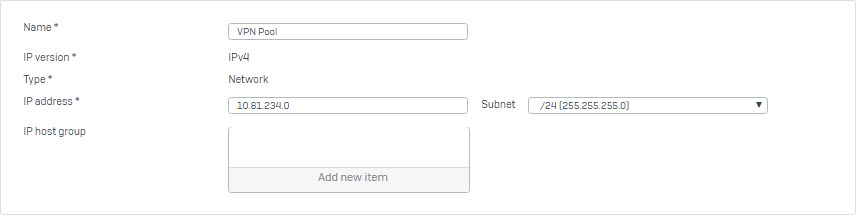
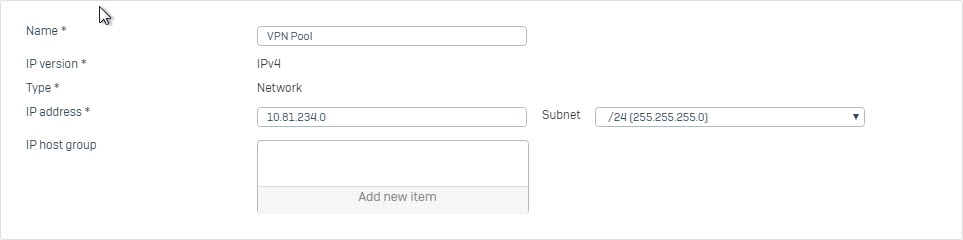
- Go to Hosts and Services > IP Host and create remote SSL VPN subnet.
Configure remote SSL VPN policy
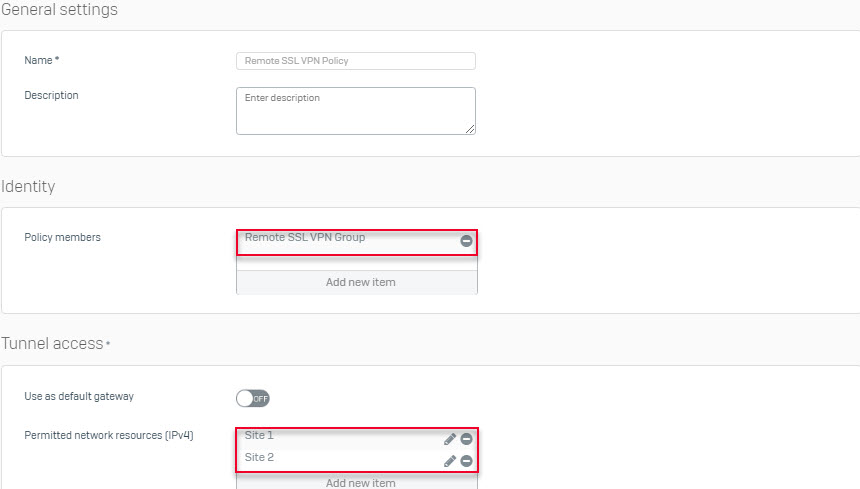
- Go to VPN > SSL VPN (Remote Access) and select Add to create SSL VPN policy with the following information.
- Verify authentication service for SSL VPN.
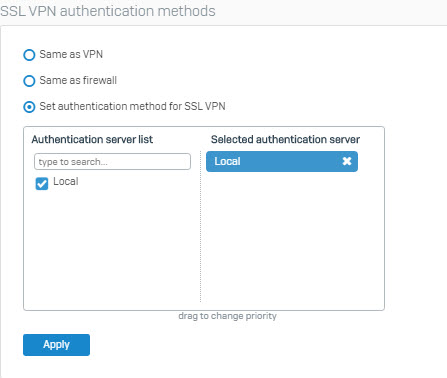
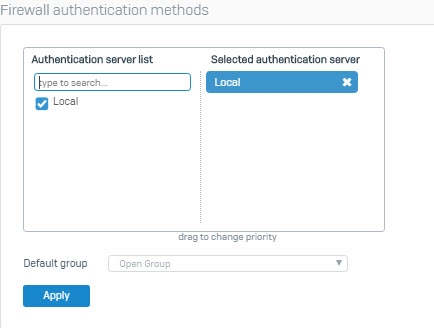
- Note: Also make sure that Local authentication server is selected under Firewall Authentication Methods section. This is needed for remote users to logon to the portal to download the SSL VPN client software later in this article.
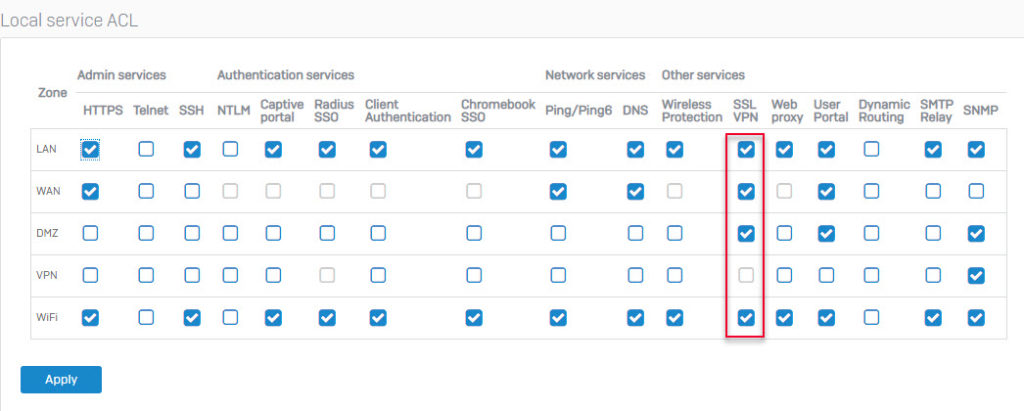
- Verifying the allowed zones for SSL VPN
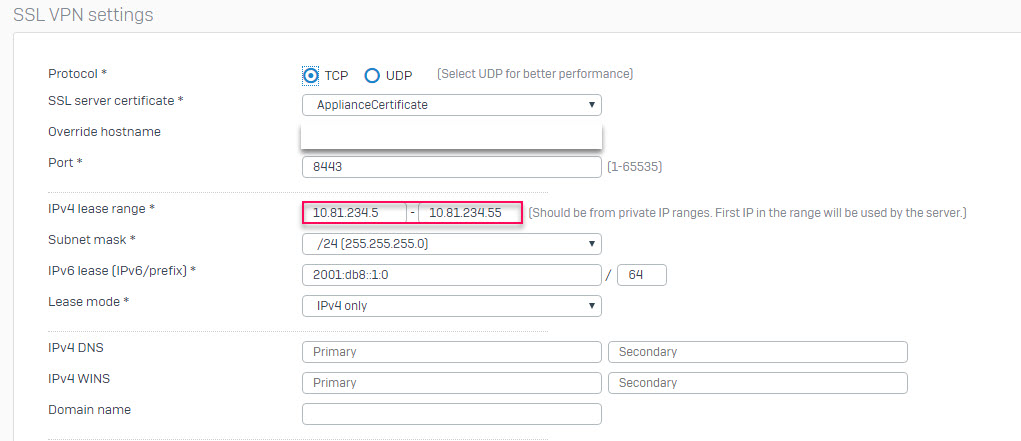
Configure SSL VPN setting
- Go to VPN and select Show VPN setting.
- In Override hostname, we will enter the public of the network they are using, to see we can access website whatismyip.com.
- In the IPv4 lease range, this is the IP range provided when the user accesses the SSL VPN remotely, we need to set this IP range within the remote SSL VPN subnet we created above.
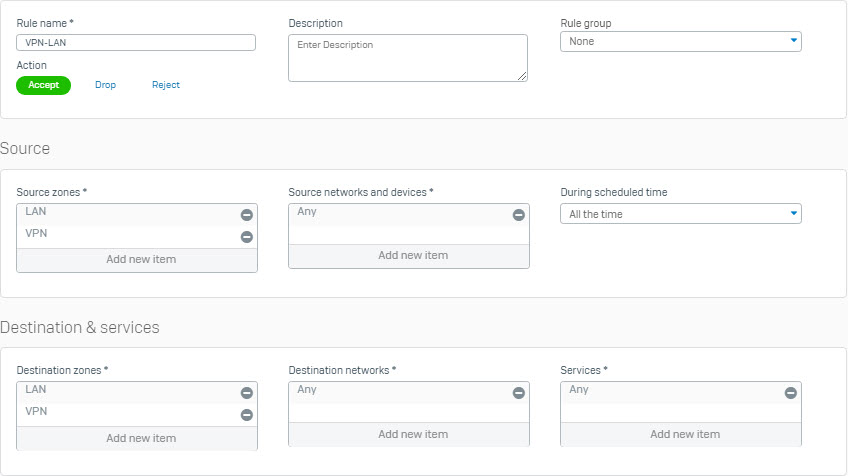
Create firewall rule for SSL VPN traffic with the following information
Configure SSL VPN Client
Download the SSL VPN Client Sofware
- Open browser, logon user portal by Sophos Firewall’s ip public and port https user portal.
- For example in this articale , we will login by WAN IP of Site 1 with link is : https://172.16.31.163.
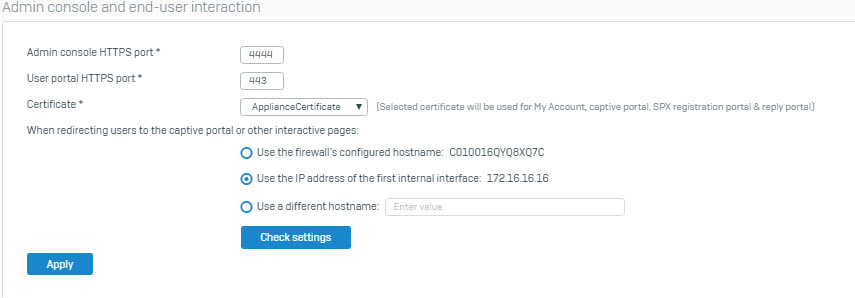
- Note: You can find the user portal https port configured in Sophos Firewall by going to Administration > Admin Settings under Port Settings for Admin Console section.
- We will login user portal by usertest account that we create above.
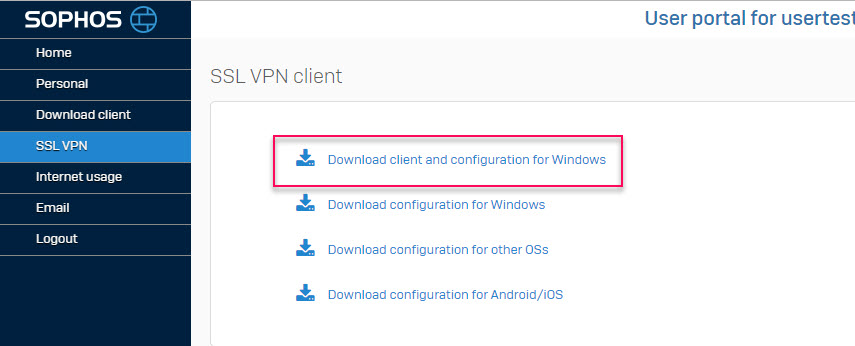
- Go to SSL VPN and click Download client and configuration for Windows to download it.
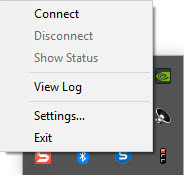
- After downloading and installing it according to the installer, when the installation is complete it will appear in the icon tray on the bottom right.
- We will right click on the icon and click Connect.
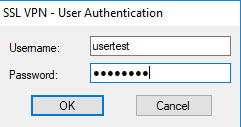
- Now that the login table pops up, we will enter the usertest password account.
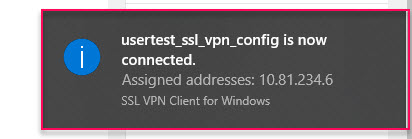
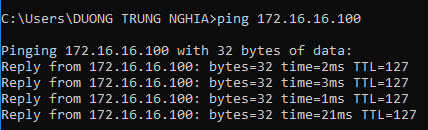
- After entering the account and clicking OK, we have successfully connected to Site 1 using SSL VPN and granted the correct IP with the IP range we have configured above, we will use the machine to ping a real machine period at LAN behind Site 1 to check.
- However, we cannot ping the LAN layer of Site 2, to do that we will configure IPsec between Site 1 and Site 2 to allow that.
Configure IPsec on Site 1
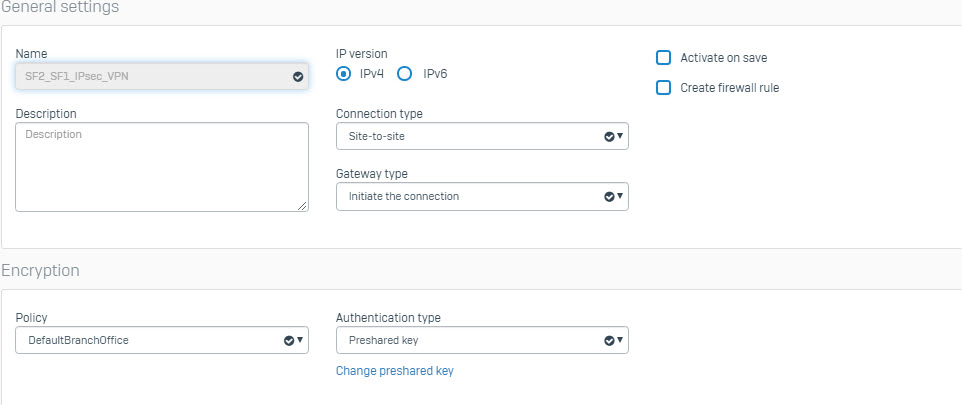
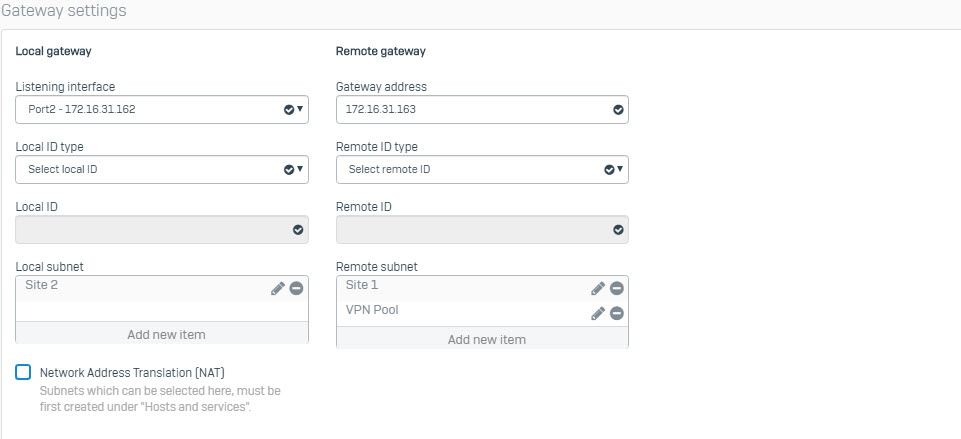
- Go to VPN > IPsec connection > Add and enter the following parameters.

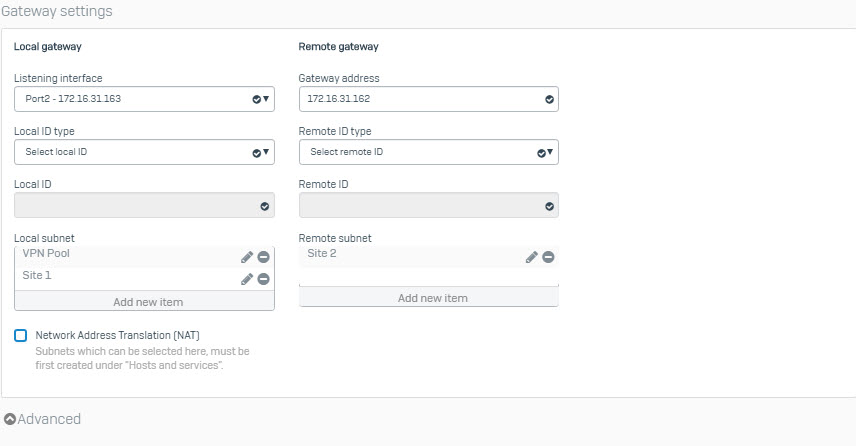
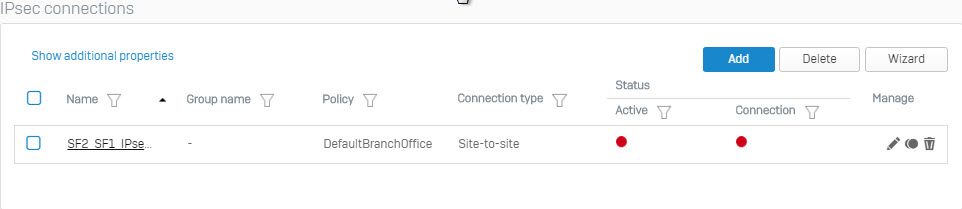
- After pressing Save, next to click on red icon in the Active column and click OK to enable connect.

Configure IPsec on Site 2
- Go to Hosts and Services > IP Host and create local subnet behind Site 1 and Site 2.
- Go to Hosts and Services > IP Host and create remote SSL VPN subnet.
- GO to VPN > IPsec connection > Add to create connect with the following paremeters.
- After pressing Save and clicking red icon to enable connect.
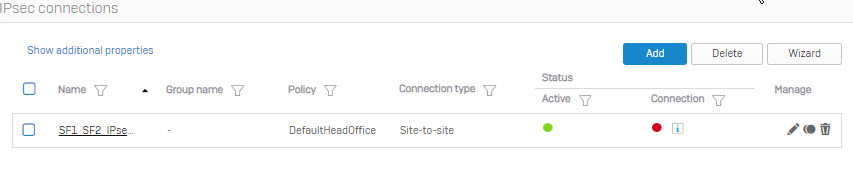
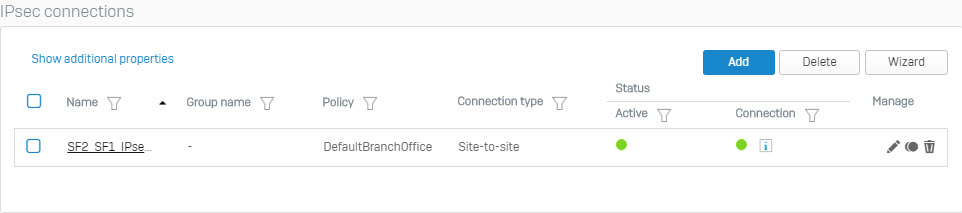
- When IPsec connection bettween Site 1 and Site is established, the round icon in the Connection column will be green.
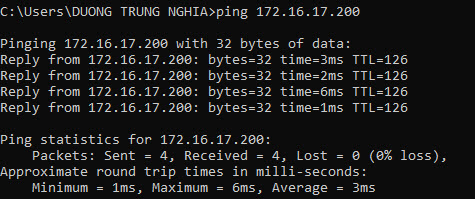
- Now we will use the remote SSL VPN machine to Site 1 and then ping the IP address of the LAN layer behind Site 2 to check the results.
Leave a Reply