Overview
This article explains how to configure IPSec VPN between two Fortigate devices, to be able to access remotely securely, ensure data security
How to configure
Step 1: Create IPSec VPN connection in site 1
- Log in to Fortigate by Admin account
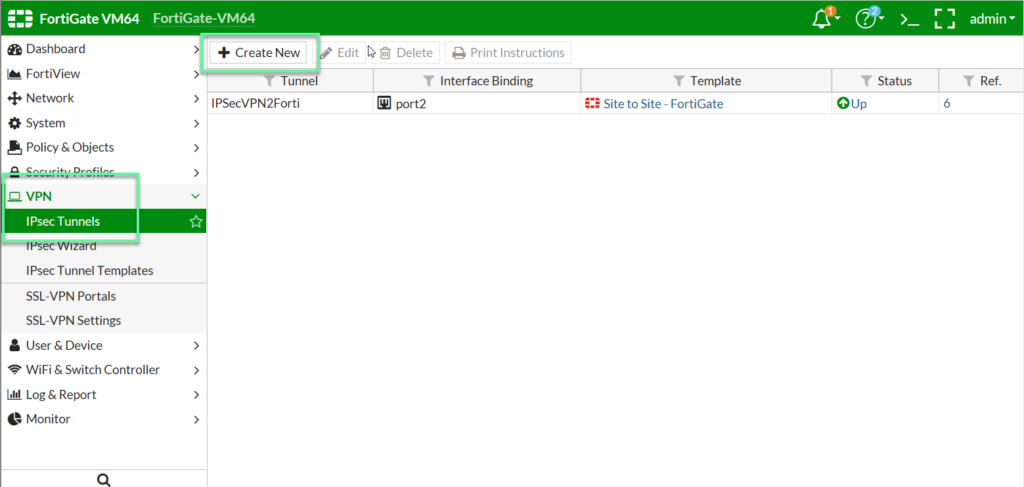
- VPN -> IPSec Tunnel -> Click Create New
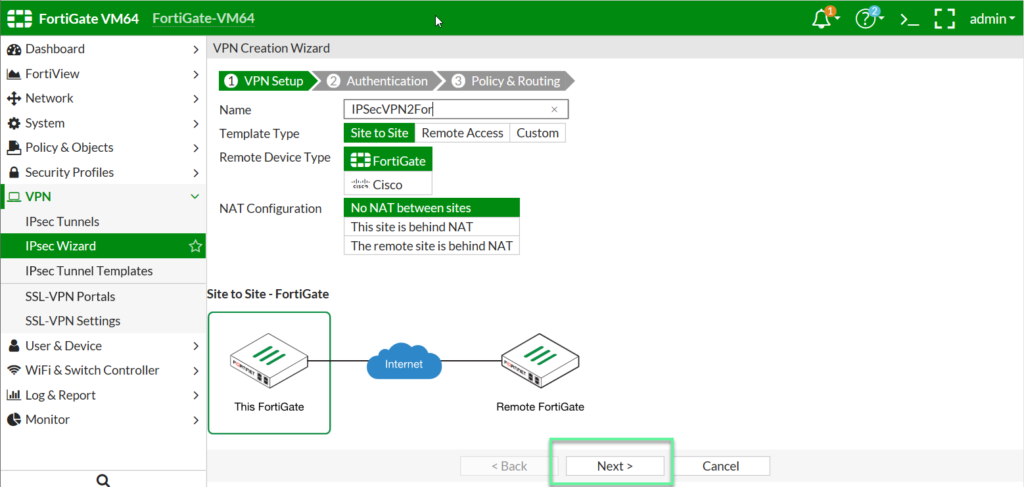
- Name for VPN -> Click Next to continue
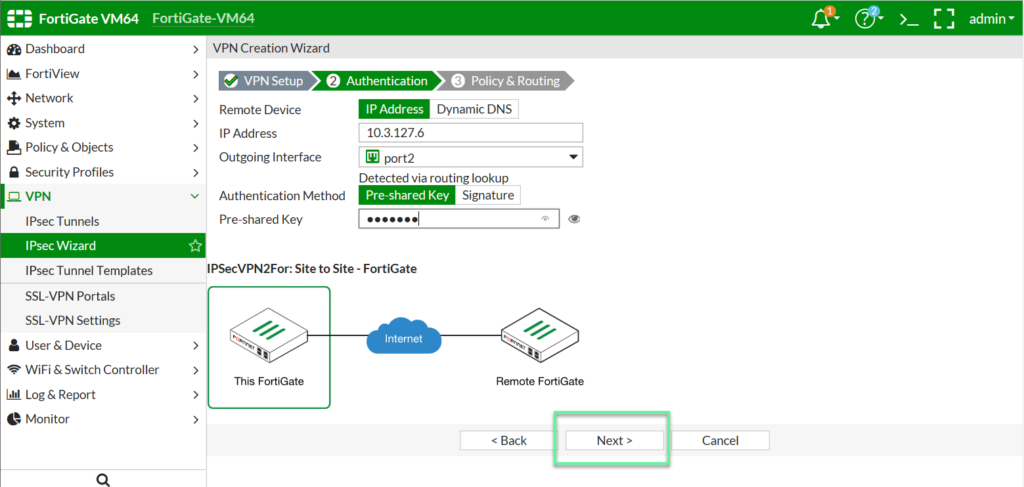
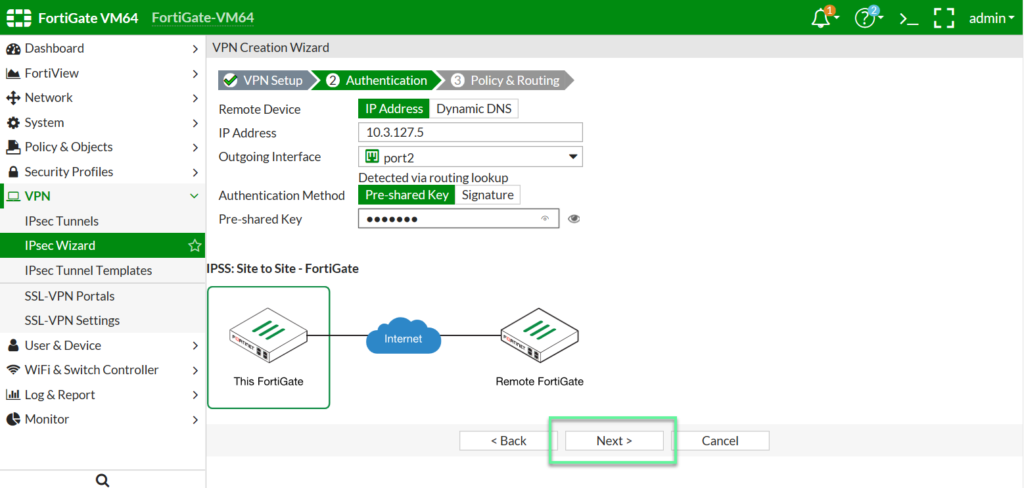
- In Remote Device: Choose IP Address if remote site uses static IP or choose Dynamic DNS if remote site uses dynamic IP with DDNS
- In IP Address: Enter IP WAN of remote site
- In Outgoing Interface: Choose WAN Port of device
- In Pre-shared Key: Enter preshared-key using for both sites
-> Click Next
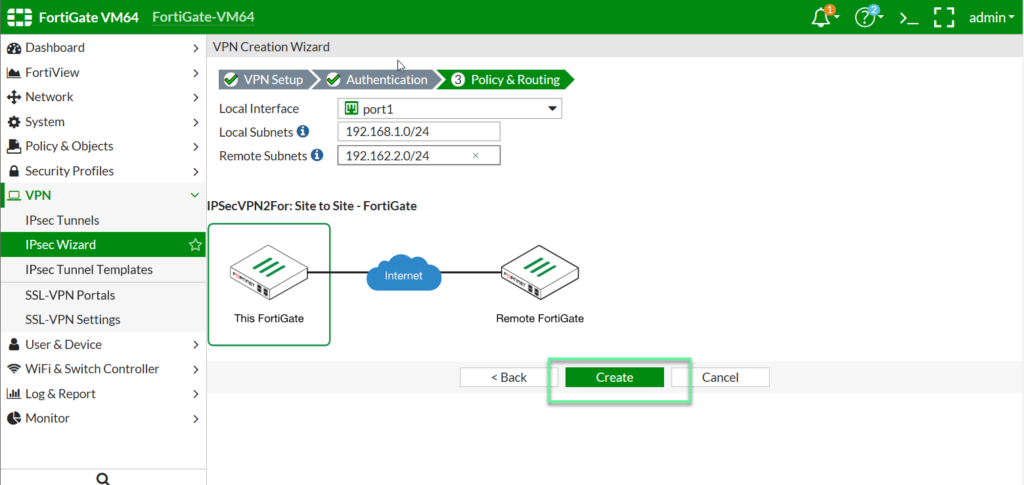
- In Local Interface: Choose LAN Port of device
- In Local Subnet: Enter LAN network of local site
- In Remote Subnet: Enter LAN network of remote site (two sites must be different form the subnet)
-> Click Create
Step 2: Create IPSec VPN connection in site 2
- Log in to Fortigate by Admin account
- VPN -> IPSec Tunnel -> Click Create New
- Enter for VPN connection -> Click Next
- In Remote Device: Choose IP Address if remote site uses static IP or choose Dynamic DNS if remote site uses dynamic IP with DDNS
- In IP Address: Enter IP WAN of remote site
- In Outgoing Interface: Choose WAN Port of device
- In Pre-shared Key: Enter preshared-key using for both sites
-> Click Next to continue
- In Local Interface: Choose LAN Port of device
- In Local Subnet: Enter LAN network of local site
- In Remote Subnet: Enter LAN network of remote site (two sites must be different form the subnet)
-> Click Create
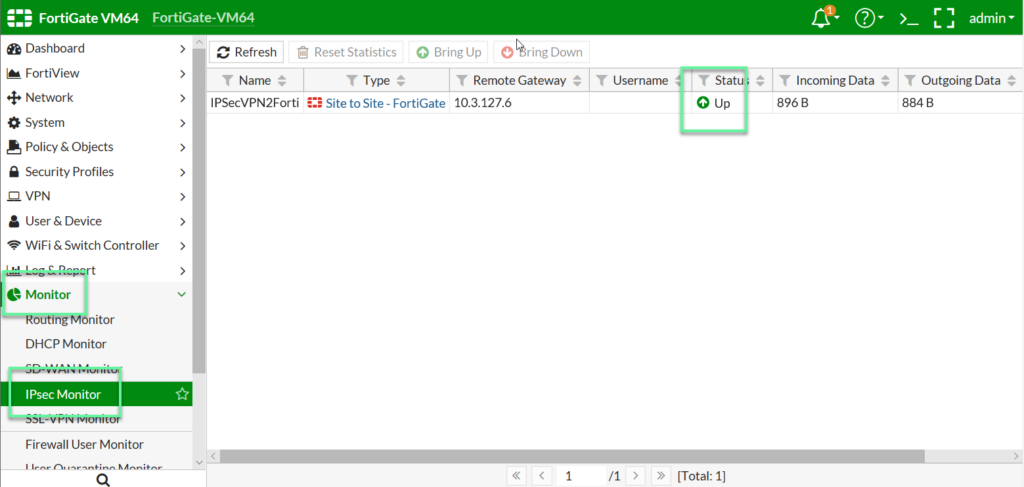
Step 3: Check connection between two sites
- Monitor -> IPSec Monitor -> See in Status (up is success)
** If you have difficulty configure Sophos products in Viet Nam, please contact us:
Hotline: 02862711677
Email: info@thegioifirewall.com
Leave a Reply