
Overview
- FTP Client applications like FileZilla, Cyberduck, WinSCP … are being used quite popularly and widely today to access, upload and download data to users’ web servers by creating connections via FTP – delivery File Transfer Protocol with the main task is to receive and process requests for sending or receiving data, creating a direct connection to the store host. Unlike HTTP – designed to forward hyper-text data via TCP connections, the FTP standard ensures that the server responds to requests as soon as it receives a signal from the host.Not only provides fast and accurate file transfer, but also security, gives users more options in the process of downloading and uploading data, and one of the most convenient features is Resume. In the following article, we will introduce you to a few basic steps to set up a personal FTP server system, through which users can access from anywhere via FTP client application, allowing more different accounts upload and download data directly to the server.
FileZilla FTP Server
- The process of setting up and configuring FTP Server is quite complicated, but if you create a FileZilla FTP Server system yourself, it is possible to turn a computer run Windows into an FTP server, then establish a connection with multiple other client computers. In essence, FileZilla FTP Server is a free and open source application for Windows operating systems, supporting secure FTP connection protocols and FTP over SSL / TLS to the server. When using the SSL protocol, we can encrypt the connections between hosts to ensure the amount of data is transmitted securely, while the application also allows users to choose multiple addresses. and different server ports.
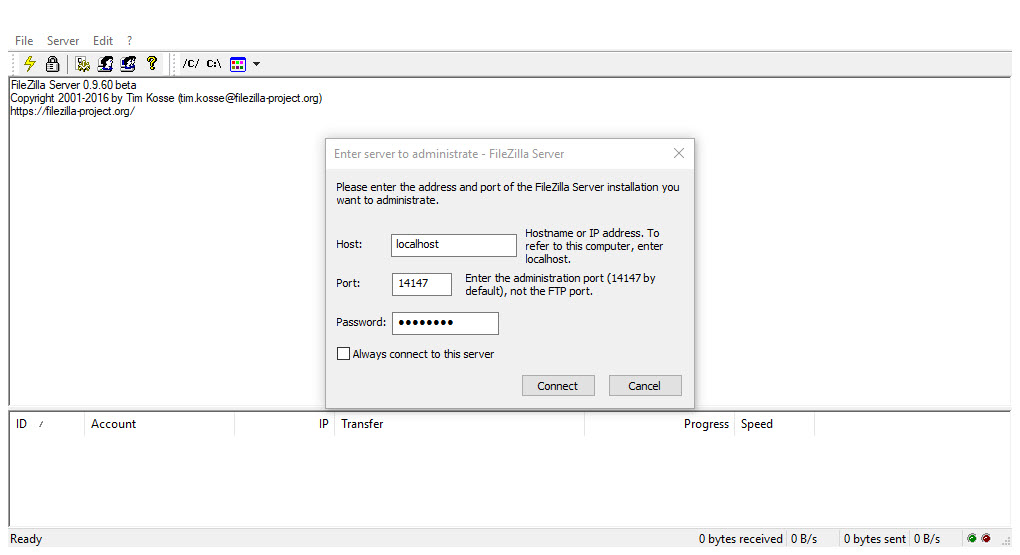
- To do so, please download and install the FileZilla software for Server, then start the application, enter the localhost address (127.0.0.1) in the Server Address section and the password in the Administration Password box, the value The default port here is 14147. Click OK:
- Download FileZilla Server.
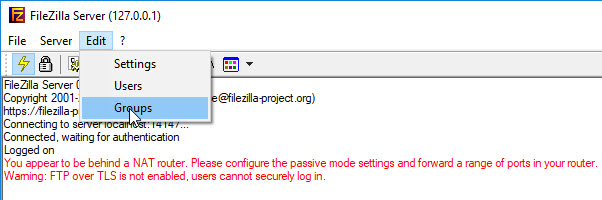
- As mentioned above, Group will help us manage easier many similar users account. The first thing to do here is to create a new Group, then assign each account separately to this group. Select the Edit > Groups as shown below:
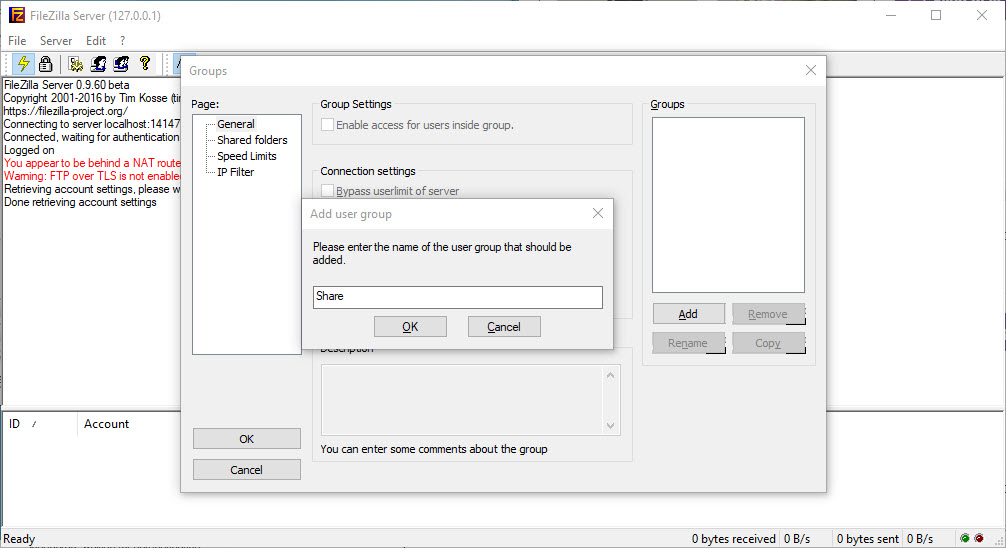
- The Groups panel will display, we will first click Add and enter the name of the group to create, then activate access for the group accounts from Group Settings. Next is the directory assignment. will be allowed to share with the client, go to Shared folders section from the left side and select the folder to share to assign here. Then, we will move on to the next step of assigning the user account to the Group:
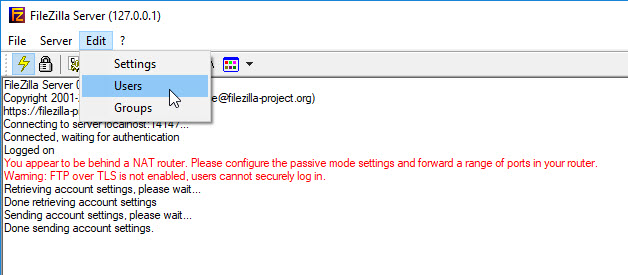
- From the Edit menu, you select Users:
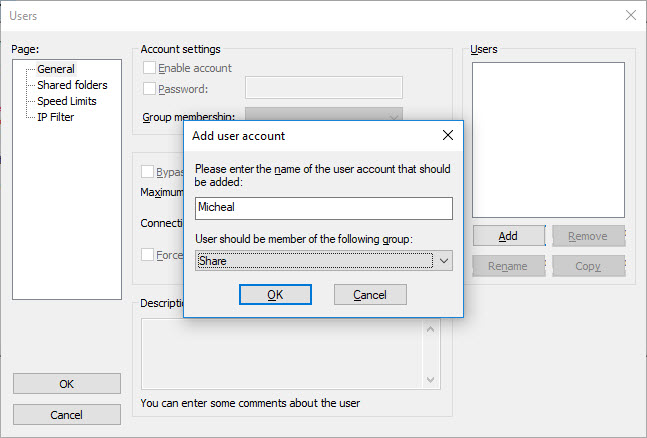
- Similar to Groups, we can create user accounts and set the read and write permissions respectively. Click the Add button, give your account a name, select the corresponding group from the drop-down menu, then click OK to finish.
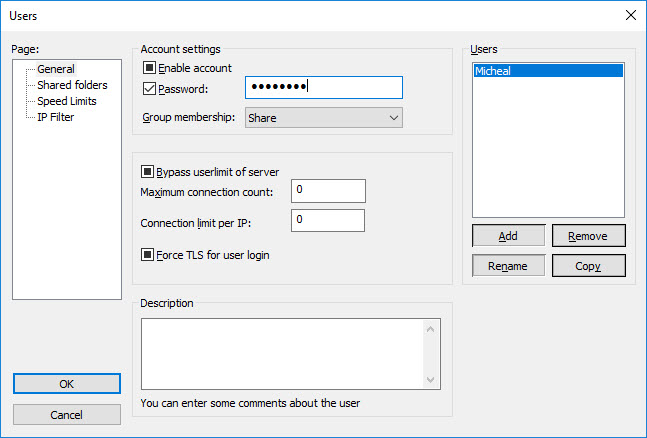
- In the default mode, the system will create a user account with a blank password, but if you want to set a password to protect the User, then activate the Password option in the Account Settings section. Here, we can change Group membership, enable the Bypass userlimit of server and Force SSL options for user login:
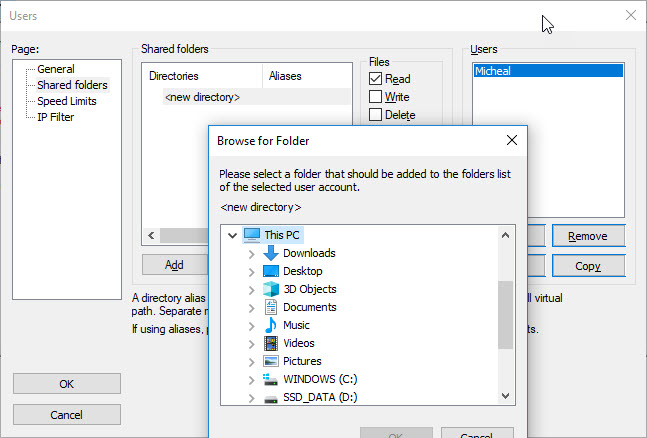
- If you don’t specify any shared folders while creating Groups, you can assign them later. Just select Shared folders then click Add from Shared folders:
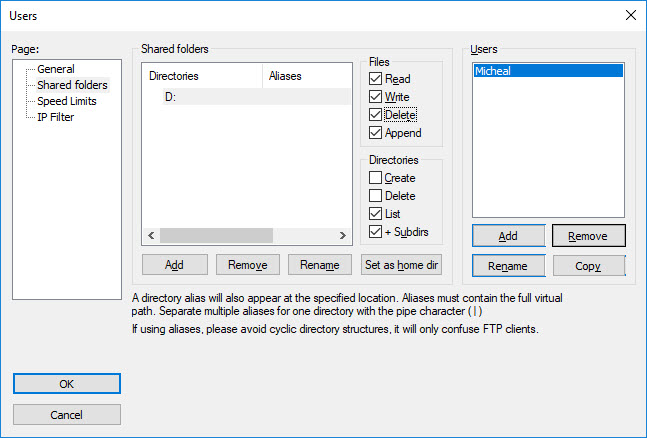
- The Files and Directories section allows us to confirm the level of authorization for user accounts, including: reading, writing, deleting, listing. By default, the program will automatically assign permissions to all components within the shared folder. However, you can turn off the option + Subdirs to restrict access, in the Speed Limits section, it is up to the maximum download and upload speeds for each account, depending on the time of day, and in the IP Filter section we can remove fixed IP addresses:
- When the User’s setup process is complete, we will switch to the client system to initiate the connection to the FTP server. If you want to transfer data through the local network, you can use the IP address of the server to create a connection from the client. Use the ipconfig command in the Command Prompt to find the IP address.
- Download FileZilla FTP Client.
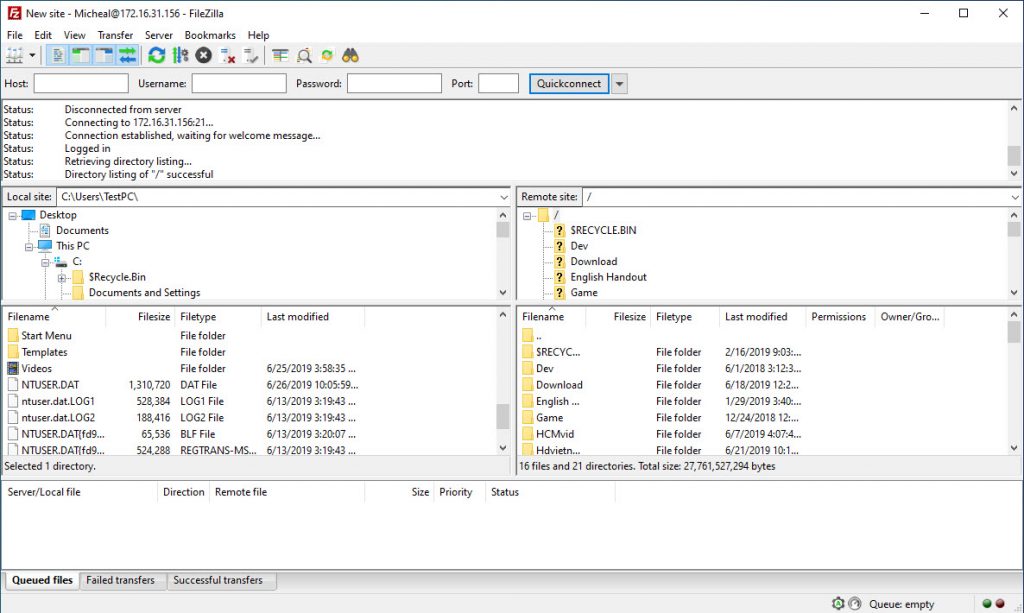
- Then, open FileZilla FTP and select File> Site Manager (you can use Ctrl + S to open), enter the required information here. If the client is connected to the same network, enter the IP address of the server in the Host section to connect, then select Normal from the Logon Type section. Next, enter the username in the User box, the password in the Password.
- When done, click the Connect button.
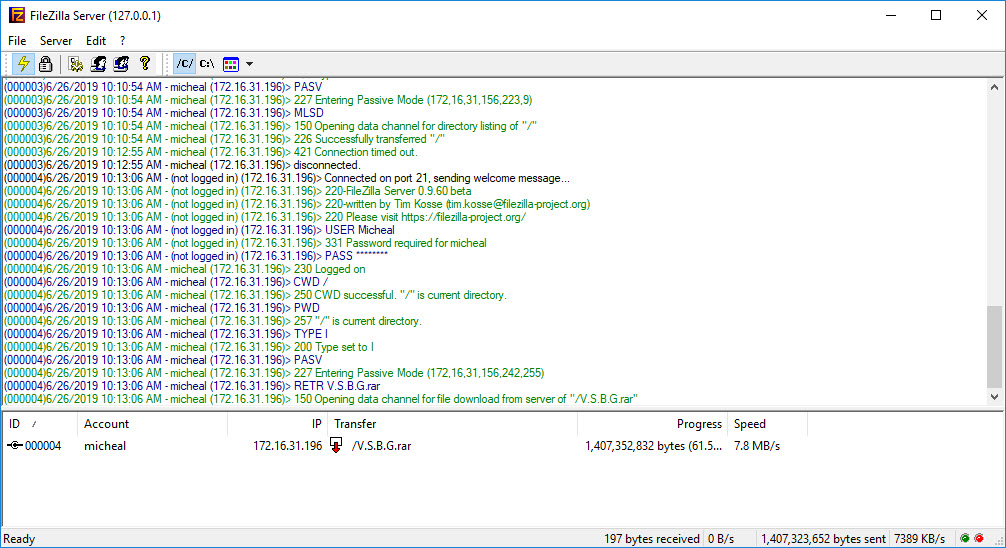
- FileZilla FTP Server will record all information about received and sent requests, including client connection addresses, login names, IP addresses, file transfer speeds:
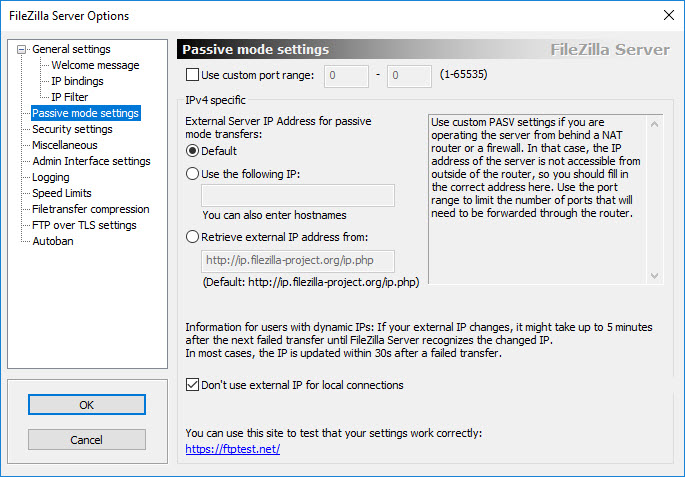
- Besides, you can also share the IP address of the server with the clients not in the network. To determine the IP address to automatically transfer, open FileZilla Server Options from the main menu and select the Passive mode settings tab, activate the Use the following IP option and enter the IP address to share. You can leave the option to receive IP addresses from ip.filezilla-project.org/ip.php or set it yourself.
- Once completed, the external client system can connect to your server and access the shared folder. If an error occurs here, it may be due to the Windows Firewall or router system.
FTP has many security risks. With Binfer you do not need to manage file permissions, user accounts etc. See FTP alternative.
Virtually all of what you articulate is astonishingly precise and that makes me wonder the reason why I hadn’t looked at this with this light before. Your article really did turn the light on for me as far as this specific topic goes. However there is one issue I am not necessarily too cozy with so while I make an effort to reconcile that with the actual core idea of the position, let me observe exactly what the rest of the visitors have to point out.Nicely done.
Thanks for watching