
Overview
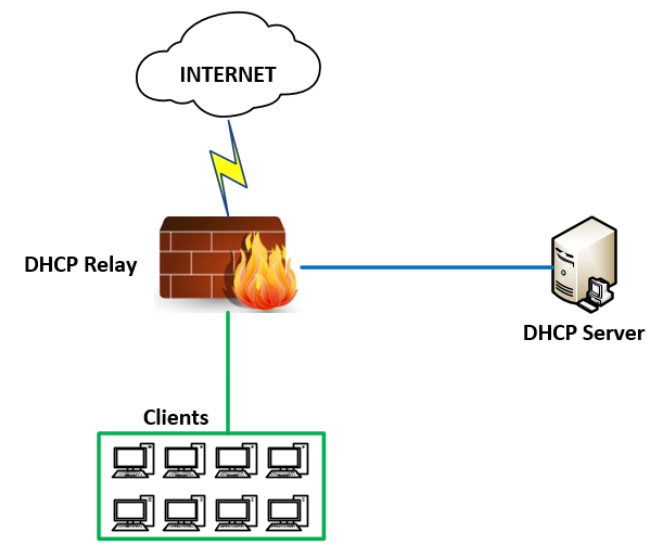
The DHCP Relay Agent is a configuration that is set for the device to receive the client’s IP request information and forward this information to the DHCP server
How to configure
Step 1: Configure DHCP Server on Windows Server 2012
- Log in to Windows Server by Admin account
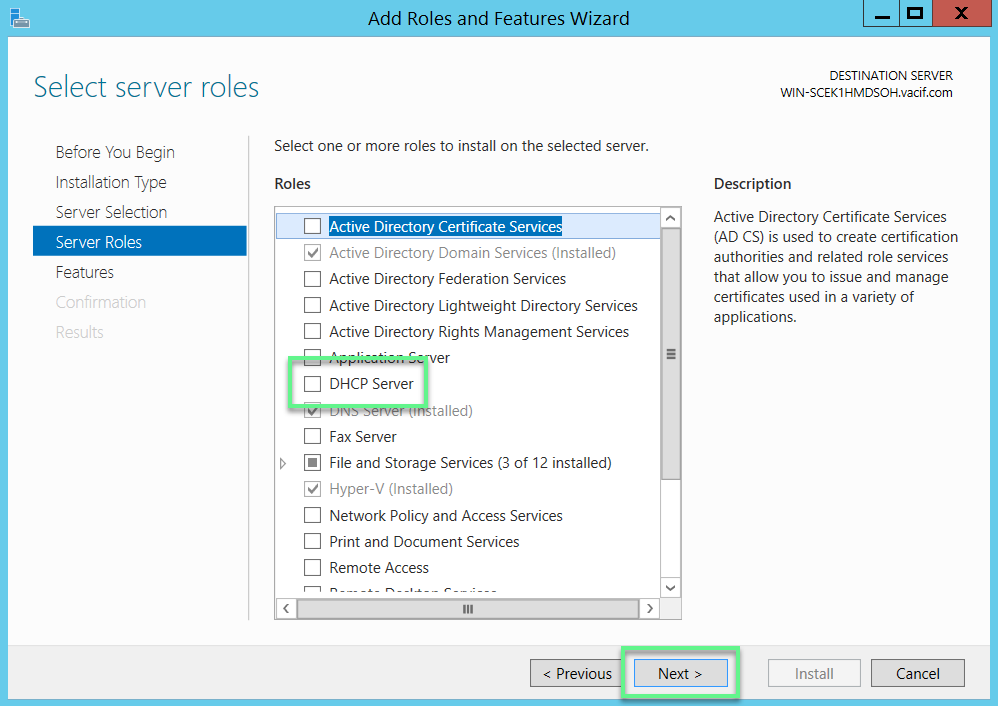
- Click Add roles and features -> DHCP Server
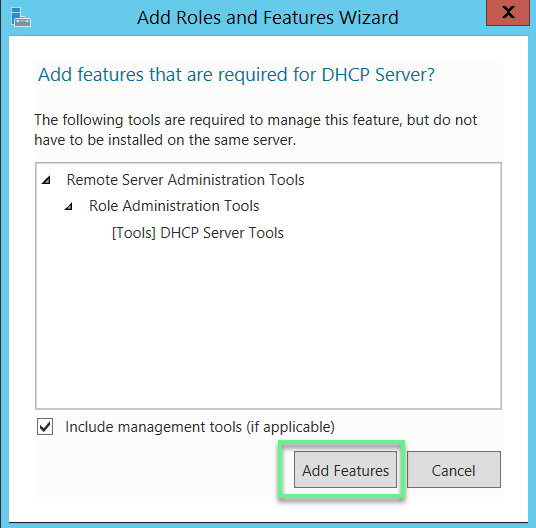
- Click Add Features -> Click Next to continue
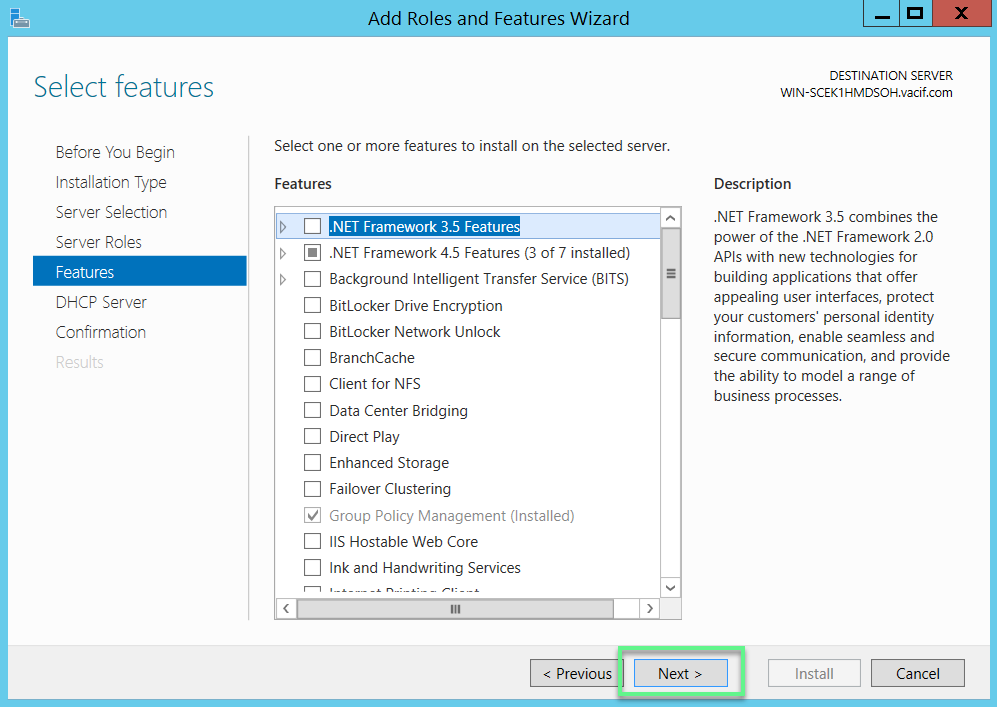
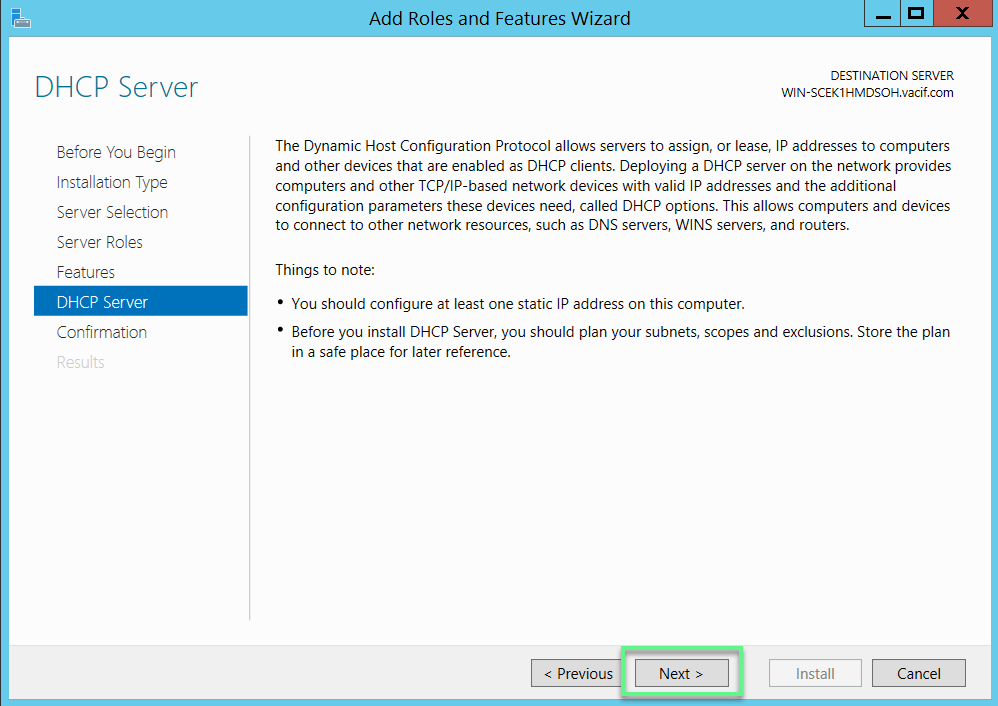
- Click Next to continue
- Click Next to continue
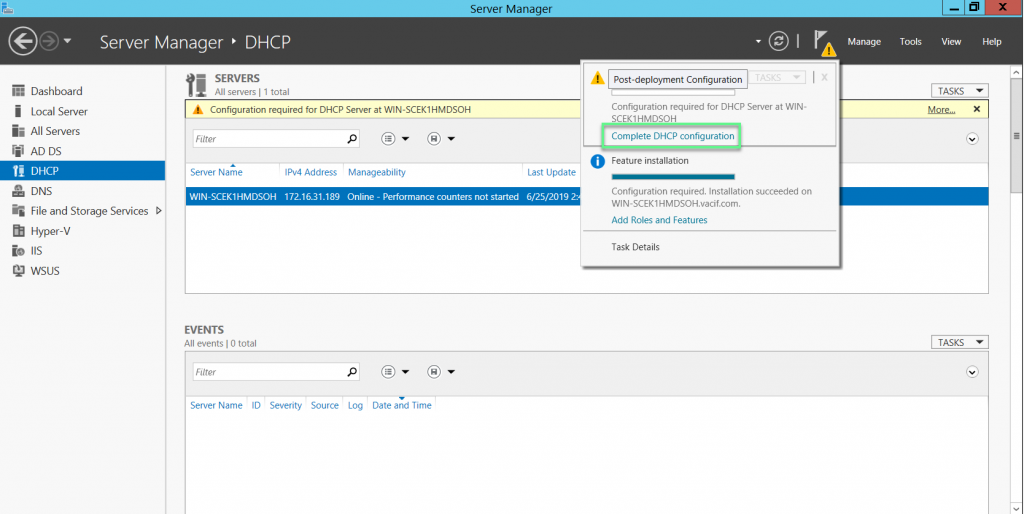
- Click Install

- Click Complete DHCP configuration
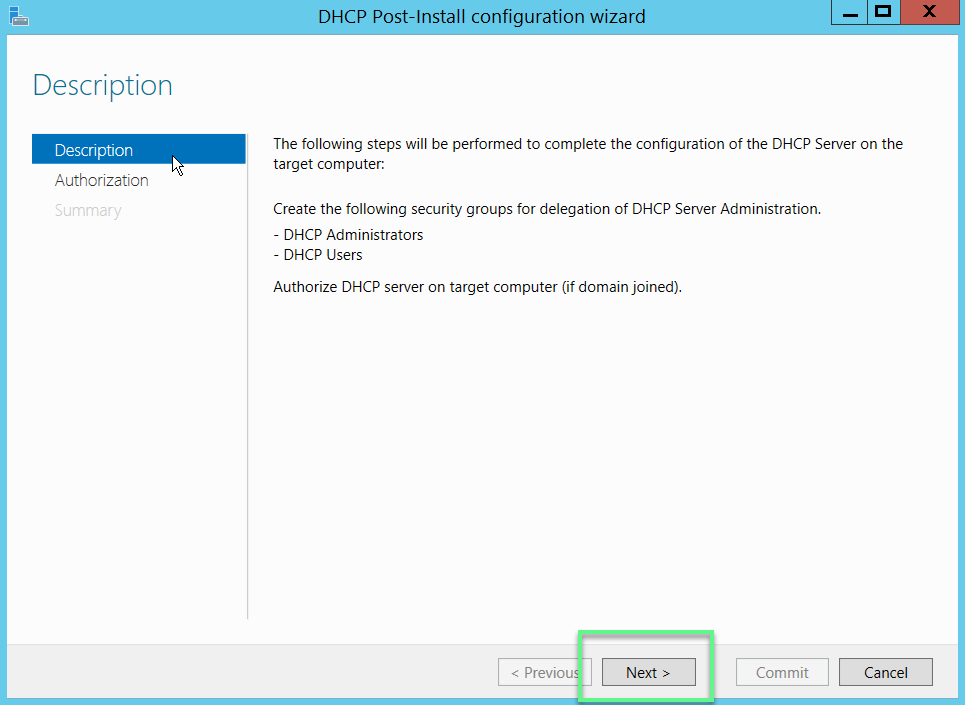
- Click Next to continue
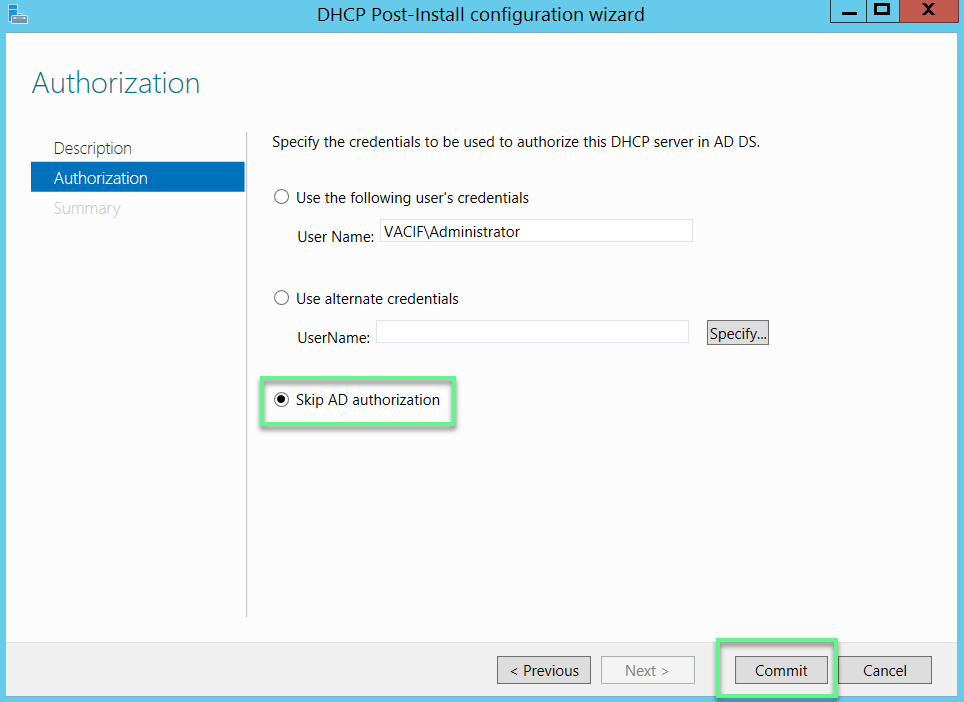
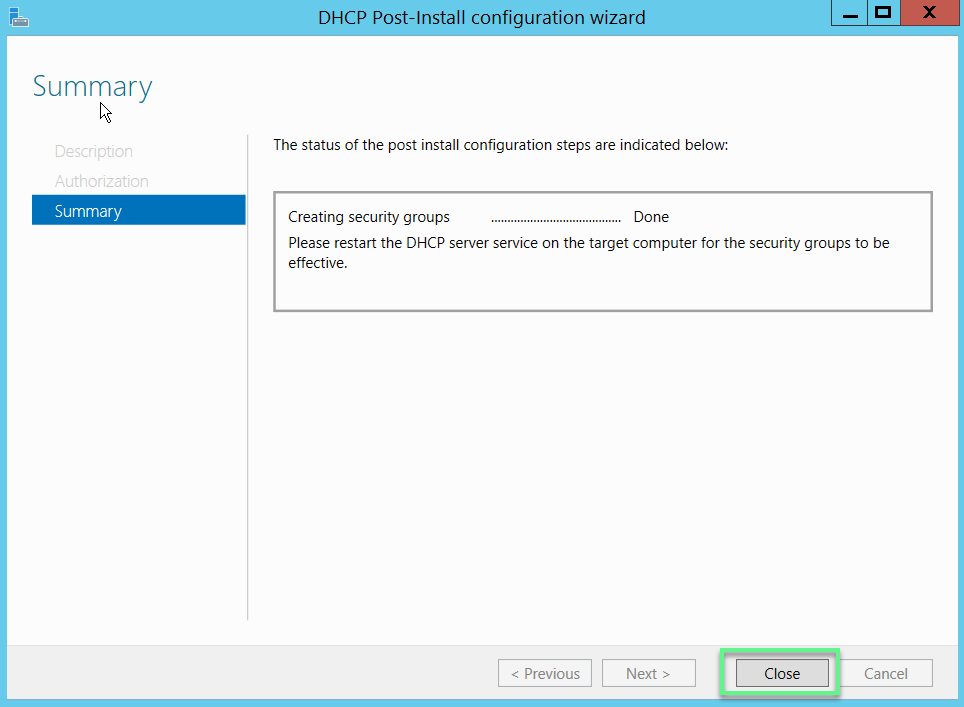
- Choose Skip AD authorization -> Click Commit
- Click Close
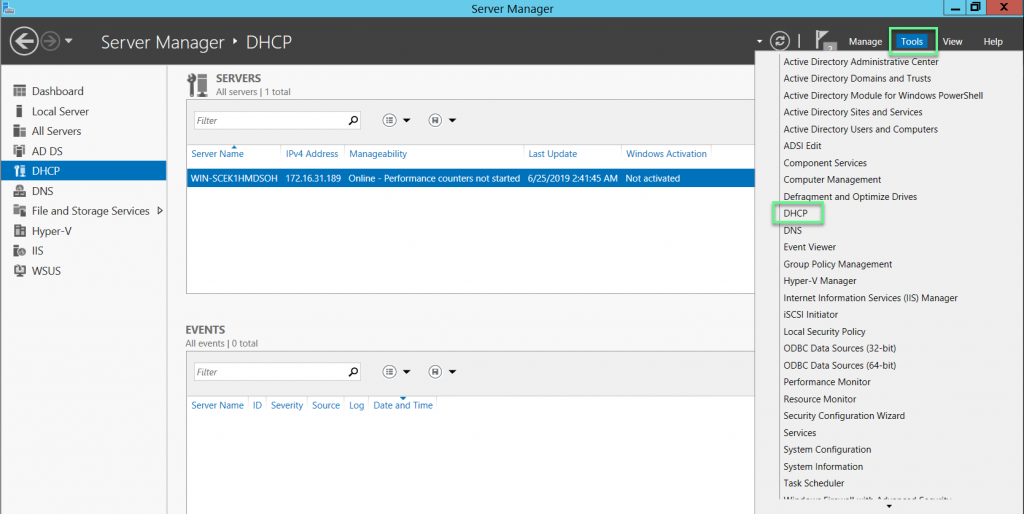
- Tools -> DHCP
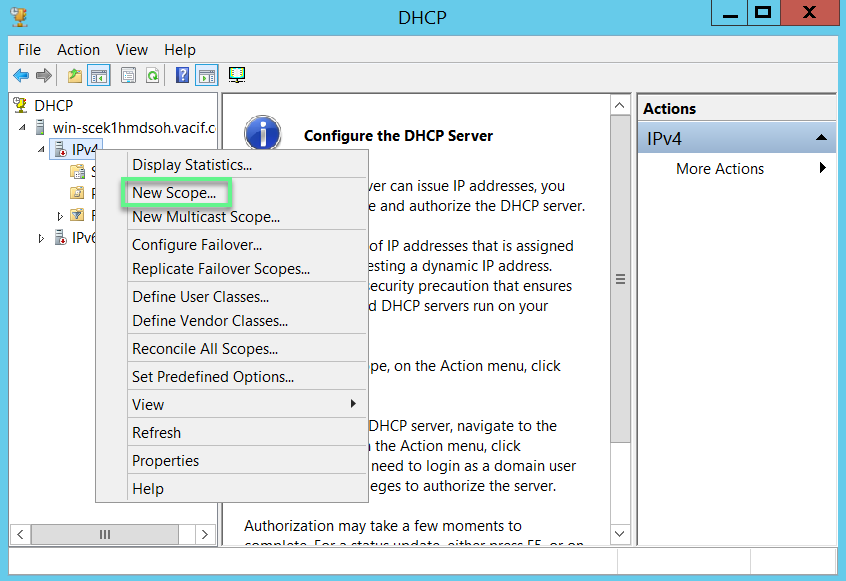
- Right click in IPv4 choose New Scope to create a new DHCP pool
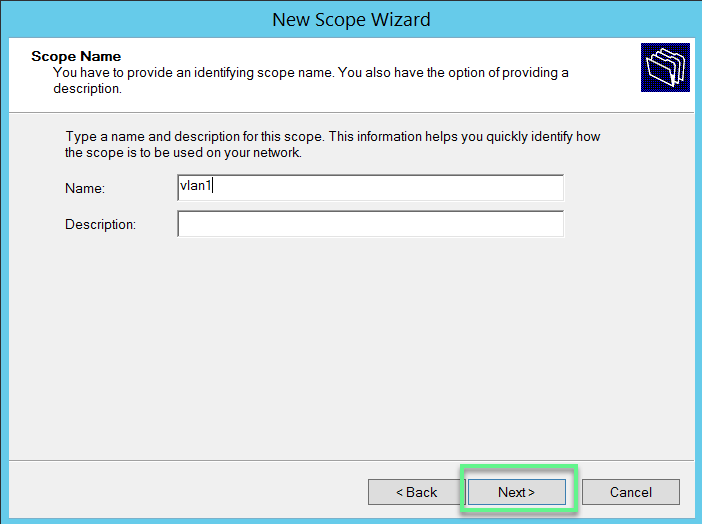
- Enter Name -> Click Next to continue
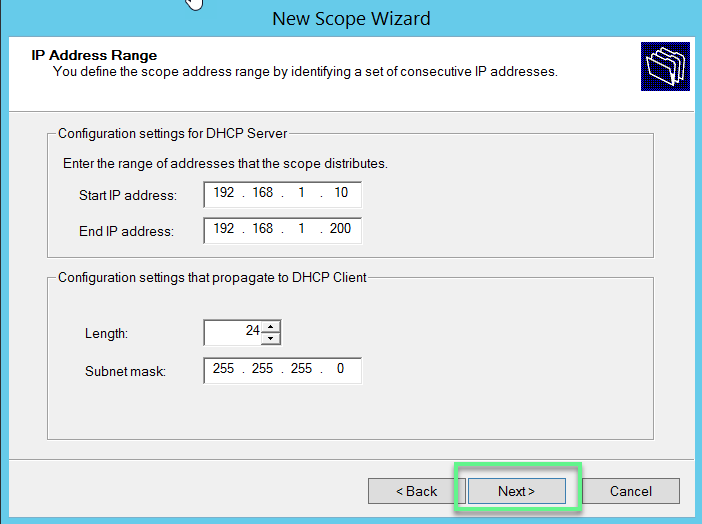
- Enter Start IP address, End IP address, Length, Subnet mask -> Click Next
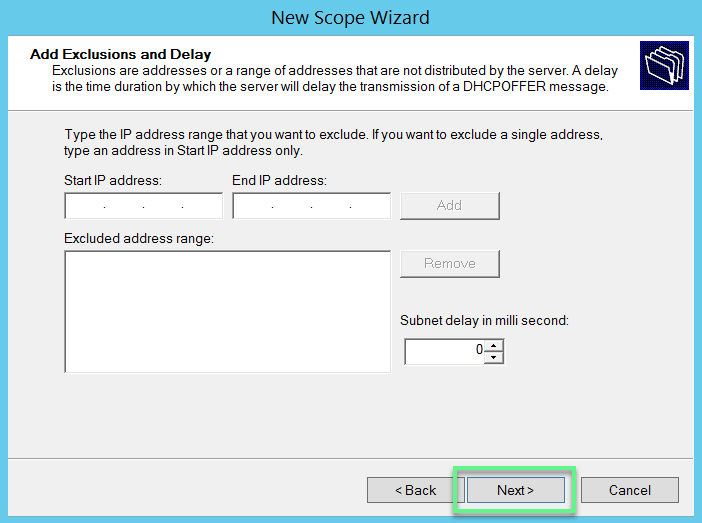
- If you want to exclude 1 or more IP addresses in range IP, you can create in Add exclusions and relay -> Click Next
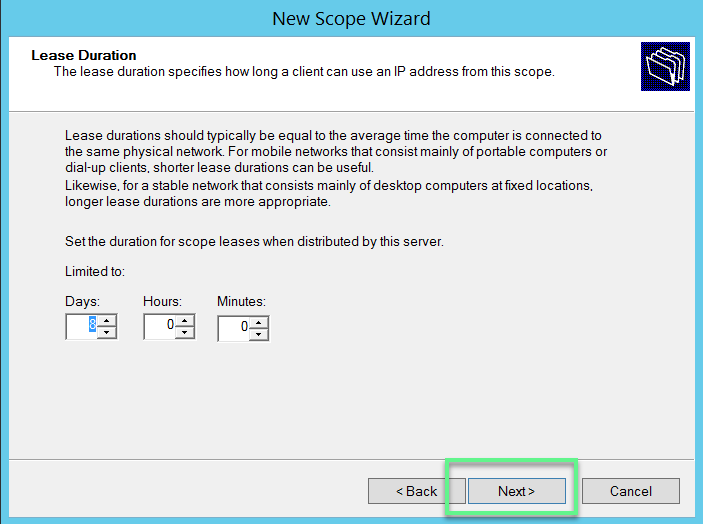
- Enter lease time -> Click Next
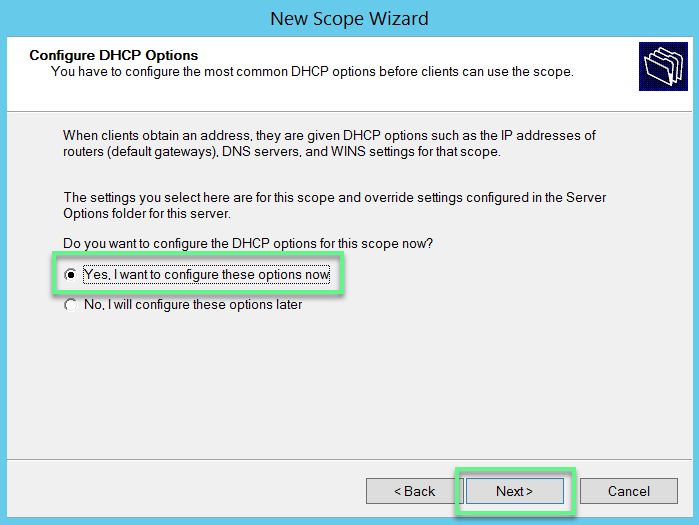
- Choose Yes, I want to configure these options now -> Click Next
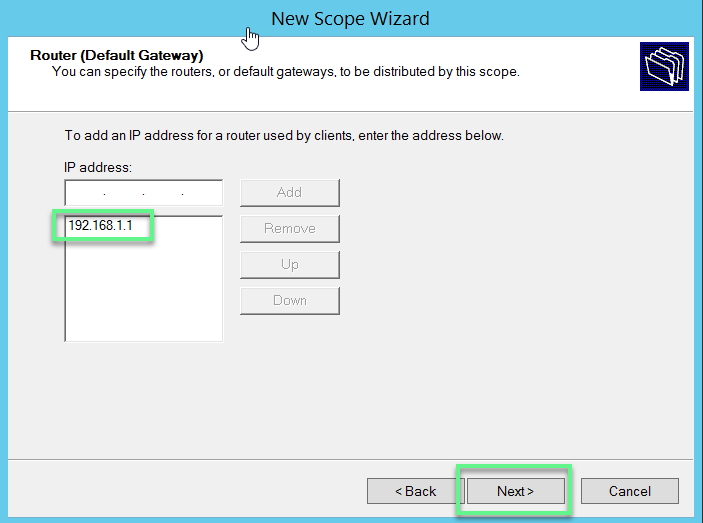
- Add a Default Gateway IP address -> Click Next
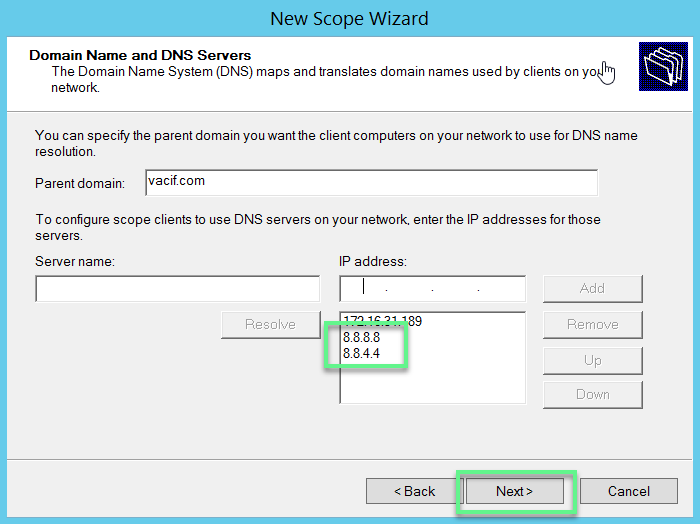
- Add DNS Server you want -> Click Next
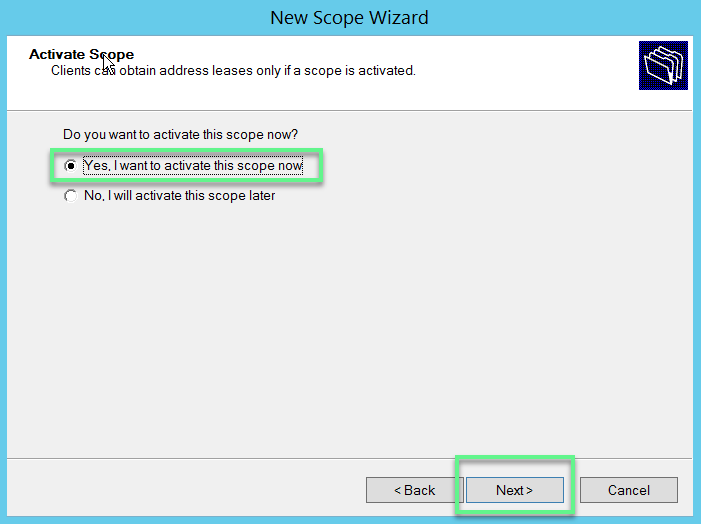
- Choose Yes, I want to activate this scope now -> Click Next
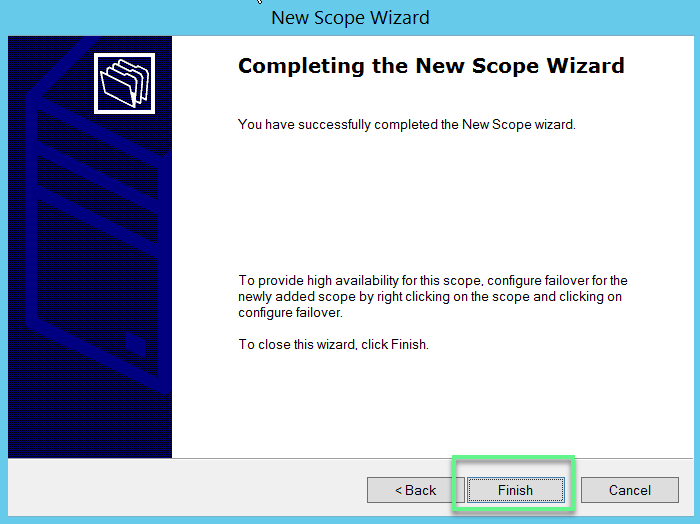
- Click Finish
Step 2: Configure DHCP relay on firewall to transfer request to provide dhcp of client
** If you have difficulty in configuring Sophos products in Viet Nam, please contact us:
Hotline: 02862711677
Email: info@thegioifirewall.com
Leave a Reply