
Overview
- This article will guide how to use Microsoft Whiteboard.
What’s Microsoft Whiteboard ?
- Microsoft Whiteboard is a free digital canvas, an application that allows users to sketch, plan and collaborate with their content and ideas. Whiteboard is automatically enabled for existing Office 365 tenants. Windows 10 and iOS users for your tenant can download the app for their preferred platform and log in, unless you have chosen to disable the service.
How to use ?
The utility of this tool:
- Give your idea room to develop ideas with the Microsoft Whiteboard tool. Convert your work into professional looking charts and shapes on an infinite canvas with an interface designed for pens, touchpads, and keyboards.
- Collaborate in real time, anytime, anywhere. Combine your team on the same virtual canvas, worldwide and across devices.
- Save automatically, continue continuously, your Whiteboard is safe in the cloud until you are ready to return to them, from the same or another device.
User interface
- When it comes to drawing and sketching applications, a smart user interface is key. Whiteboard provides only a white background picture that users can draw. Canvas grows automatically with your work, so drawing on the outskirts of your sketch will expand the canvas.
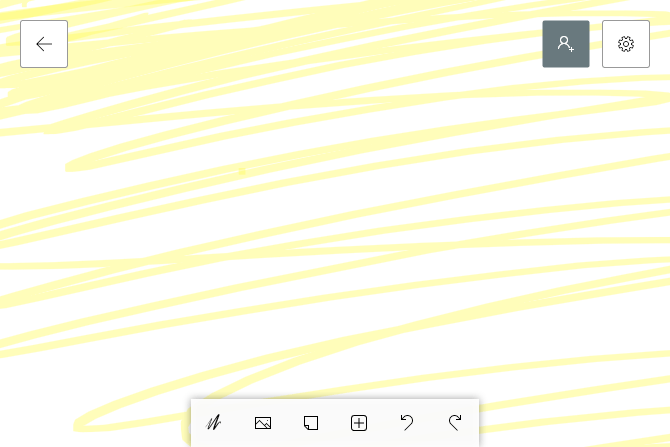
- At the top of the window, you will see three icons. The left allows you to choose another whiteboard from the one you are working on or create a new one.
- The gray icon on the right allows you to create a web link that you can share to collaborate with others on the same Whiteboard project. Note that the Web sharing link off option described below must be enabled to create your link.
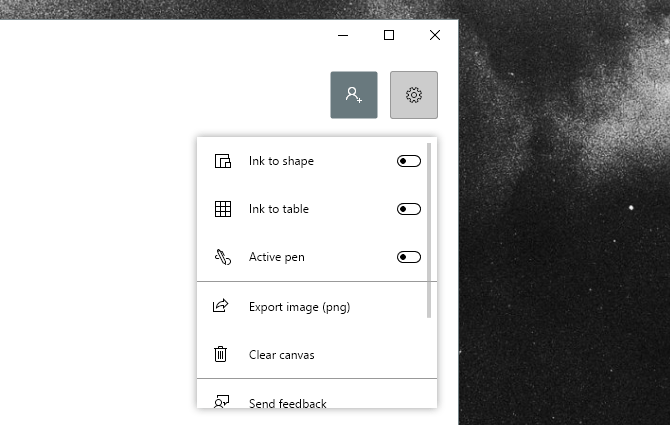
- On the right is the Setting button, which will allow you to activate some features in Whiteboard.
- Those are the main options at your disposal.
Paint
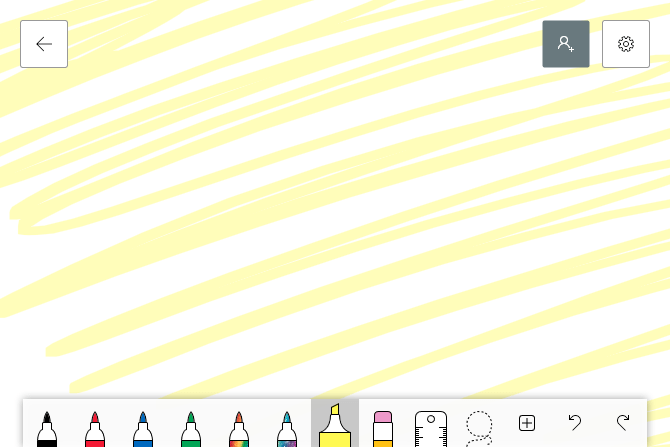
- The sketching application interface is usually 200% of installation and 80% of drawing tools. In Whiteboard, you can choose one of two options to display your tools: passive pen and active pen.
- The passive pen is described above, and the active pen is described below. To switch to the active pen, click the Setting icon and activate the Active pen option.
- We will use the active pen feature to explain the rest of the tools and features, as it is easiest to use with graphical tablets.
- The difference between a passive pen and an active pen is that the active pen will allow you to move the drawing with the mouse and draw with the pen simultaneously.
- The tools do exactly what you expect: from left to right, you’re presented with a bunch of different colored markers. There is currently no default method for resizing tools or changing their colors.
- Click your ruler to open the ruler tool. Use your mouse wheel to change its angle and draw a ruler to create a line in your canvas.
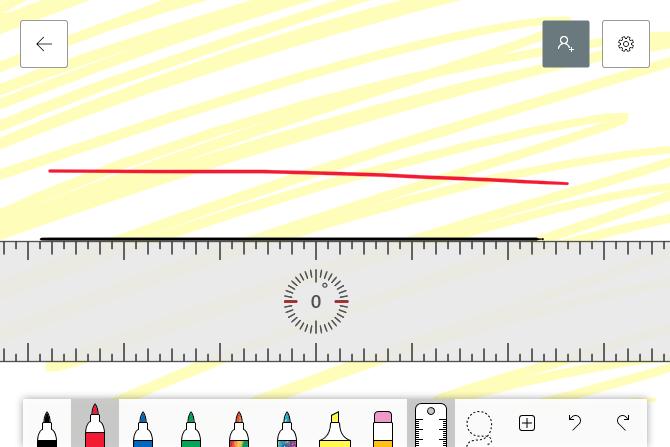
- To remove a ruler, simply click the ruler icon again to turn it off.
- Next to the ruler is a selection tool. Click the selection tool and, with your pen tool, draw around the shape, line or image you want to move or delete.
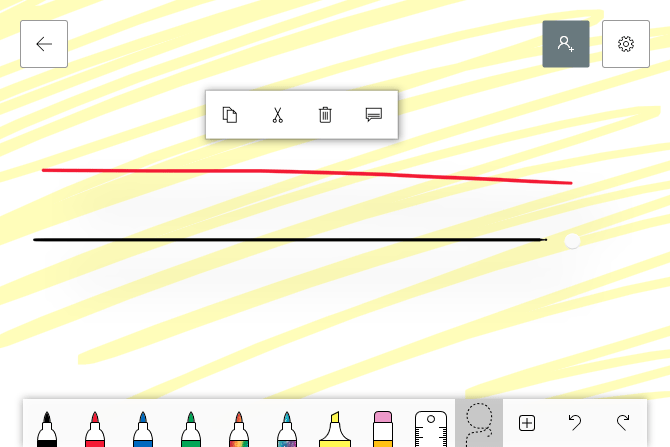
- Your selected objects will jump up. Then use the options shown or their respective keyboard commands to copy, cut, delete or add notes to the object. Adding a note will place unseen, additional text on a sketch or image for future reference.
Image position
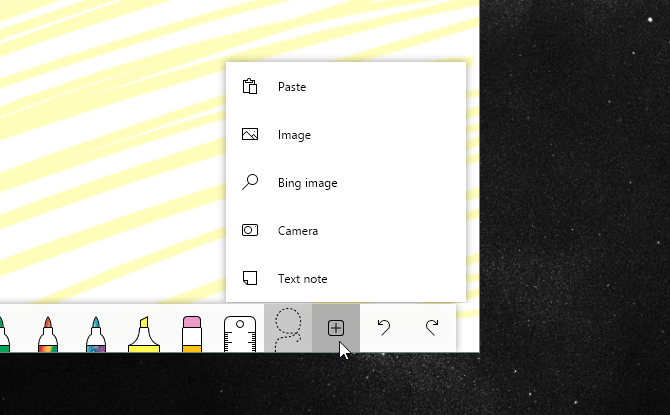
- You are not limited to pen tools only. Click the + icon to open your image and text options.
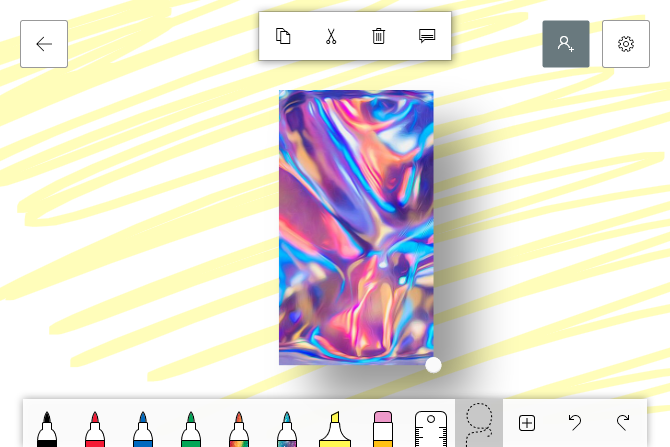
- Select the Image option to place an image from your local files into Whiteboard. The file will appear as a pretty moving image.
- Click on the image to see your options. Rotate your image by clicking and dragging the small white circle at the edge of your image.
- You can also sketch on pictures as well.
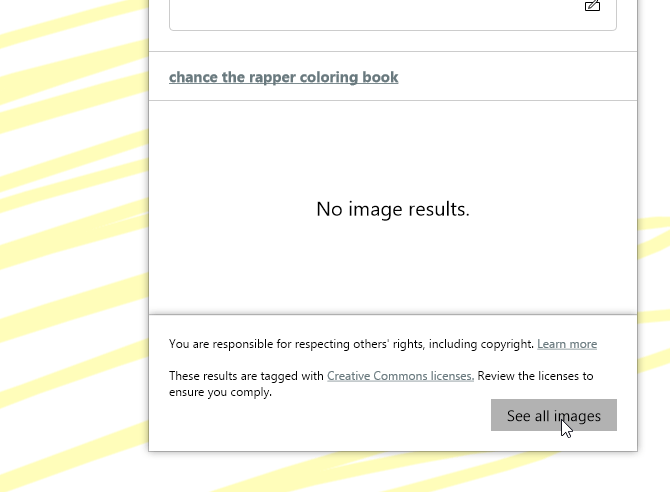
- If you do not have a reference image on your computer, you can use the Whiteboard ED Bing image function. Bing Images will open a search prompt and then include images based on your search from Bing.
- Image results will be limited by default, because the application limits your results to images that are not copyrighted. To view all images, click the View all images option at the bottom of the prompt.
- Select your image and click the (+) overlay button to add it to your Whiteboard. When the image is placed on your whiteboard, you can adjust it as a local image.

- Whiteboard also allows you to overlay images. To create an image stack, simply drag an image onto another image until you see a circular stack icon.

Text and take notes
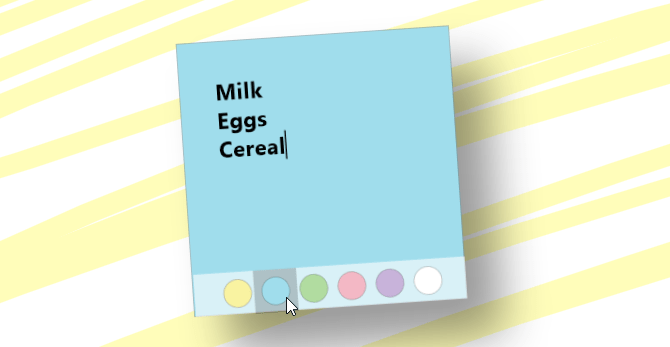
- Do you want to rely on your handwriting to take notes? Click the (+) icon again and choose Text note. A sticky note will appear, just like the Windows 10 sticky note application. Orient your note as you would like an image, and double-click the note to start typing.

- You can also change the color of a note while typing by clicking on the 3-dot icon at the bottom of the note and choosing your color.
Ink feature
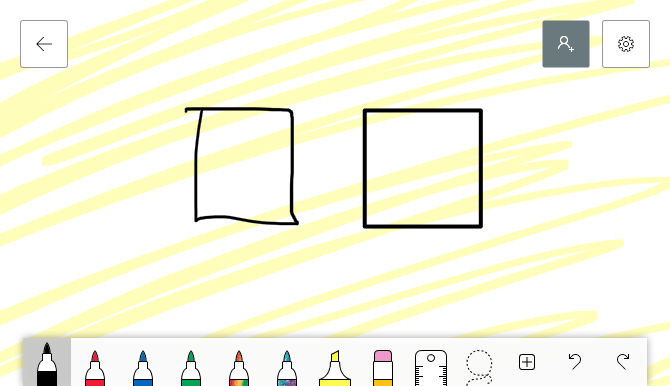
- To allow you to fully utilize the aspect of Whiteboard’s touch screen, Microsoft has integrated Ink features to ease the drawing process. First, open your Whiteboard settings and turn on Ink to shape it.
- Ink for shaping automatically shaping from rough sketches. Simply outline the shape and the whiteboard will automatically shape you.
- You can even include a table to organize your whiteboard or your home data. Open your settings and activate Ink to board. This option also automatically activates Ink for shaping.
- Draw a rectangle, and then draw a line in the middle of the shape. This will activate the table, after which you can add rows and columns with the following pop-up buttons.
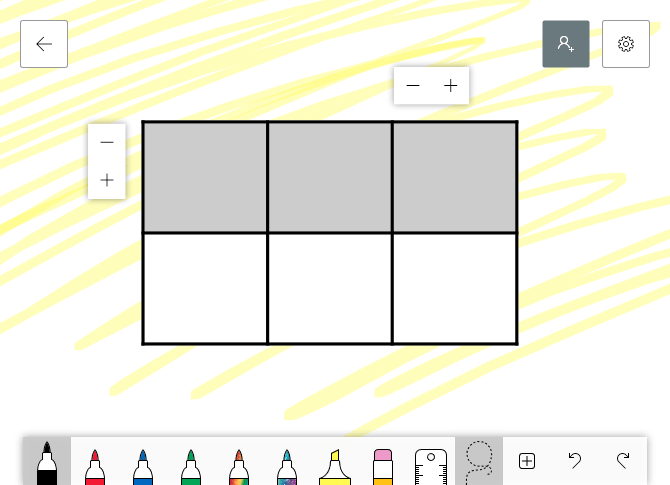
- Fill in the squares as you see fit. If you need to delete a row or table, reselect the table and the buttons will reappear.
- The possibilities of this type of technology are endless, even allowing users to draw formulas that Whiteboard automatically draws on the chart. Unfortunately, this is a feature that I was able to reproduce, implying that certain software problems may still exist in the application.
Save the whiteboard
- You have a few convenient options to save your Whiteboard. For one, all whiteboards are stored on your Microsoft account when you first log in to the app or link your account to a Windows PC.
- That means you don’t have to save the whiteboard, because it automatically backs up using your account. However, you can save PNG images (when the file format should be used) of the whiteboard for later use.
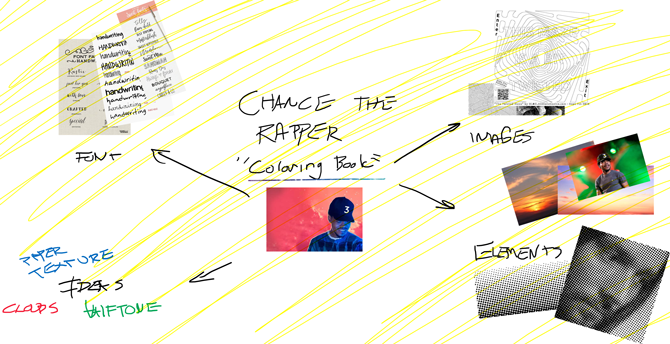
- Open your installation and select the Export image (png) option. Here’s a quick example of whiteboard capabilities, used to plan graphic design.
I’m so glad to have found your web blog, it’s really everything my friends from work and I have been searching for. The up to date info on this website is definitely appreciated and will assist my family and friends quite often. It appears as if the site gained a lot of specifics about subjects on the site and the other hyper links and information really show it. I’m not usually on the internet during the week but when I get a break im more often than not avidly searching for this kind of knowledge or stuff closely related to it. I have three of my friends that have assumed an interest in this because of all that I have discovered about it and they are more than likely going to be visiting the blog because it is such an excellent find. I’m also facsinated in government issues and how to deal with the new turns and twists in elections. Today I have been studying Dark romance
Thanks for watching