
Overview
- This article will introduce new features in PowerPoint.
What’s new ?
As an Office 365 subscriber, you often get new and improved features of Office 2016. So what’s new in Word 2016?
Word 2016 Quick Start Features:
Create a document:
- Open Word 2016.
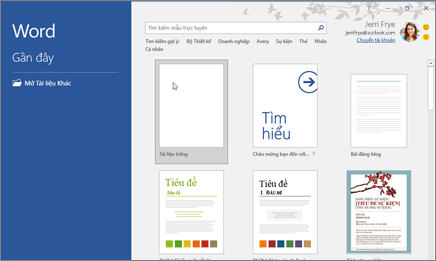
- Choose an option:
- Select Blank document to create the document from scratch. Choose an option:
- Choose one of the templates.
- Select Preview for tips for Word.
Add and format text:
- Place the cursor where you want, then enter the text. The status bar at the bottom of the document will display the Page and word count.
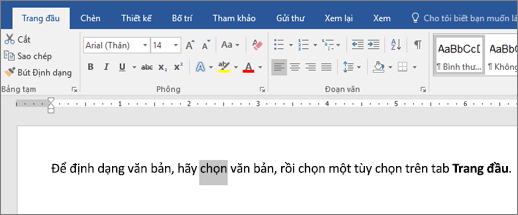
- To format text, select the text, then choose an option on the Home tab: Bold, Italic, Bullet, Numbering, etc.
Save the document to OneDrive:
When you save your file to the cloud, you can share and collaborate with others, and access your files from anywhere – on your computer, tablet or phone.
- Select File > Save As.
- Please select OneDrive.
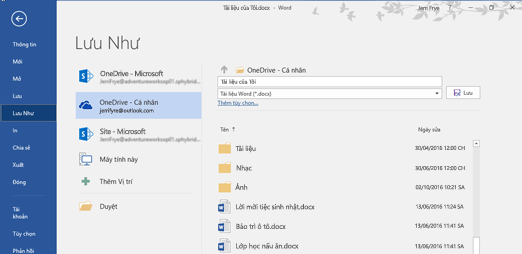
Save your personal files to OneDrive – Personal and work files to corporate OneDrive. You can also save to another location in the list or Add Location.
Check spelling, grammar and style with Editor:
Word automatically checks spelling and grammar, then makes style suggestions with the Editor, marks misspelled words with red underlined ripples, grammatical errors with blue double underlines and suggestions output with a yellow dotted line.
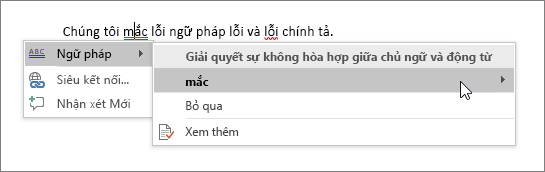
Note: The editor is only available to Office 365 customers and is available in a limited number of languages. This feature also includes an Accessibility Checker.
- Right-click on the word, then read the explanation.
- Choose an edit or Skip.
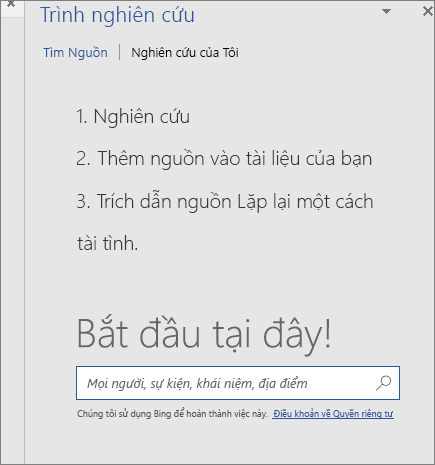
Conducting research:
With Research, you can search topics on the web, find reliable research articles, as well as insert content and images – all from within your Word document.
- On the References tab, choose Researcher.
- Enter a subject in the Search box, and then press Enter.
- Select the resources you want to use from the search results.
The researcher can help you prepare your outline and add and edit citations in your document.
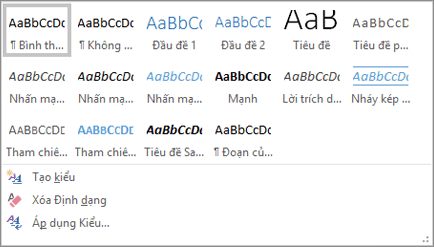
Use Styles in Word 2016:
Use Styles for headings, paragraphs, etc. to apply a font, font size, font color, and consistent spacing throughout the document.
- Select the word, paragraph, list or table to which you want to apply the style.
- On the Home tab, under Style, select the style you want.
Choose a Style and Subject Set:
Use the Style and Theme Set to add a professional look to your document.
- On the Design tab, point to Other Style Sets, and then see the format change automatically.
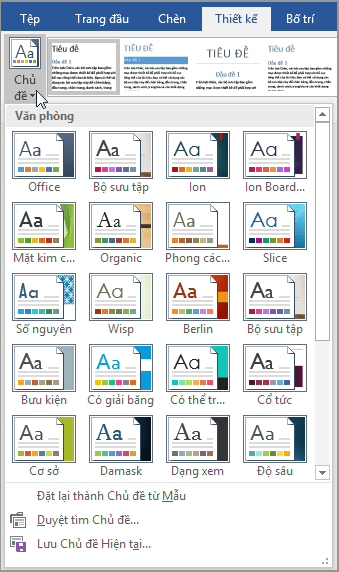
- Select a Theme, then select a topic from the drop-down list.
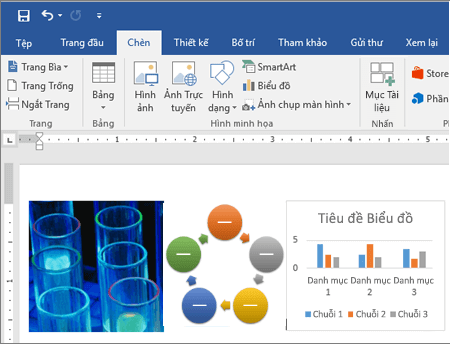
Add Photos, Pictures, SmartArt or Charts:
- Select the Insert tab.
- Select the option you want to add:
- Photos– select Photos, browse to the image you want, then select Insert.
- Picture– select Picture, then select an image from the drop-down list.
- SmartArt – select SmartArt, choose a SmartArt Graphic, then select OK.
- Charts – select Charts, select the chart you want, and then select OK.
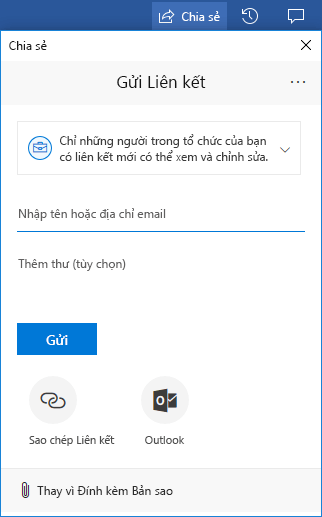
Share your document:
- Select Share on the ribbon or select File > Share.
Note: If your file has not been saved to OneDrive, you will be prompted to upload the file to OneDrive for sharing.
- Select the person you want to share from the drop-down menu or enter a name or email address.
- Add a message (optional), then select Send.
Co-edit document:
After sharing your document, you can work on it at the same time with others.
- For the best experience, work together in Word Online and see changes in real time.
- Under Share, you’ll see the names of the people who are also editing the file.
- Colored flags will show you exactly where each person is working in the document.

Chat in the document:
- If someone else is editing your file online, select Chat to open the chat window.
- Enter text, then press Enter to send your message.
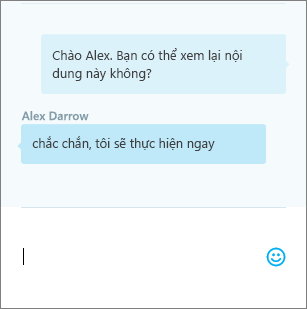
Your conversation will not be saved when you close the file. If you want to keep a record of your conversation, and maintain a constant conversation, talk to your colleagues in Microsoft Teams.
Track and review changes:
- To track changes, select Review> Track Changes.
The Change Tracking button lights up and any new changes are highlighted. To stop tracking changes, select Track Changes again.
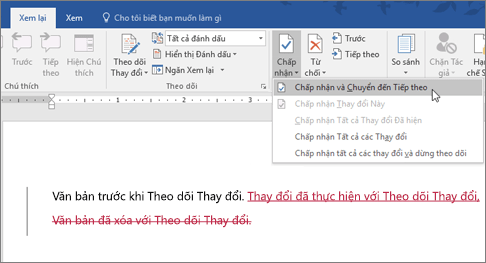
- How to review changes:
- Place the cursor before a change.
- Select Accept to maintain changes or Reject to discard.
To accept all changes, select Accept All Changes from the drop down list.
Leave a Reply