
1.What is mapping IP?
- Mapping IP is a feature provided by Sophos to perform static IP assignment for a device specified by its MAC address.
- With this feature, we do not need to set static IP manually on each machine.
- This article will guide you to configure Mapping IP on Sophos XG.
2.Configuration
- First, to perform ip mapping for your computer we need to know its MAC address.
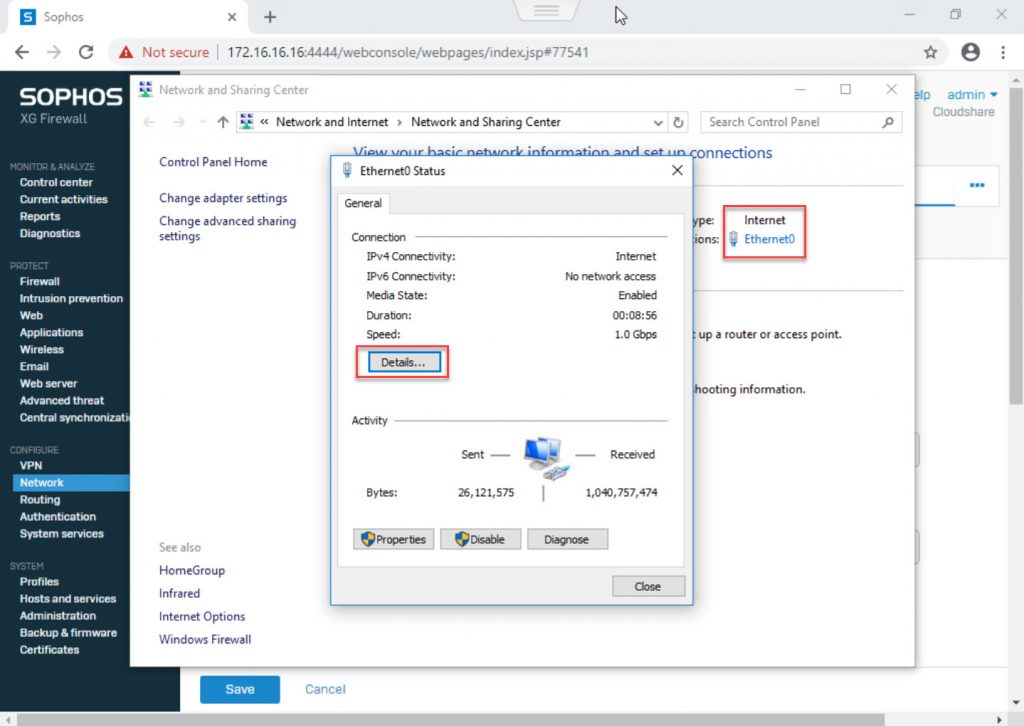
- To see the MAC address, right-click on the internet icon at the bottom right of the screen, select Open Network and Sharing Center.

- Table Network and Sharing Center appears, in the section Ethernet0 we left click.
- Ethernet0 Status table appears, click Details …
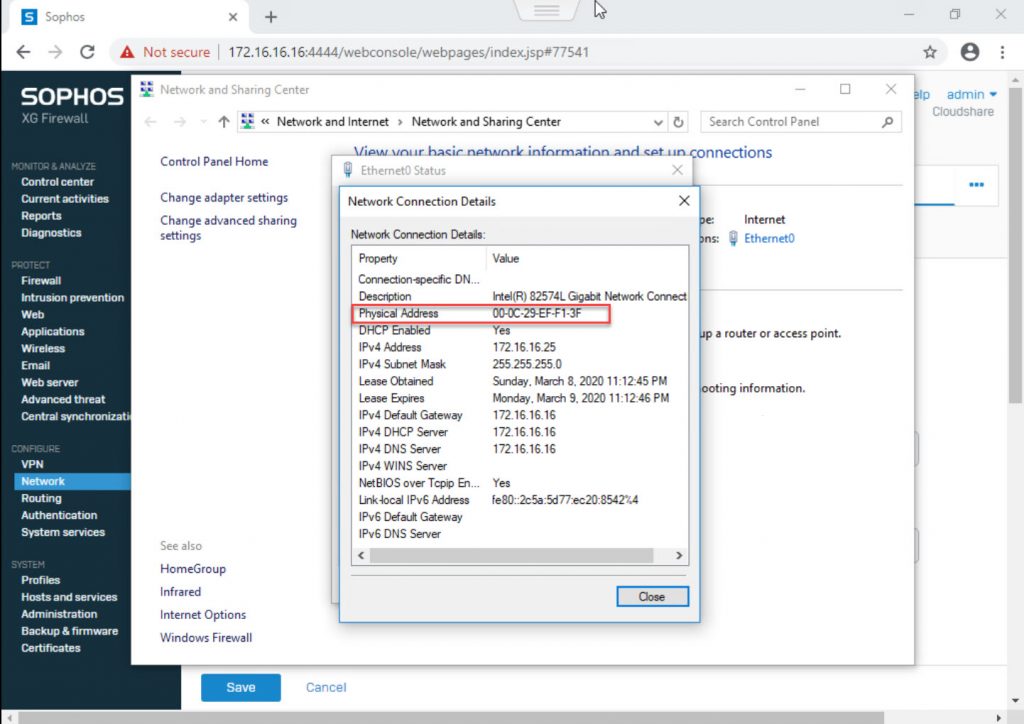
- Network Connection Details table appears, pay attention to the Physical Address line to the right of this text is a sequence of numbers that is the MAC address.
- In this example, we have the MAC address of the machine that needs mapping ip is 00-0C-29-EF-F1-3F.
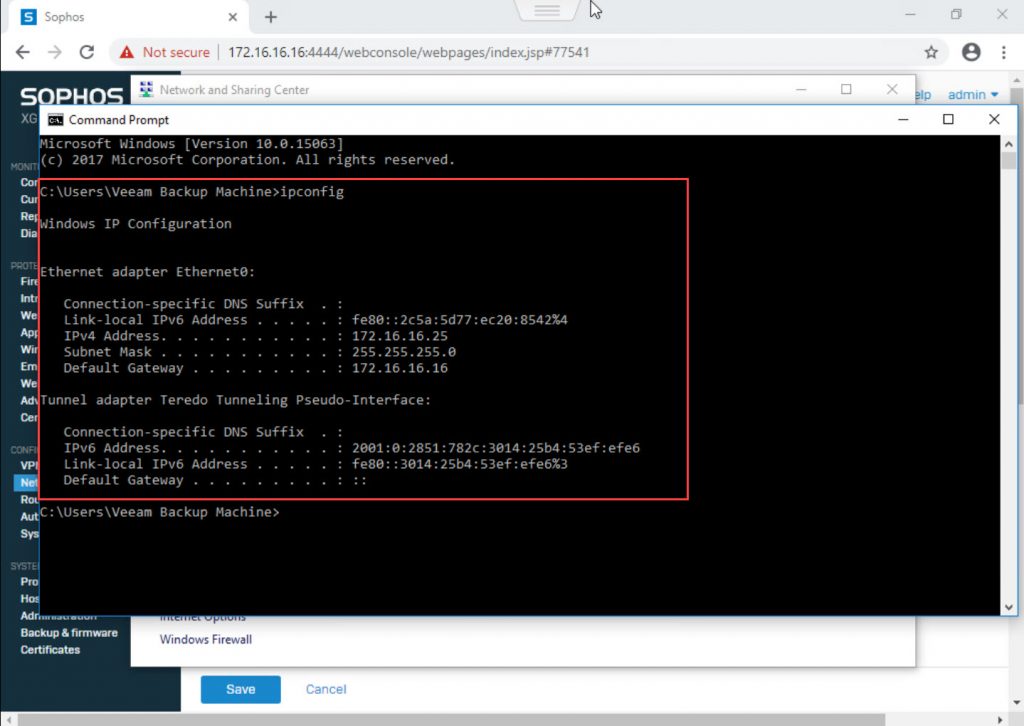
- Next we will check the current IP address of the machine, type cmd in the search bar and enter the command ipconfig to check.
- In this example, the current IP is 172.16.16.25 and the DHCP allocation address is 172.16.16.16 which is the address of Port 1 Sophos.
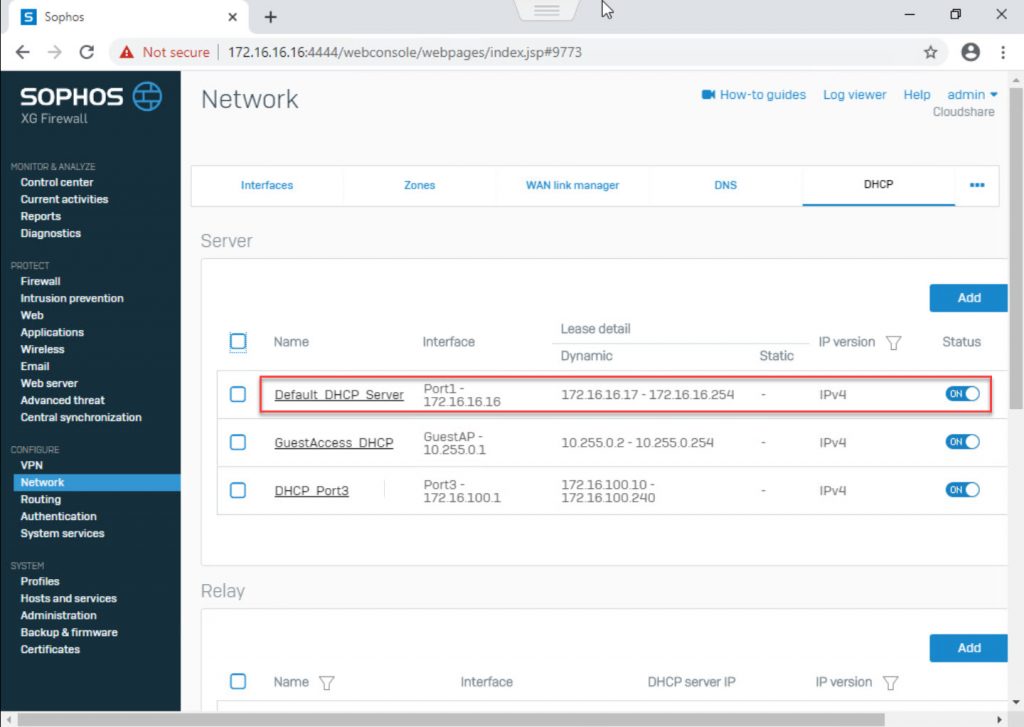
- Then log in to the Sophos admin page with your IP and admin account.
- Click Network> DHCP, and check to see if there is currently a DHCP network allocating 172.16.16.0/24.
- In this example, Default_DHCP_Server is allocating this network array, left-click on the name of this DHCP.
- The General Settings panel appears, we need to pay attention to the Static IP MAC mapping section.
- Here we will have 3 values to fill:
- Hostname: the name of the machine to assign IP, this field you can set according to your rules for easy management, here I will set it as PC_VEEAM_BACKUP.
- MAC address: this field you need to enter the MAC address you just checked earlier, in this example it is 00-0C-29-EF-F1-3F.
- IP address: this field is the IP you want to assign to this MAC address. DHCP. Before setting the IP for this field you need to pay attention to the DHCP allocation sequence above, the IP you enter in this field must not be in the DHCP allocation area.
- In this example, my DHCP allocation range is from 172.16.16.17 to 172.16.16.240, so we can fill in the IP from 172.16.16.241 to 172.16.16.254, here I set it as 172.16.16.250.
- Finally go back to cmd, enter and run the command ipconfig / release to wipe the IP
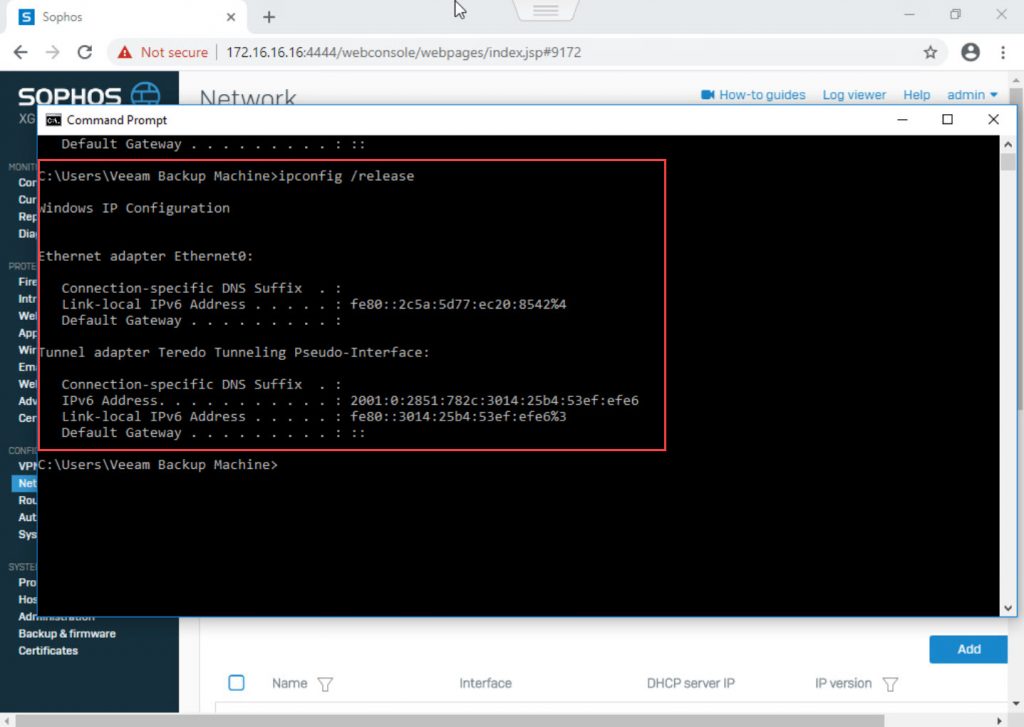
- Then enter and run ipconfig / renew command to get the IP and check the result.
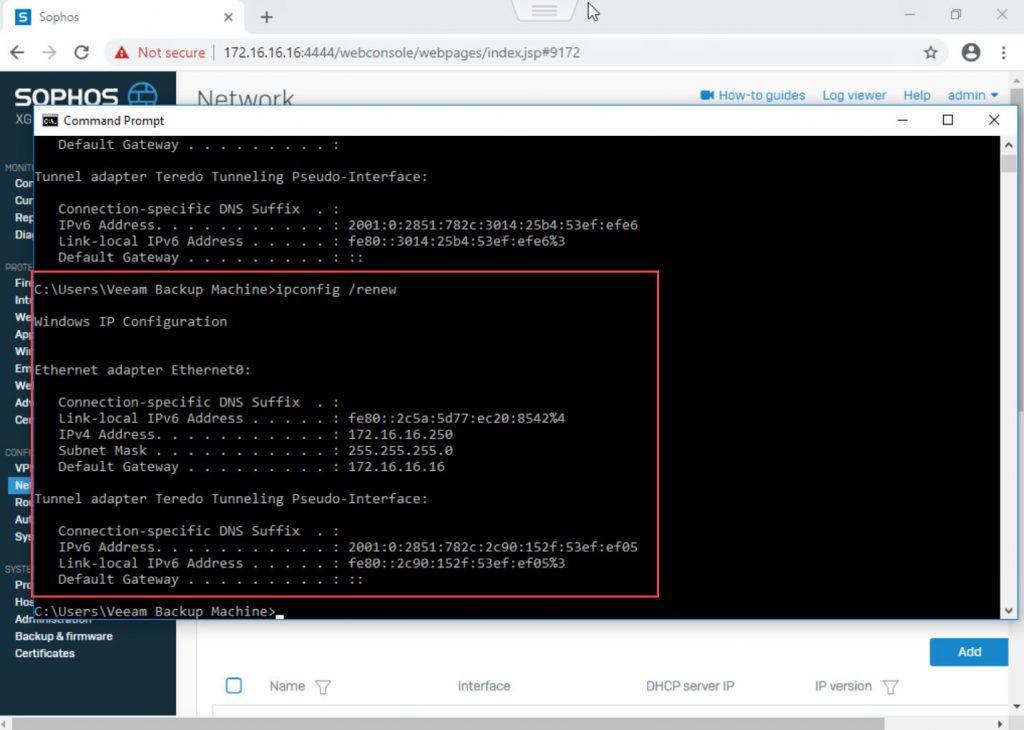
- As you can see, the machine has received IP 172.16.16,250 because we have configured mapping.
Leave a Reply