
Overview
The articles show how to configure management, monitoring server running VMWare ESXi. VMWare ESXi is a well-known technology developed and widely used today, installed on a physical server from which it can form many virtual machines with different operation systems
Diagram
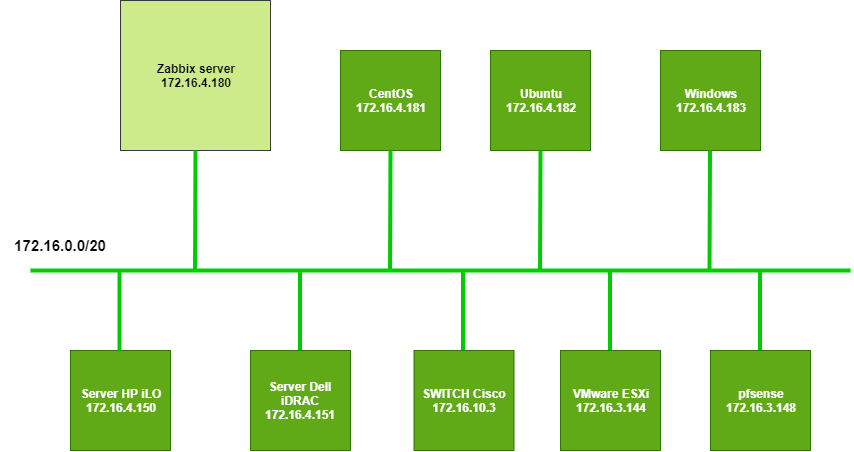
How to configure
- Edit the config file on the zabbix server to enable VMWare monitor
- Edit file /etc/zabbix/zabbix_server.conf and add line StartVMwareCollectors=5 to the of the file
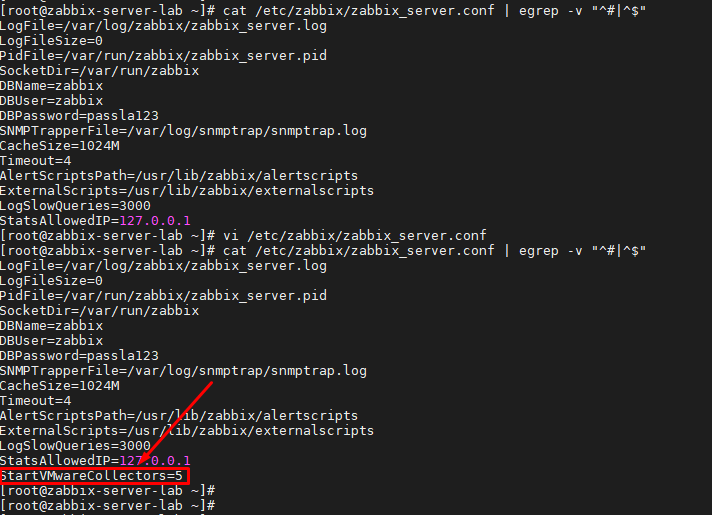
- Restart zabbix server service
systemctl restart zabbix-server
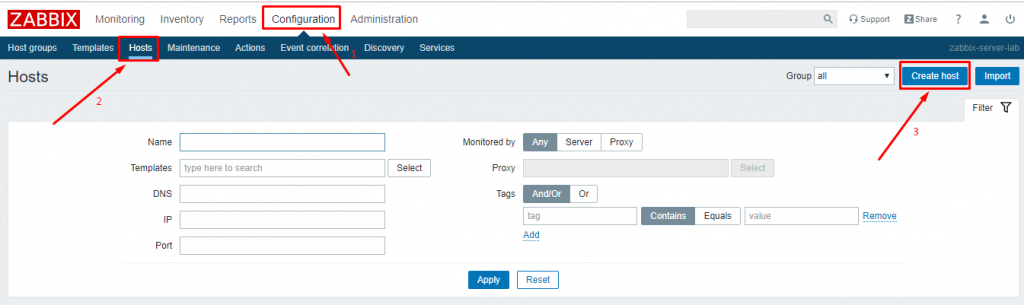
- Add host VMWare ESXi
- Go to Configuration -> Click select Hosts -> Click Create host
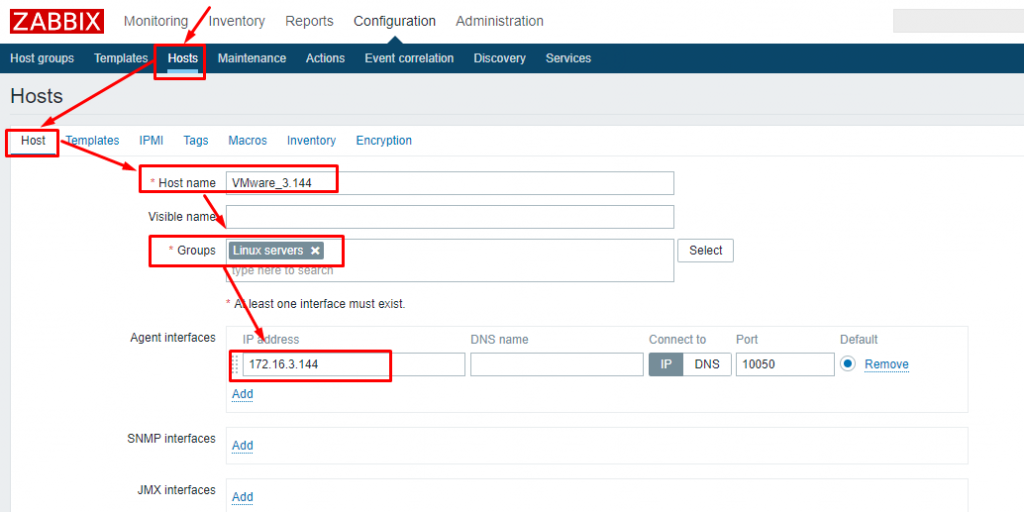
- In Hostname: Enter the name
- In Groups: Choose Linux servers
- In Agent interfaces: Enter IP address of VMWare ESXi
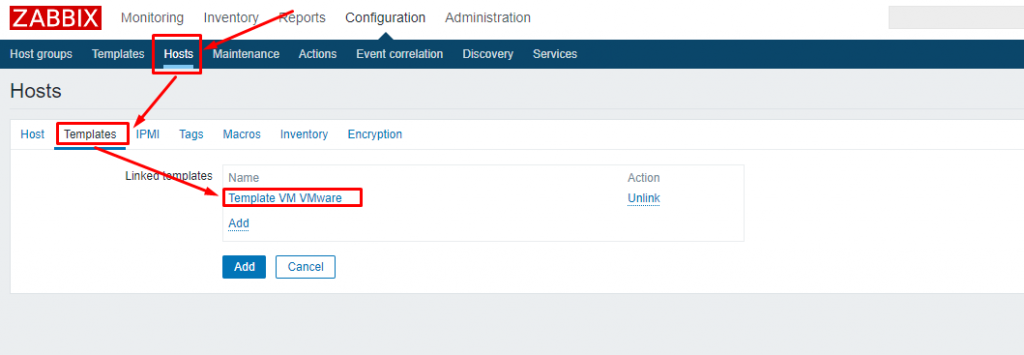
- In Templates -> Choose Template VM VMware
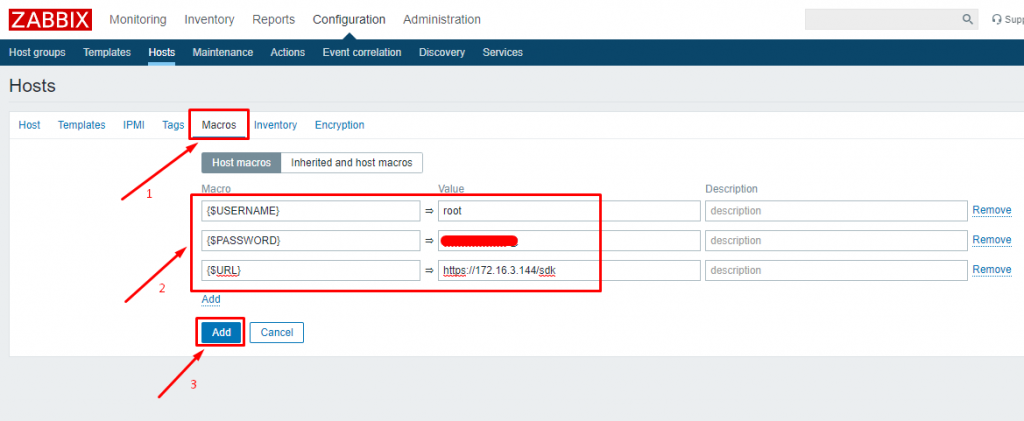
- In Macros -> Fill information
{$USERNAME} – root
{$PASSWORD} – root password
{$URL} – https://+ Vmware server IP address +/sdk
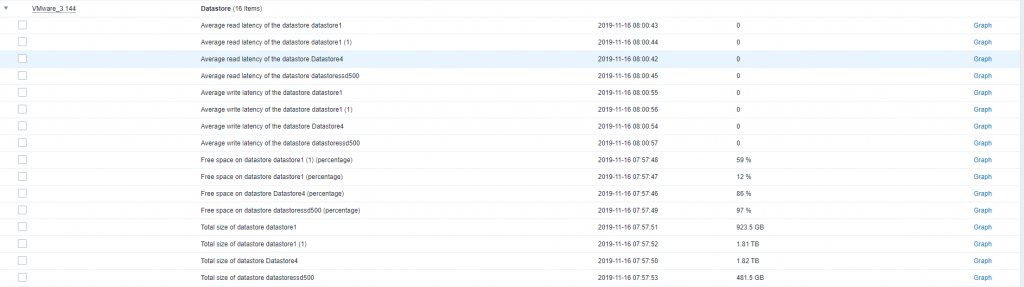
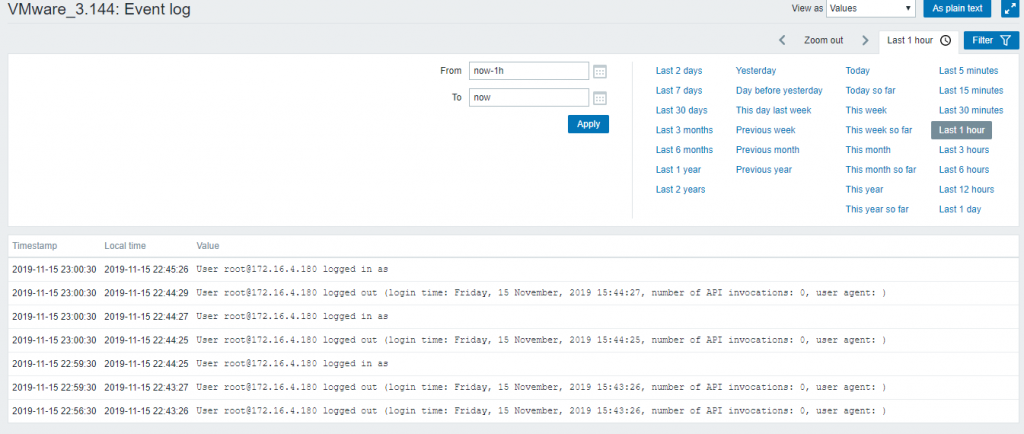
- Check the result
Leave a Reply