
1. The purpose of the article
As you all know, the implementation of installing a new software, especially antivirus software on users’ computers is not easy because it usually takes a lot of time as well as affects the activities of the person use.
In this article we would like to introduce to you how to install Sophos Endpoint antivirus software to user machines using Group Policy on Windows Server, with this installation you can save a lot of time as well as does not affect too much user activity.
2. Network diagram, configuration scenarios, and steps to take.
2.1 Network diagram
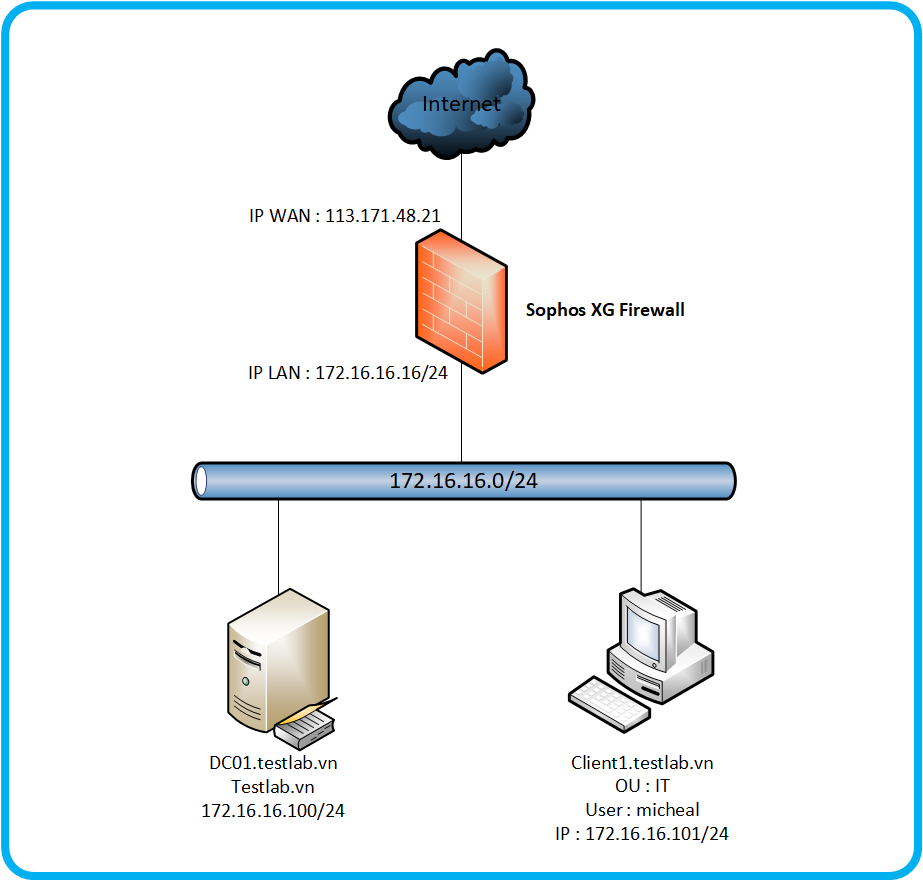
The network diagram has the following components:
- Sophos XG devices will connect to the internet via static ip 113.171.48.21.
- The Sophos XG device is a DHCP provider with the network layer 172.16.16.0/24 and the LAN port ip address being 172.16.16.16/24.
- Under the Sophos XG device is a server domain controller named dc01.testlab.vn with ip 172.16.16.100/24 and a PC that has been john domain named Client1.testlab.vn and has ip 172.16.16.101/24 and is is importing domain account is michael under IT OU.
2.2 Scenario
We will perform an implicit installation of Sophos Endpoint software on Client1 through the group policy on Windows Server.
2.3 What to do ?
- Create a share folder on Windows Server.
- Download the Sophos Endpoint installation file.
- Prepare scripts.
- Create a group policy.
3. Configuring
3.1 Create a share folder on Windows Server
The first step we need to do is to create a share directory to contain the sophos endpoint installation file so that the workstation can access to get the installation file.
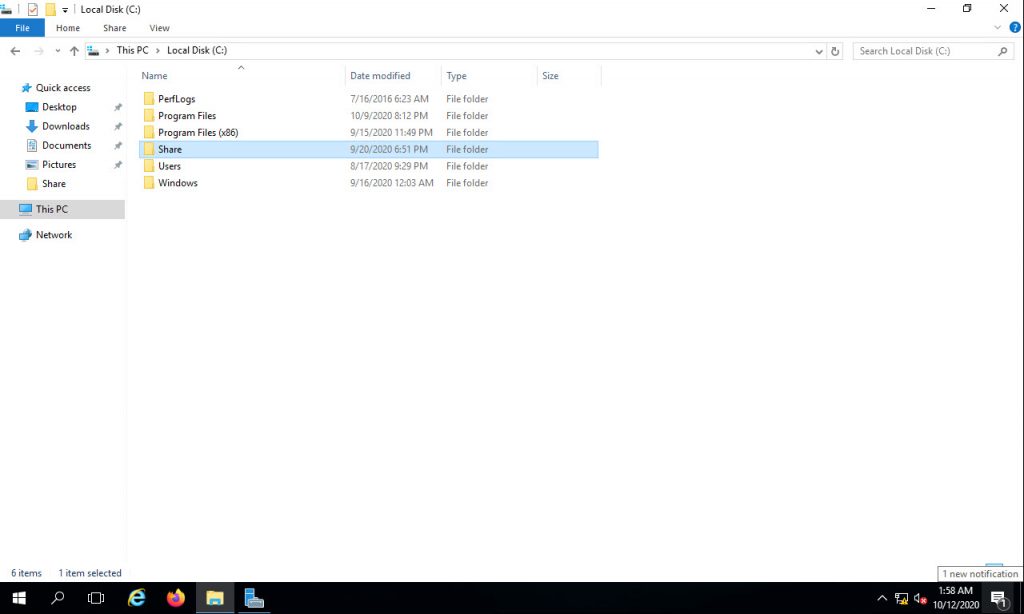
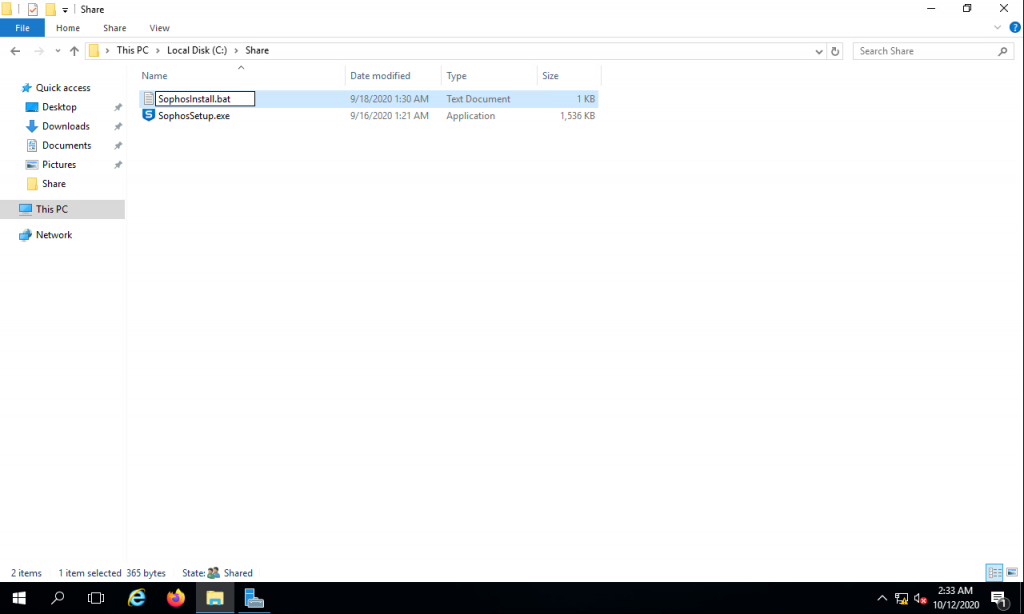
Here we will create a folder called Share on drive C of the windows server machine.
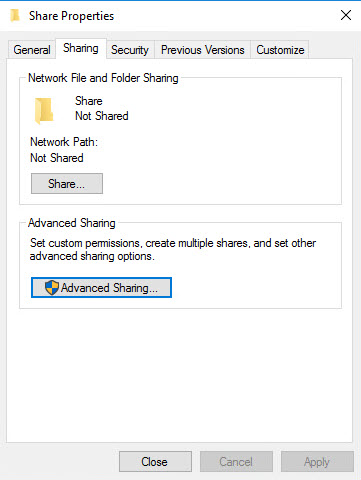
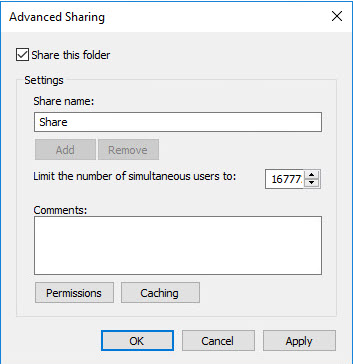
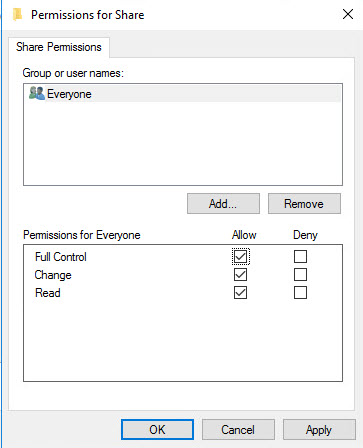
Next we will perform the configuration to share this folder by right clicking on the folder> selecting Propertise> Sharing> Advanced Sharing …> ticking Share this folder> Permission> tick Allow at Full Control and click OK to close tabs.
3.2 Download the Sophos Endpoint installation file
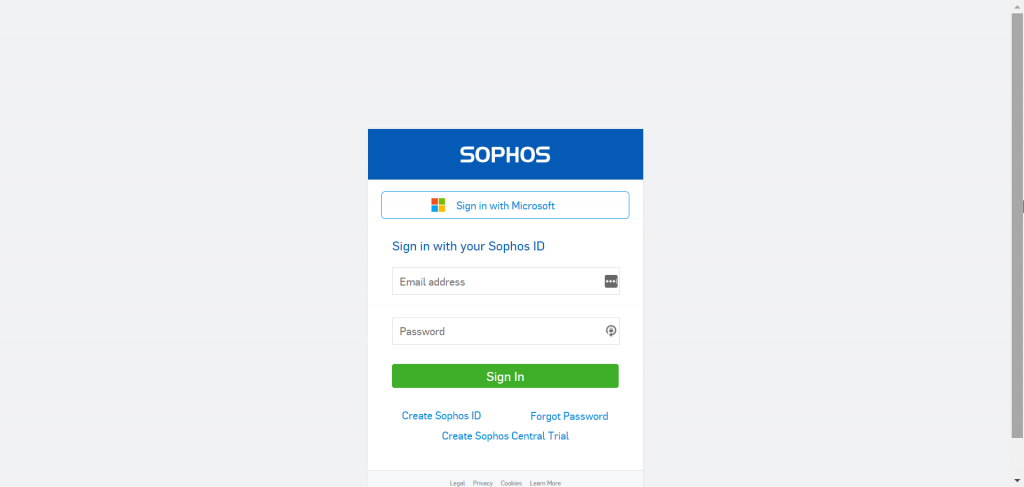
To download the Sophos Endpoint installation file, we visit www.central.sophos.com and log in with the admin account.
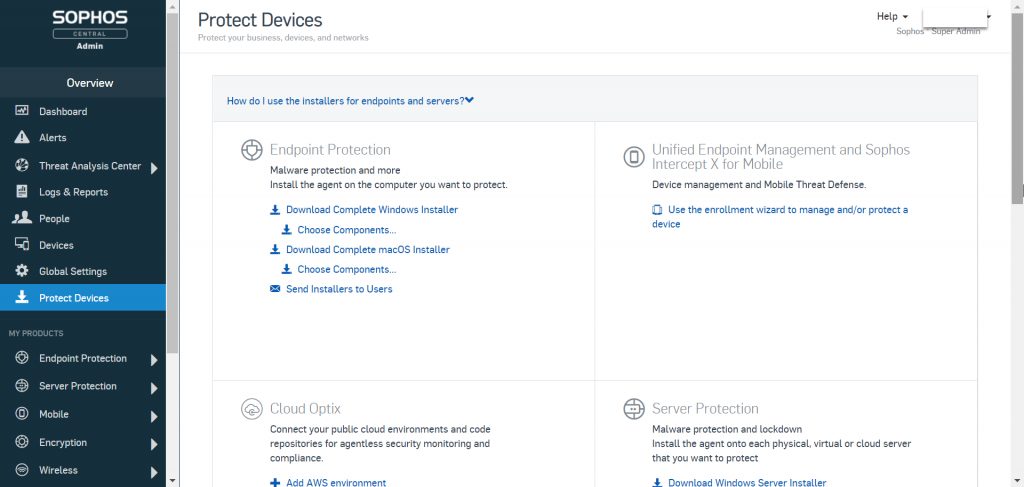
After logging into Protect Devices> Endpoint Protection> Download Complete Windows Installer to download the installation file.
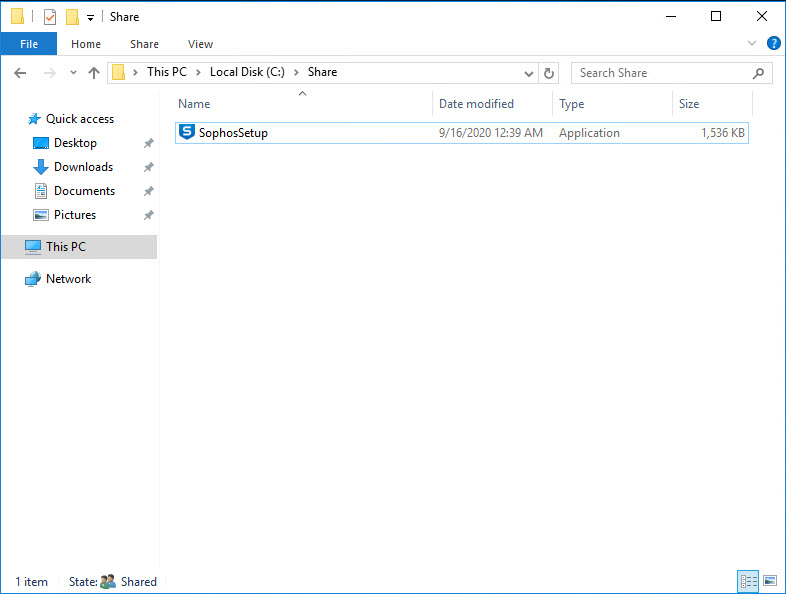
Note we will save this setup file in the Share folder just created.
3.3 Prepare Scripts
We need to prepare a script to perform the implicit installation of Sophos Endpoint software automatically on the workstations.
We create a text file named SophosInstall, open it and copy the following scripts to the text file and save it to the Share folder.
|
1 2 3 4 5 6 7 8 9 10 11 12 13 14 |
@echo off SET MCS_ENDPOINT=Sophos\Management Communications System\Endpoint\McsClient.exe IF "%PROCESSOR_ARCHITECTURE%" == "x86" GOTO X86_PROG IF NOT EXIST "%ProgramFiles(x86)%\%MCS_ENDPOINT%" GOTO INSTALL exit /b 0 :X86_PROG IF NOT EXIST "%ProgramFiles%\%MCS_ENDPOINT%" GOTO INSTALL exit /b 0 :INSTALL pushd \\DC01\Share SophosSetup.exe --quiet Popd |
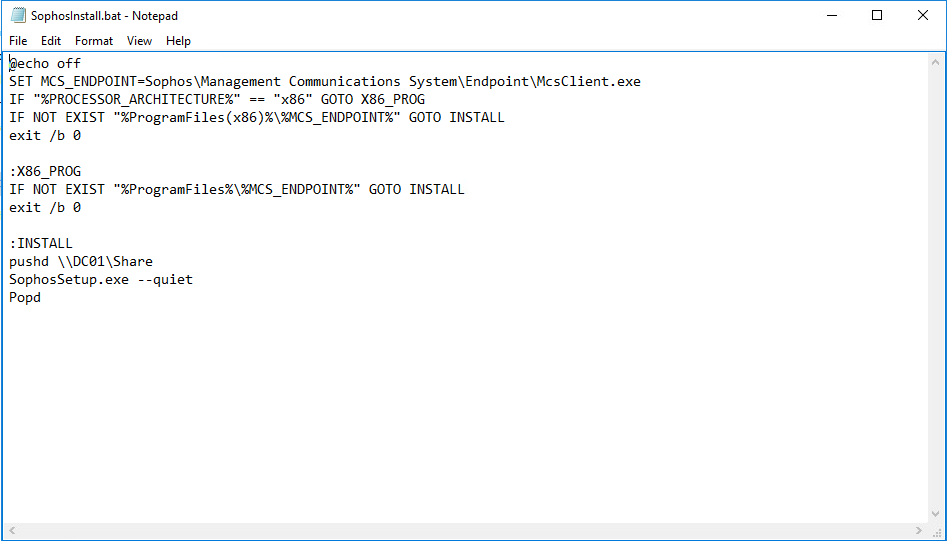
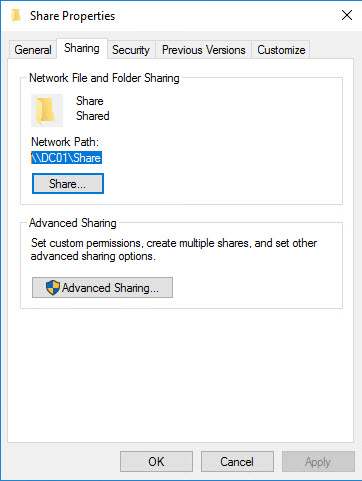
Note in the line pushd \ DC01 \ Share, \ DC01 \ Share is the path of the share folder containing the Sophos installation file that you created.
To get this path, right-click the Share folder> select Propertise> Sharing> Nretwork Path and copy the path.
After creating the SophosInstall text file, this time the SophosInstall file has a .txt extension.
To convert to a .bat file, we right click on the file> select Remane and modify the file extension from .txt to .bat.
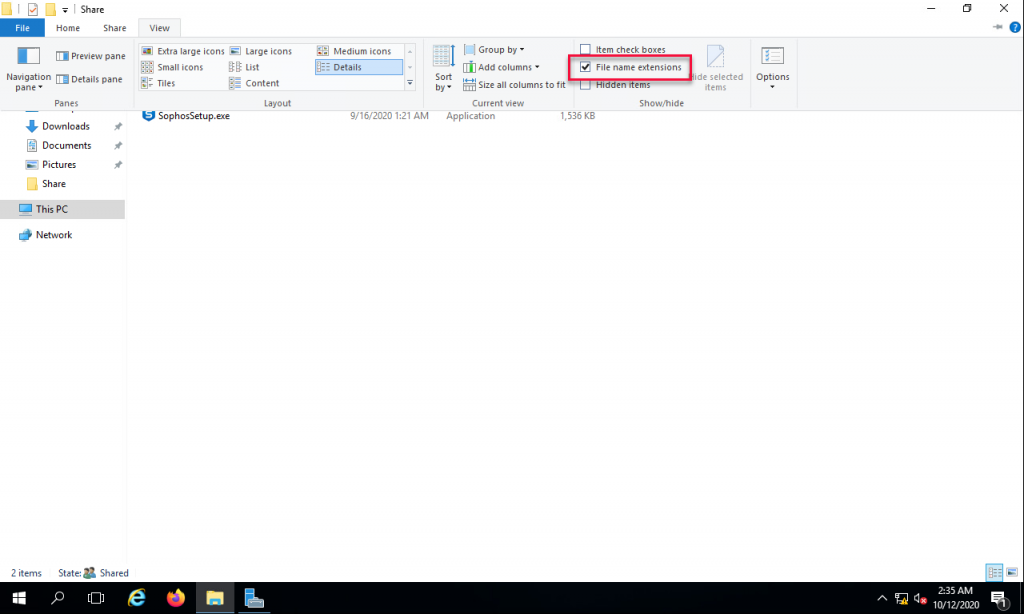
Note if you choose Remane but the file extension does not appear for you to edit you need to do the following.
On the Share folder in the toolbar, select the View tab and check the box File name extension.
3.4 Create a Group Policy
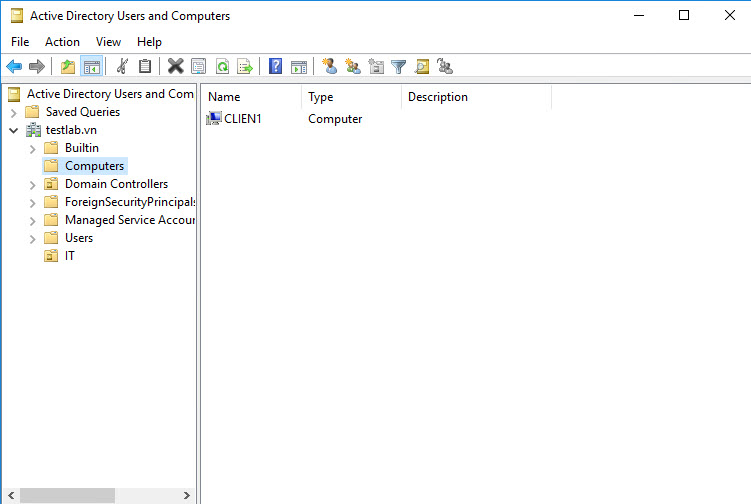
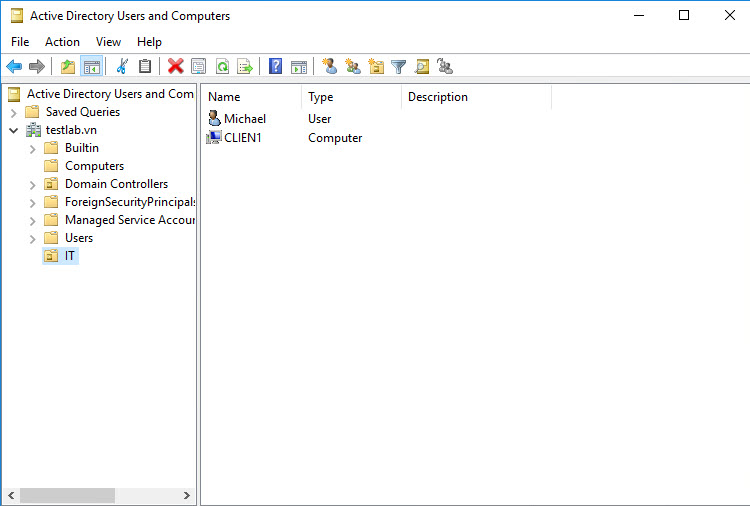
Before creating the policy we need to note that this policy is only applicable to non-user devices, so we need to move the device of the Client1 machine to the IT OU where we are applying the policy.
To switch your device open Server Manager> select Tools> Active Directory Users and Computers, the Active Directory Users and Computers table appears.
Pay attention to the OU Computer section, this is the place where the devices have been identified.
To move these devices to the desired OU you simply drag and drop them into the OU you moved, in this article I will move it to an IT OU.
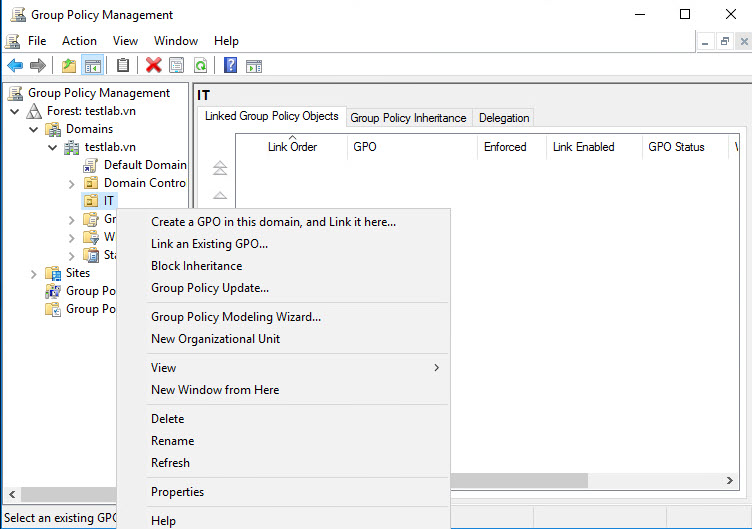
To create a gourp policy we need to access the Group Policy Management.
To access them type Administrative in the Windows search box> select Windows Administrative Tool> select Group Policy Management.
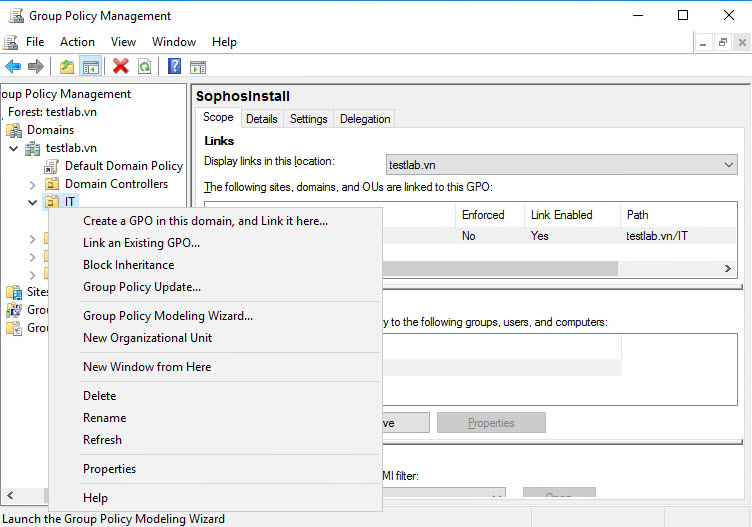
Next go to Group Policy Management> Forest: testlab.vn> Domains> testlab.vn.
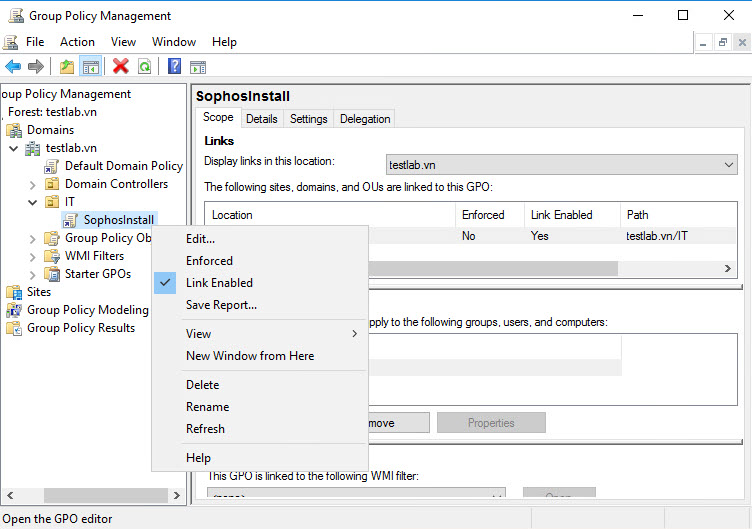
Here we will create a policy for the IT OU to create a right click on the IT OU and select Create a GPO in this domain, and Link it here ….
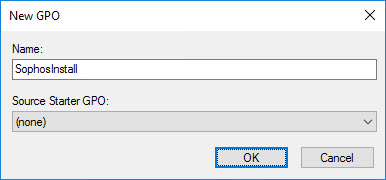
Name the policy SophosInstall and click OK.
After the SophosInstall policy is created, right click on it and choose Edit.
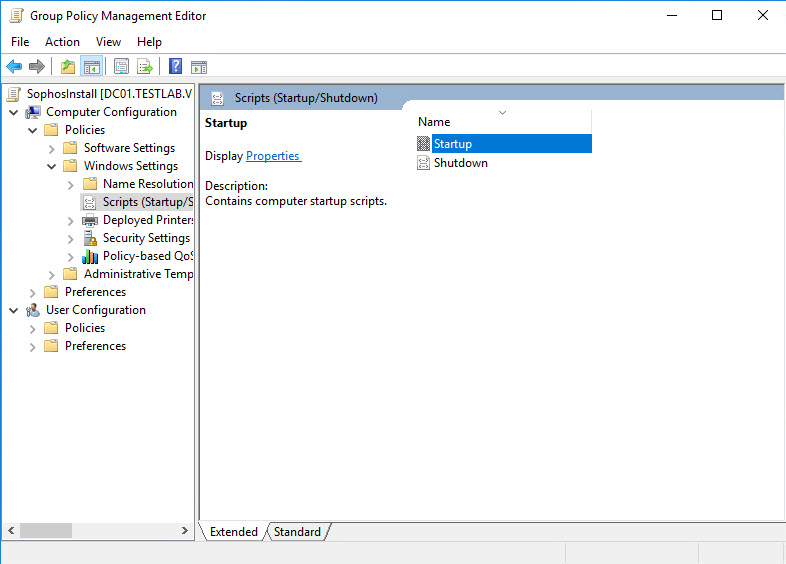
The Group Policy Management panel appears, accessed from SophosInstall [DC01.TESTLAB.VN]> Computer Configuration> Policies> Windows Settings> Scripts (Startup / Shutdown) and double-left click on Startup in the right panel.
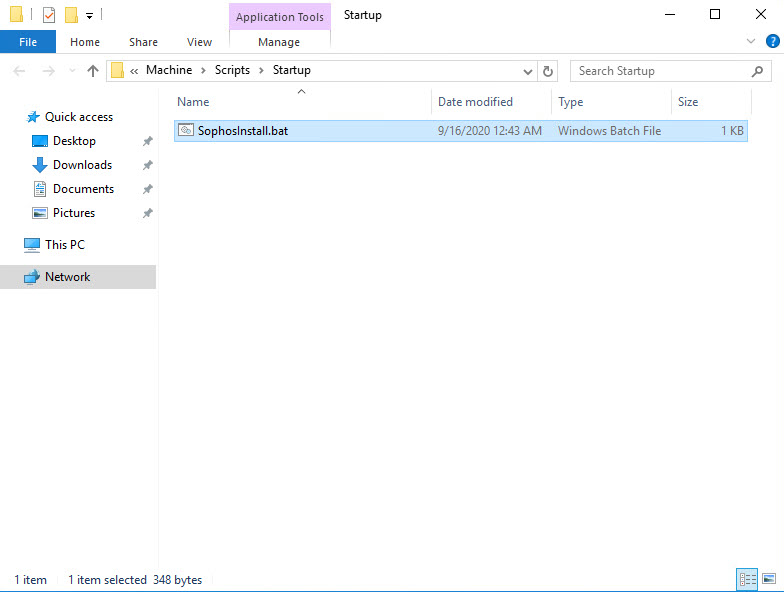
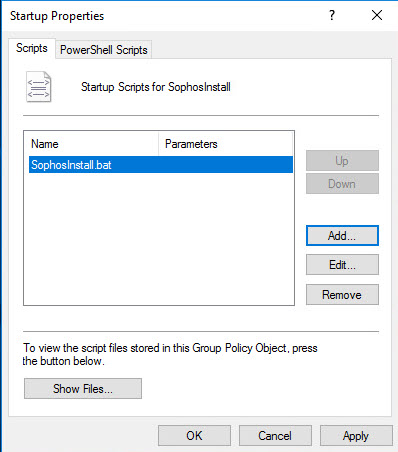
At the Startup Propertise panel appears, click on Show Files, at this time the Startup folder appears where the scripts will be executed, we need to copy the prepared SophosInstall.bat scripts file into this directory.
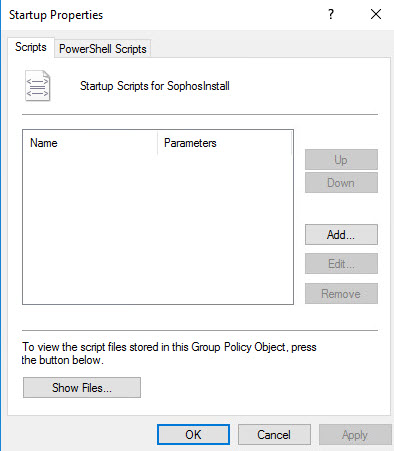
Go back to the Startup Propertise panel, select Add> select SophosInstall.bat and press OK to save.
Back in the Group Policy Management panel, right-click on the IT OU where the SophosInstall policy is located and select Group Policy Update.
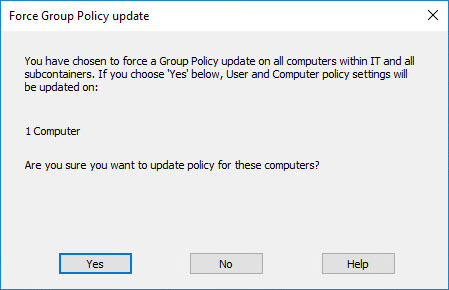
The Force Group Policy Update panel appears, click Yes to update the policy for the device and wait 3 seconds to complete.
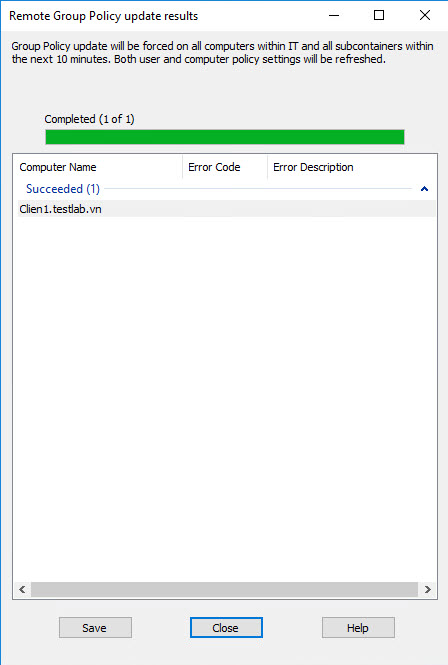
When finished click Close to close the window.
Next we will go to the Client1 machine, type in the windows cmd search bar to turn on the Command Prompt.
Type the command gpupdate / force and press Enter to execute, wait about 3 seconds to complete and restart the computer for the computer to install Sophos.
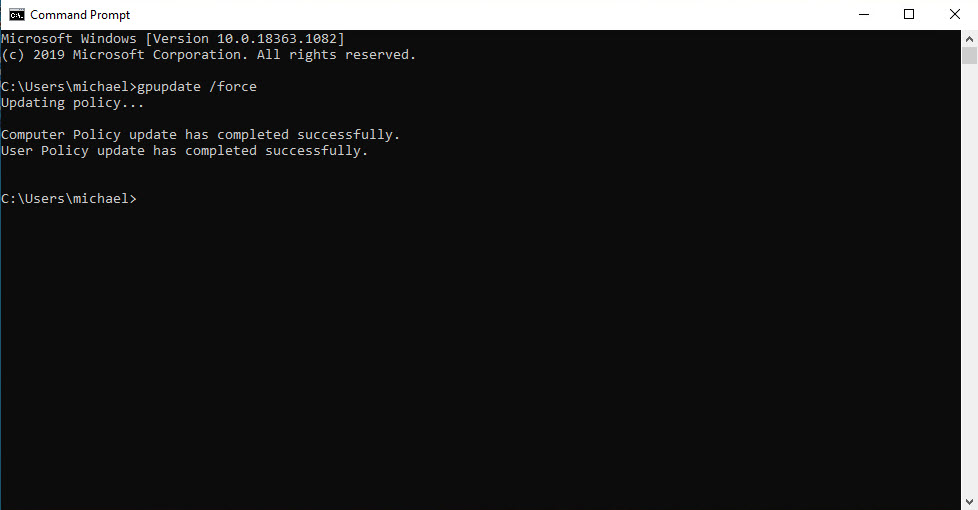
Wait 10-15 to finish installing Sophos Endpoint.
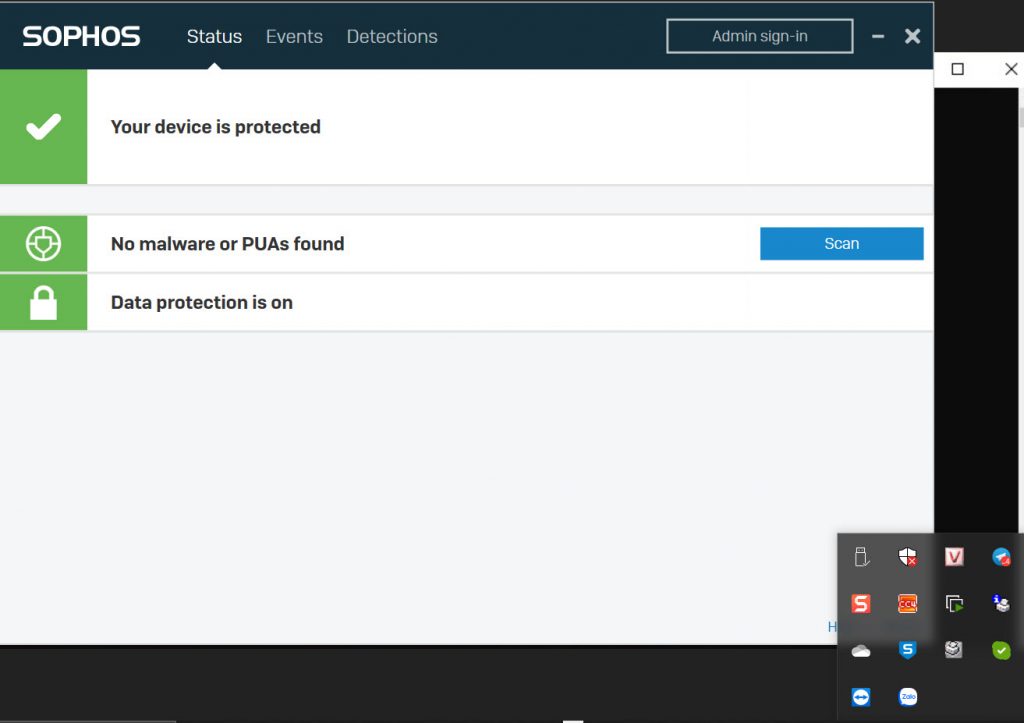
When the installation is completed, you can see the Sophos icon on the lower right side of the computer screen.
Great instructions! I plan on using them soon. However, I have one small question. My goal is to use this same process to basically run an audit of PCs that do not have an endpoint installed and to pipe it out to a CSV or the like. Do you think your script could be adapted to do this?