
Overview
The article guides how to install Zecurion Agent on Windows computers to be managed by Zecurion Server system by policies, …
Diagram
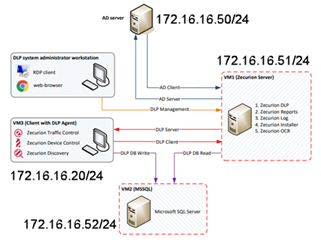
Table of content
- Configuration required
- How to install Zecurion Agent
- Manually install from the installation file
- Install using the Installer Server on Zecurion Server
How to configure
1. Configuration required
- CPU: 1 CPU 2 Core
- Memory: 2 – 4 GB
- Disk: 50 GB
- System Operation: Windows 7 – Windows 10 (x86 – x64)
- Installed software: Zecurion Endpoint
2. How to install Zecurion Agent
There are 2 ways to install Zecurion Agent: Manually install from the installation file and install using Zecurion Server
Way 1: Manually install from the installation file
- Download installation file
- Unzip installation file which was downloaded before
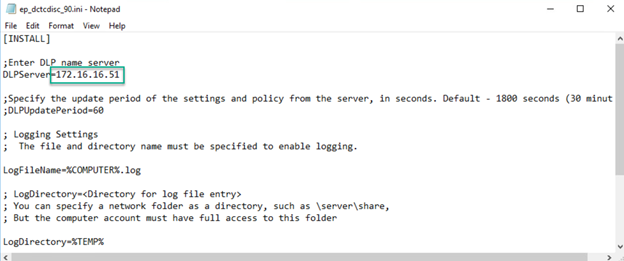
- Open unzipped folder -> Right click and choose ep_dctcdisc_90.ini -> Click Edit
- Change dlp_server_name by name and IP address of Zecurion Server -> Save the file
- Run file ep_dctcdisc_90.msi to install
- After finishing -> Choose Restart
** Notice: Windows firewall should be turned off so that it does not fail

- Check Zecurion Server

Way 2: Install using Installer Server on Zecurion Server
On Zecurion Server
- Open Zecurion Server using web browser and login by Administrator account
- Download Zecurion Agent installation file
- Go to INSTALLER -> Choose Installation packages -> Click + icon
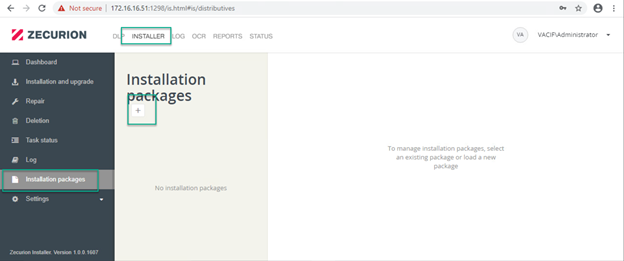
- Click Load installation file

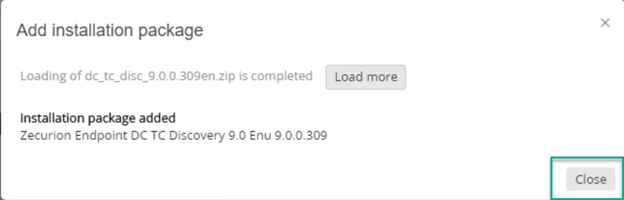
- Upload file .zip -> Click Close
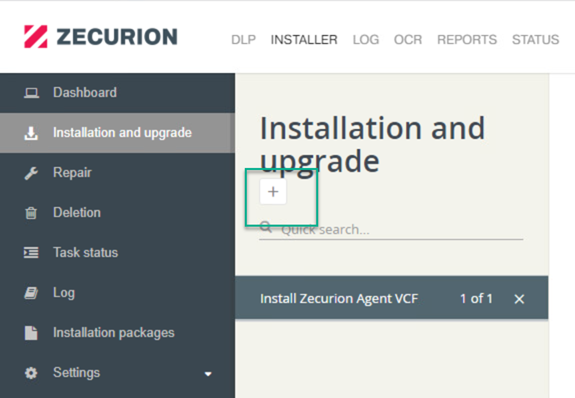
- Choose Installation and upgrade -> Click + icon
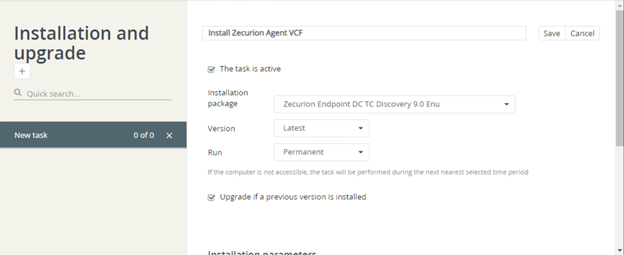
- Configure installation setting
- Enter name for policy
- Tick in The task is active
- In Installation package: Choose uploaded file
- In Version: Choose Lastest
- In Run: Choose Permanent
- Tick in Upgrade if a previous version is installed
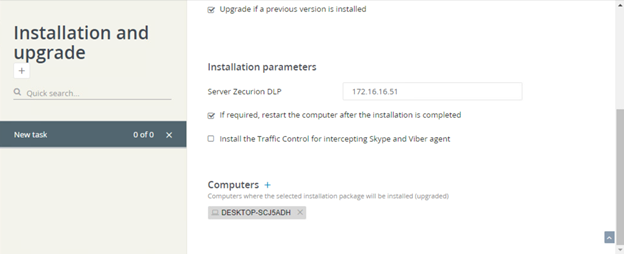
- In Server Zecurion DLP: Enter IP address of Zecurion Server
- In Computer: Choose computer which you want to install (the computer have to belong to domain, domain have to connect with Zecurion Server)
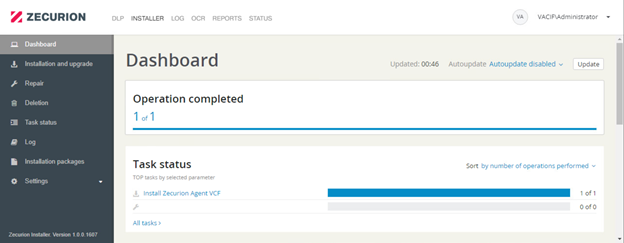
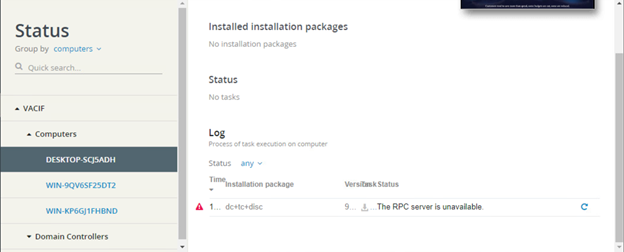
- Check status

- Check installation successfully
** Notice: Windows Firewall should be turned off
Leave a Reply